
WhatsApp templates let you start a conversation from Connect or contact someone again after the customer-service window has ended. To use one, prepare it in Connect and submit it for Meta\u2019s review. Saving a template in the system does not mean it is already approved for sending.
If someone has messaged you, you can reply without a template for 24 hours after their latest message. Outside that period, the WhatsApp Business Platform requires an approved template to start or resume contact. Use templates with people who agreed to receive your messages, and honor requests to stop receiving them. Read WhatsApp\u2019s official policy.
1. Open the WhatsApp channel templates
In Connect, go to Settings > Channels. Open the actions menu on your WhatsApp channel row and choose Templates. This area brings together the templates Connect knows for that channel.
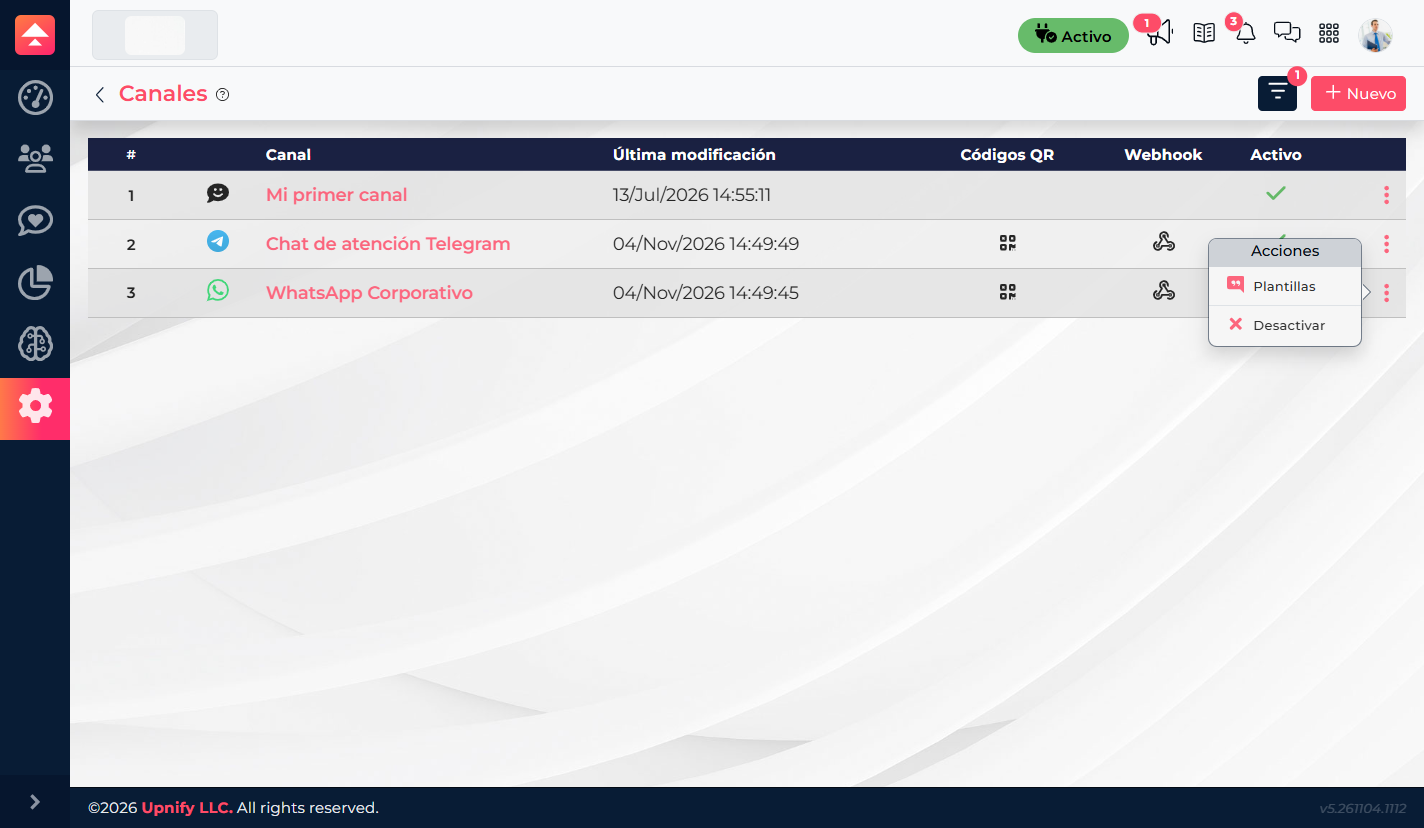
If this is your first time, the list may be empty. Select New to create a template. If templates already exist in Meta but do not appear here, use Sync to refresh the channel list.
2. Write the template for a clear purpose
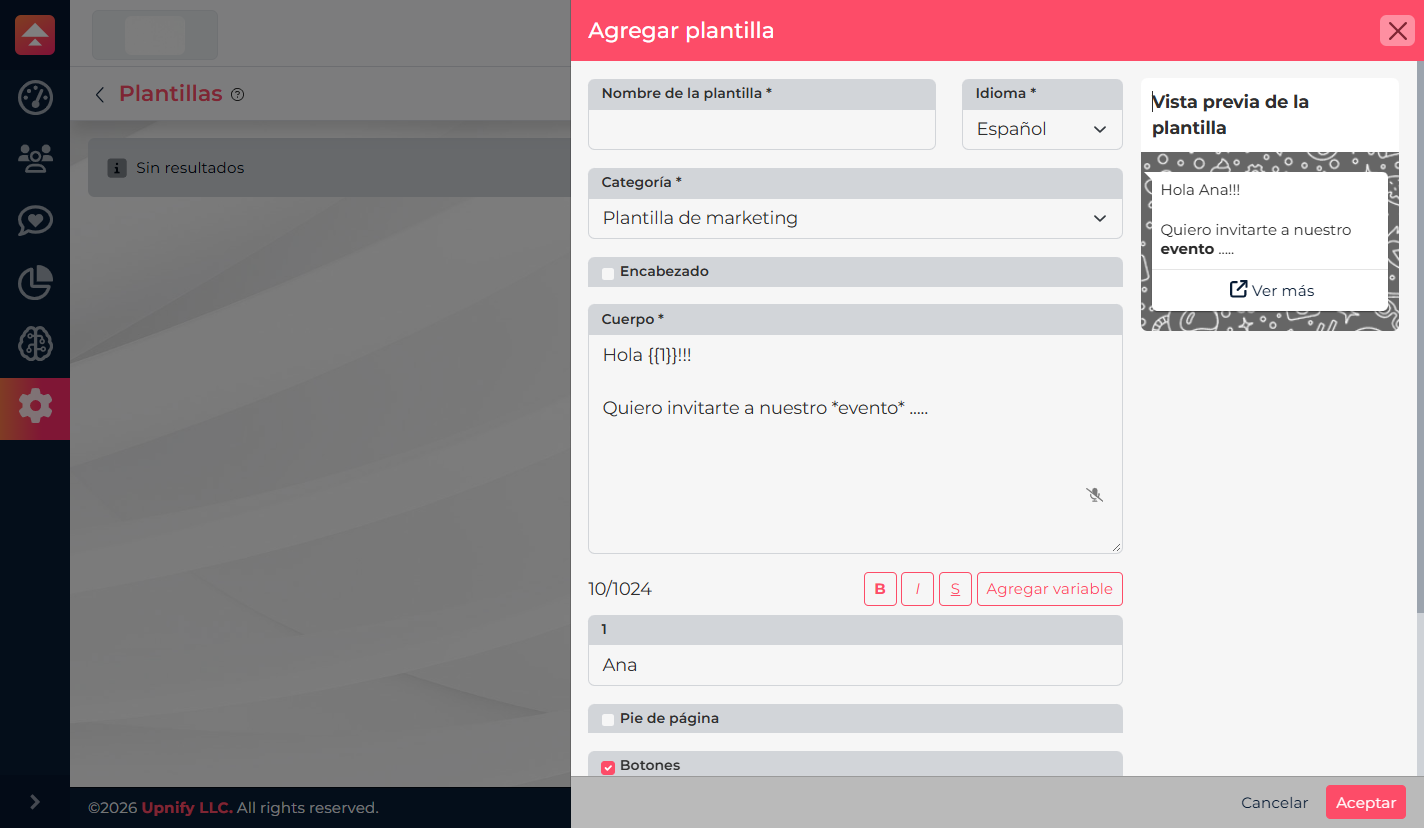
In the form, enter a name that helps you recognize the template\u2019s purpose, select its language and the category that best matches the message. Then prepare its content:
- Header: optional. Use it to introduce the message when it adds useful context.
- Body: clearly explain why you are contacting the person and what the next step is.
- Variables: insert a variable with Add variable when part of the message should be personalized, such as the person\u2019s name.
- Footer and buttons: optional; add them only when they make the action easier to understand or complete.
For example, to invite someone to a product demo, you could write: \u201CHello, [name variable]. We have opened new time slots to show you the solution. Would you like to choose a time?\u201D Insert the variable with the form control; manually typing braces or bracketed text does not turn it into a dynamic value.
A promotion, offer, or invitation should be described as such. Do not present promotional content as a service update. Meta reviews the category and content against its policies.
3. Submit the content and check its status
When you are done, select Accept. Connect sends the template request to Meta and saves a record for the channel. Meta performs its own review, so the result may take time and is separate from successfully saving the form.
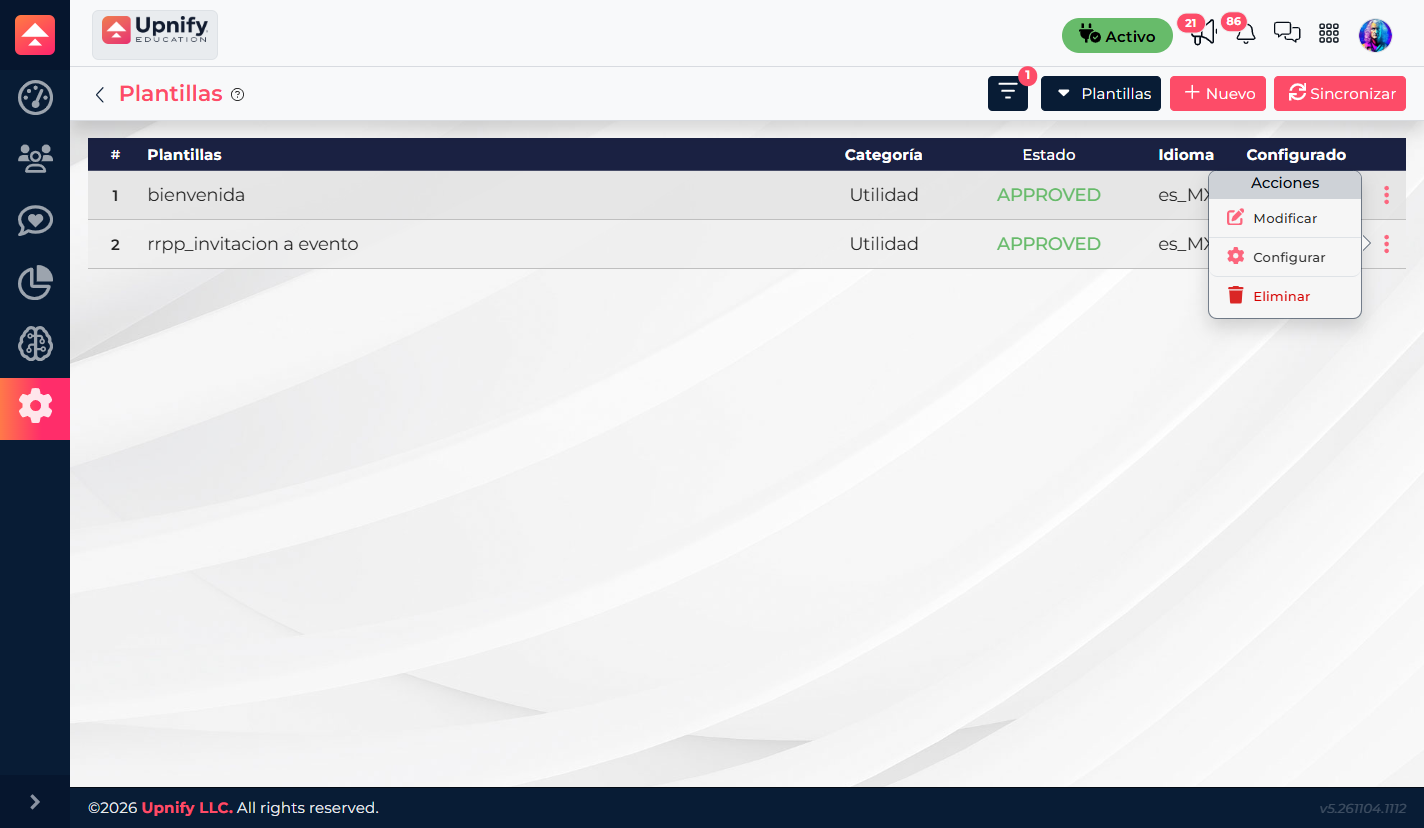
Return to the template list to check the status. Once Meta approves it, you will see the corresponding status \u2014 for example, APPROVED \u2014 and can configure its variables. If it is still pending, do not use it to start conversations yet. If Meta rejects or pauses it, review the content and policies before editing or resubmitting.
4. Map variables to contact data
If the template includes variables, open its configuration and assign the data that should replace each position. For example, map the first variable to the contact\u2019s name so each person receives a correctly personalized greeting.
Before using the template, check the order of the variables and the message each contact would receive. If the template has no variables, you do not need this configuration.
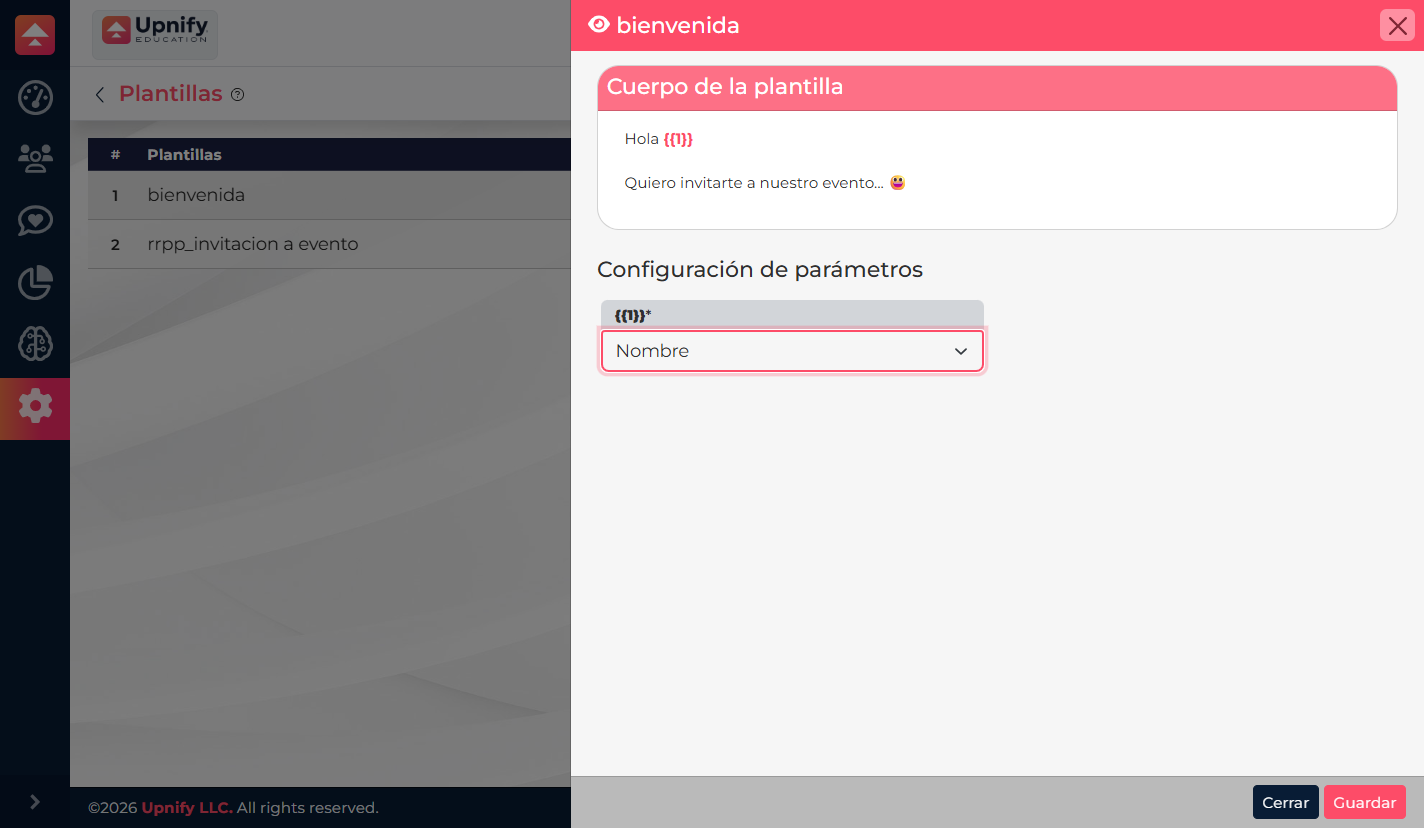
Example: invite contacts to a product demo
Suppose the sales team wants to invite people who requested information and agreed to follow-up. Create a template in the appropriate category, insert a name variable, and briefly explain the invitation. Submit it for review, wait for Meta\u2019s approval, and map the variable to the contact name. The team can then start the conversation with an approved, personalized message.
Once approved, the template can be used in the sending flows available in Connect. Approval does not replace the person\u2019s consent or guarantee delivery to every recipient; follow WhatsApp policies and review the channel results.
If a template is missing or unavailable
- Use Sync if the template exists in Meta but does not appear in Connect yet.
- Make sure you are viewing templates for the correct WhatsApp channel.
- Check Meta\u2019s status before starting a conversation outside the customer-service window.
- Confirm that variables are configured in the same order in which they appear in the message.
- If Meta did not approve the template, review its category, purpose, and wording. Meta decides the review outcome.
For current rules about approval and use, read the WhatsApp Business Messaging Policy.