

Upnify Zapier integration
 Por Upnify Editorial Team
Zapier is a platform that connects work applications with the purpose of automating tasks, it is easy to use since it does not require advanced programming knowledge, just follow the steps and you will be able to automate your workflows.
For example: You can connect a chatbot to receive leads directly to your Upnify account.
Zapier has more than 4000 apps available to use, including Upnify.
To connect Upnify to Zapier you will need to follow the steps below.
1. Login to Zapier. Create an account if you don't have one already created. Click on the button Create Zap.
2. In the search field, type Upnify and select it from the list.
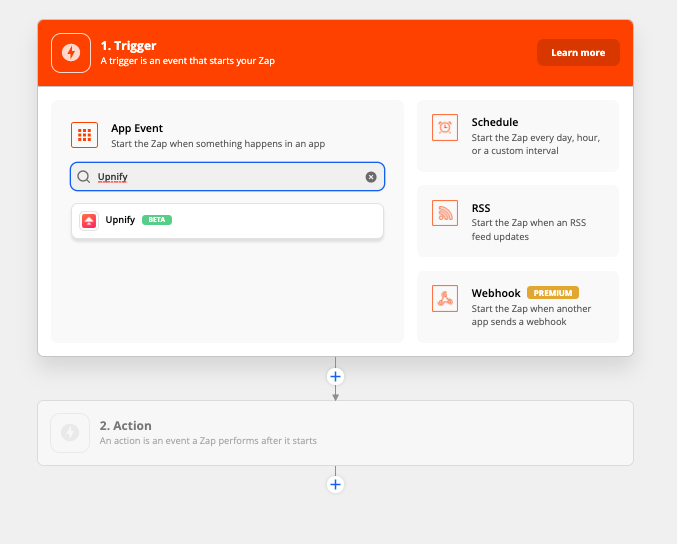
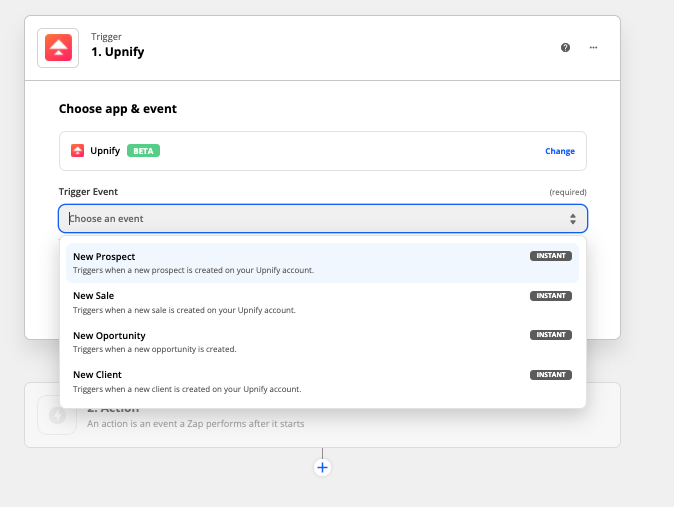
3. In trigger event, select the CRM operation you want to respond to, f.e. "New prospect".
4. Associate your Upnify account by clicking Connect a new account.

5. LogIn to your Upnify account in https://upnify.com. In Upnify go to the menu System-> Integrations-> API and create a new Zapier Integration. Fill out the integration data. Copy the token that the system provides you.


6. Paste the token obtained in Upnify and press Yes, Continue.

7. Test the trigger to review the information Upnify will provide for your integration.

8. Create a Google sheet with the columns you want to use. For example: Name, Last Name, Email.

9. Choose the application you want to use in order to process the information Upnify will send, in this case "Google Sheets".

10. Select the action event you want to use in Google sheets, for example "Create spreadsheet row".
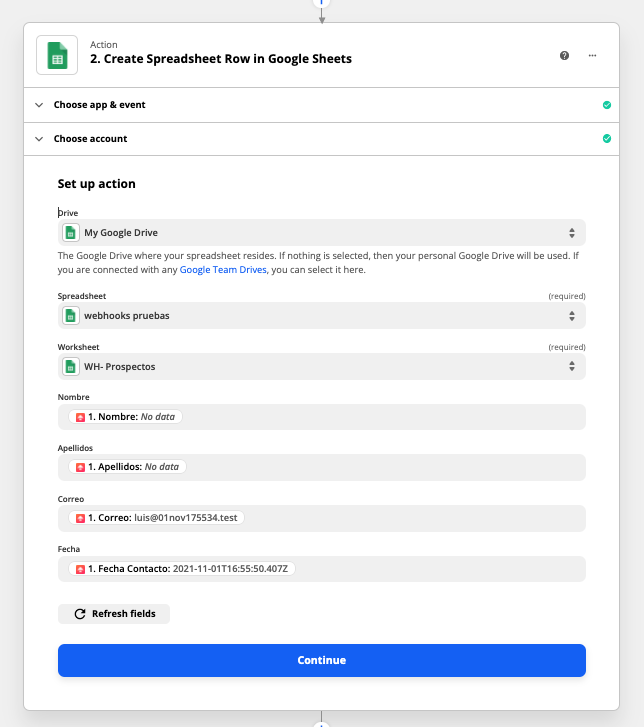
11. Login into google to identify your user. Select the document you will be using to store the information and map the columns of the sheet with the information Upnify provides and press Continue.
12. Click "Turn on Zap" to finalize the process.

Learn more about Zapier and Upnify integrations by clicking here.
You may also be interested in: