
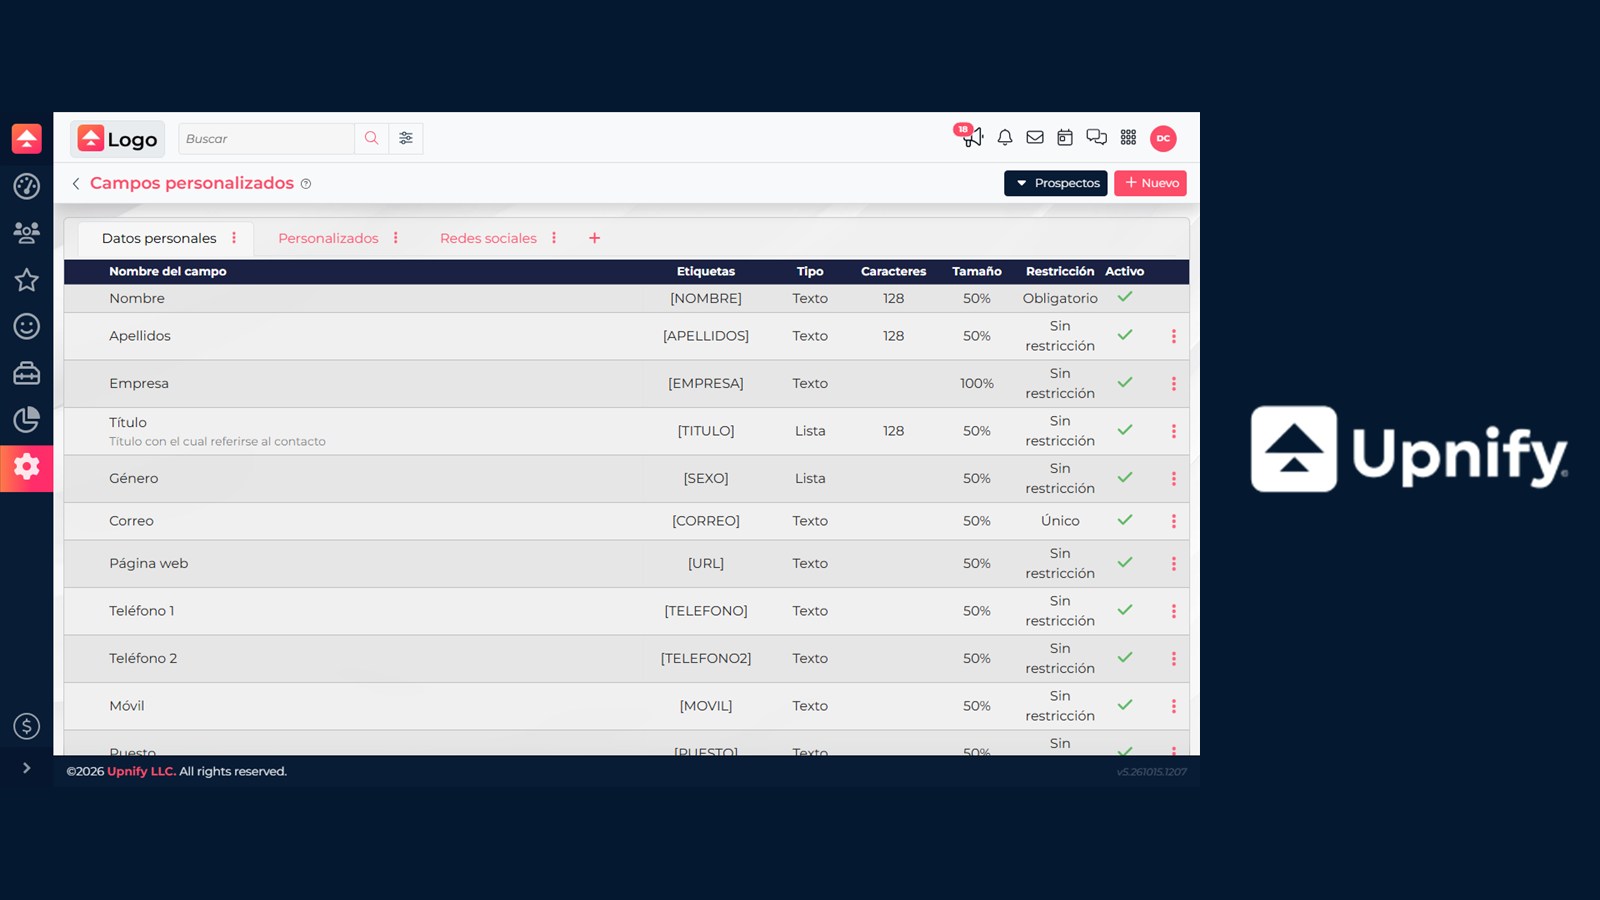
Custom fields let you store information that is not part of CRM’s standard record details, such as a renewal date, service preference, or internal identifier. First decide which record type owns the information: prospect, opportunity, customer, sale, company, or product. Fields are configured by record type; creating one for prospects does not automatically create it for customers.
Create a custom field
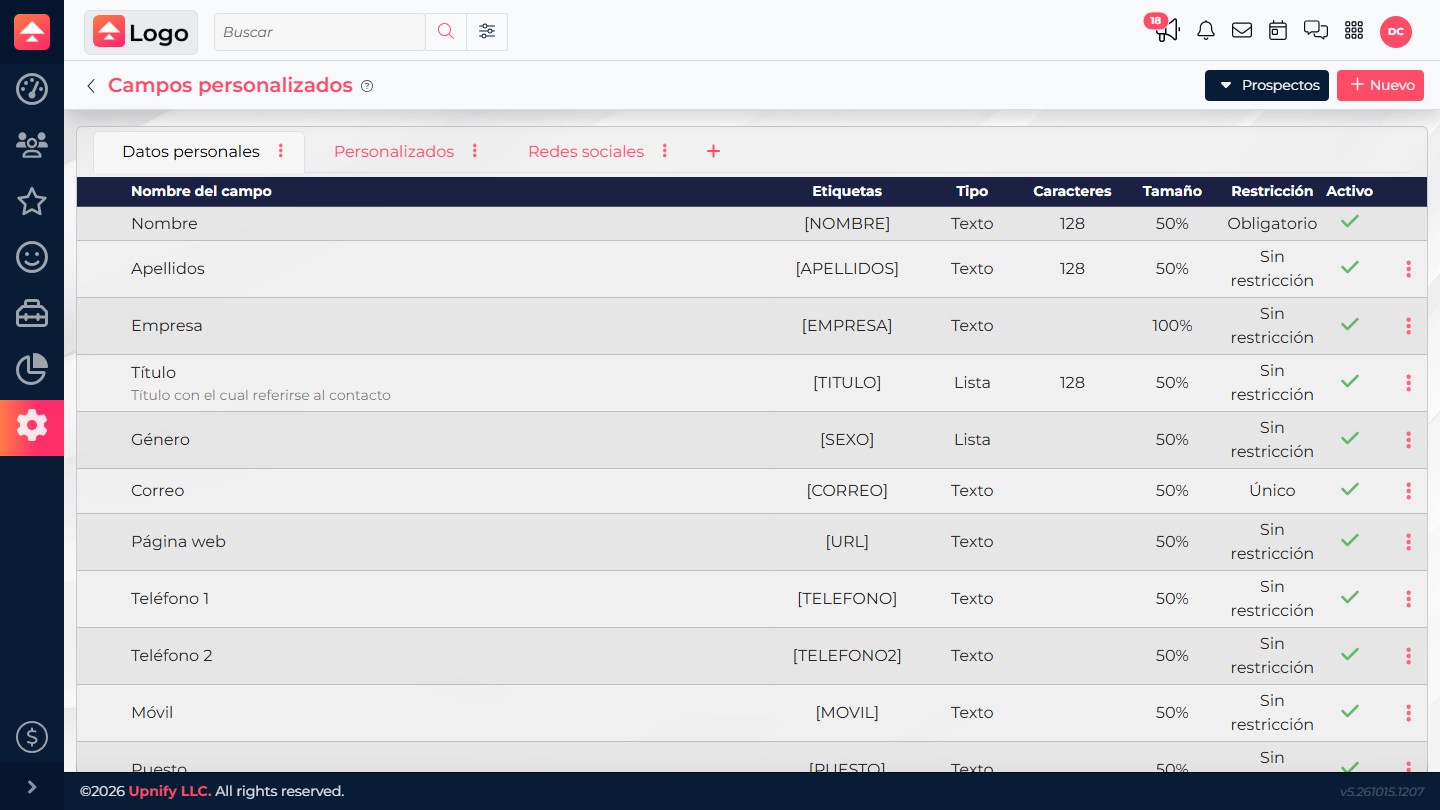
- In CRM, go to Settings > Custom fields. You need access to this setting; if it is unavailable, ask your administrator to check your permission.
- Use the selector in the upper-right corner to choose the record type that will use the information. Review the existing tabs as well; each tab groups related fields.
- Choose the tab where the field should appear. To create a new group, select the + beside the tabs and give it a name that describes its contents.
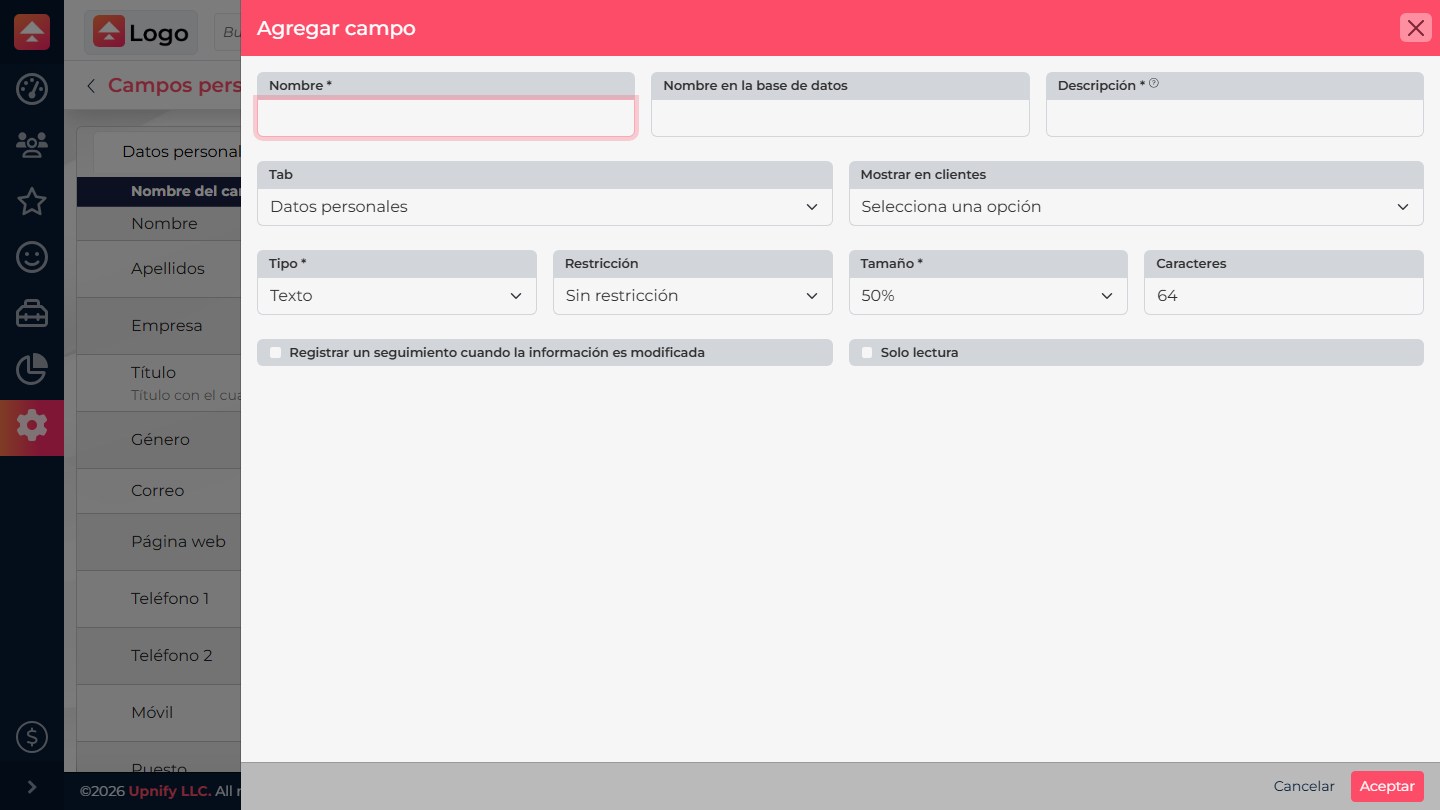
- Select New. Enter the name your team will see and a clear description. The database name is generated automatically and is read-only.
- Choose a Type. Use text for free-form values, a list for one choice, a check list for multiple choices, date for dates, and number types for quantities. If you choose a list, add consistent options.
- Set the Restriction for your process: no restriction, required, unique, unique and required, or suggest duplicates. Duplicate suggestions can alert users without making the value an absolute block.
- Set the display width and, when applicable, the character limit. Enable options—such as creating a follow-up when the value changes or making the field read-only—only when they fit your workflow.
- Review the setup and select Accept. Open a record of that type to confirm the field appears in the selected tab and accepts the expected value.
Use the field in templates, campaigns, and quotes
When you save a custom field, CRM generates a personalization tag linked to it and adds it to the available variables. In a template or campaign editor, open the Tags menu and select the field. This inserts its value without typing the variable yourself. When the content is used, CRM reads the value saved on the corresponding record.
color uses [PROD_COLOR].Personalization tags insert data into text or a document. They are different from segmentation tags assigned to contacts for filtering or grouping.
Organize and maintain fields
In the list, drag a row’s order handle to change its position within the tab. Use the tab options menu to rename a tab or delete it when the configuration allows. Put the information users need most often near the top of the form.
Some standard fields can be activated or deactivated; custom fields can also be deleted. Deleting a custom field removes the information stored in it. If the field is already in use, first review forms, filters, reports, rules, and imports. Change its description or setup only when the meaning of the data remains the same.
If a field is missing or will not save
| Issue | What to check |
|---|---|
| The field does not appear | Confirm the selected record type, assigned tab, and whether the field is active. |
| The record will not save | Check whether the field is required or unique, its allowed length, and its data type. For a unique field, look for an existing matching value. |
| The order does not change | Drag the row handle within its tab and wait for the list to update. |
| An import does not fill the field | Confirm the field was created for the right record type and the import maps to it. |