Mass import lets you add multiple records in one operation. Before attaching a file, decide what kind of information you are importing and organize its columns. This makes it easier to match each value to the right CRM field and catch issues before saving.
1. Organize one row per record
In a tabular text file, each column should contain one kind of value and each row should represent one record. If you use headers, name the first row with recognizable labels such as \u201CFirst Name,\u201D \u201CE-mail,\u201D or \u201CCompany.\u201D Keep values for the same person or opportunity together and make sure no columns are shifted.
| File header | CRM field to select | Example |
|---|---|---|
| First Name | First Name | Luna |
| Last Name | Last Name | Test |
| luna.demo@example.org | ||
| Company | Company | Example Company |
CRM also accepts TXT and JSON files. For CSV, confirm which character separates the values; the assistant offers comma, semicolon, and tab. If your file uses a different separator, correct it before continuing so values do not end up grouped in the wrong columns.
2. Choose what to import
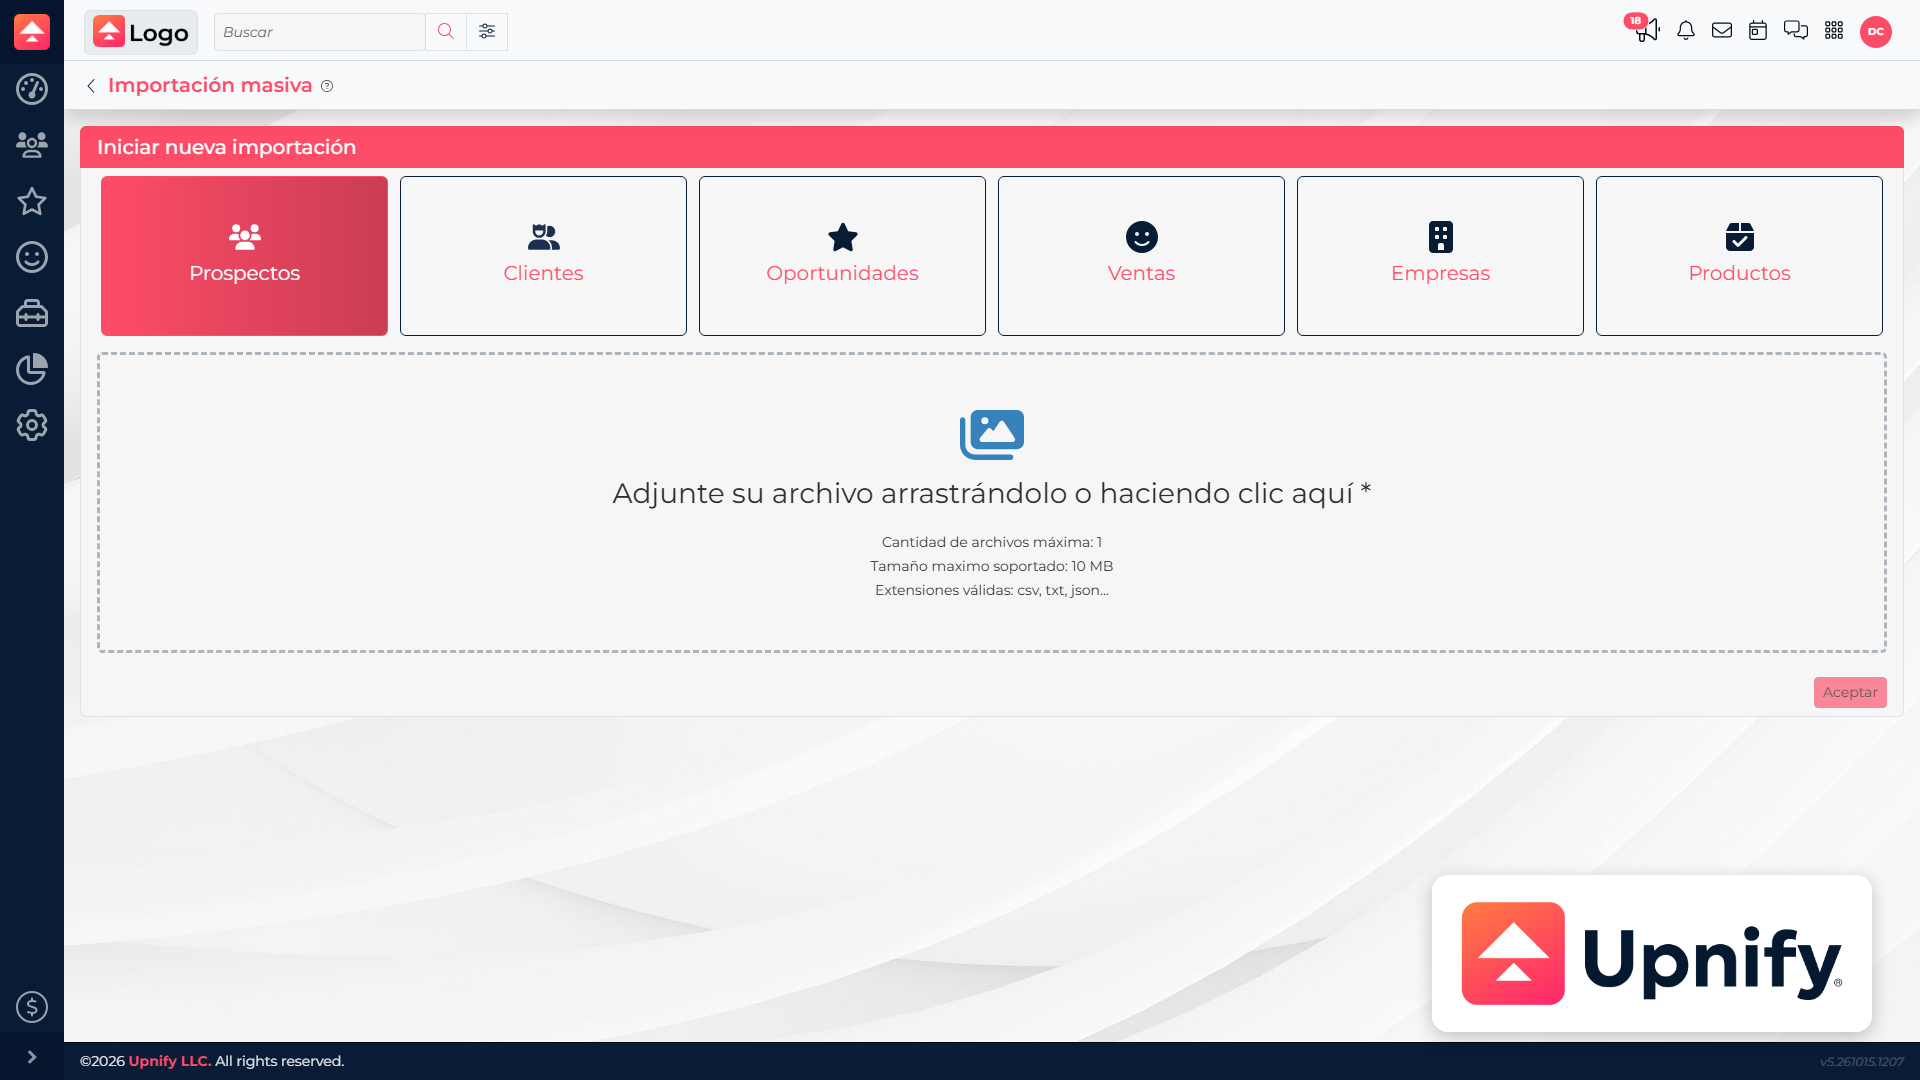
In CRM, open Tools > Mass import and select the destination entity: Prospects, Customers, Opportunities, Sales, Companies, or Products. This choice determines which fields are available in the next step, so make sure it matches the contents of your file.
Drag the file into the box or click to select it. Check the file name and select Accept to open the preview.
3. Set the separator and headers
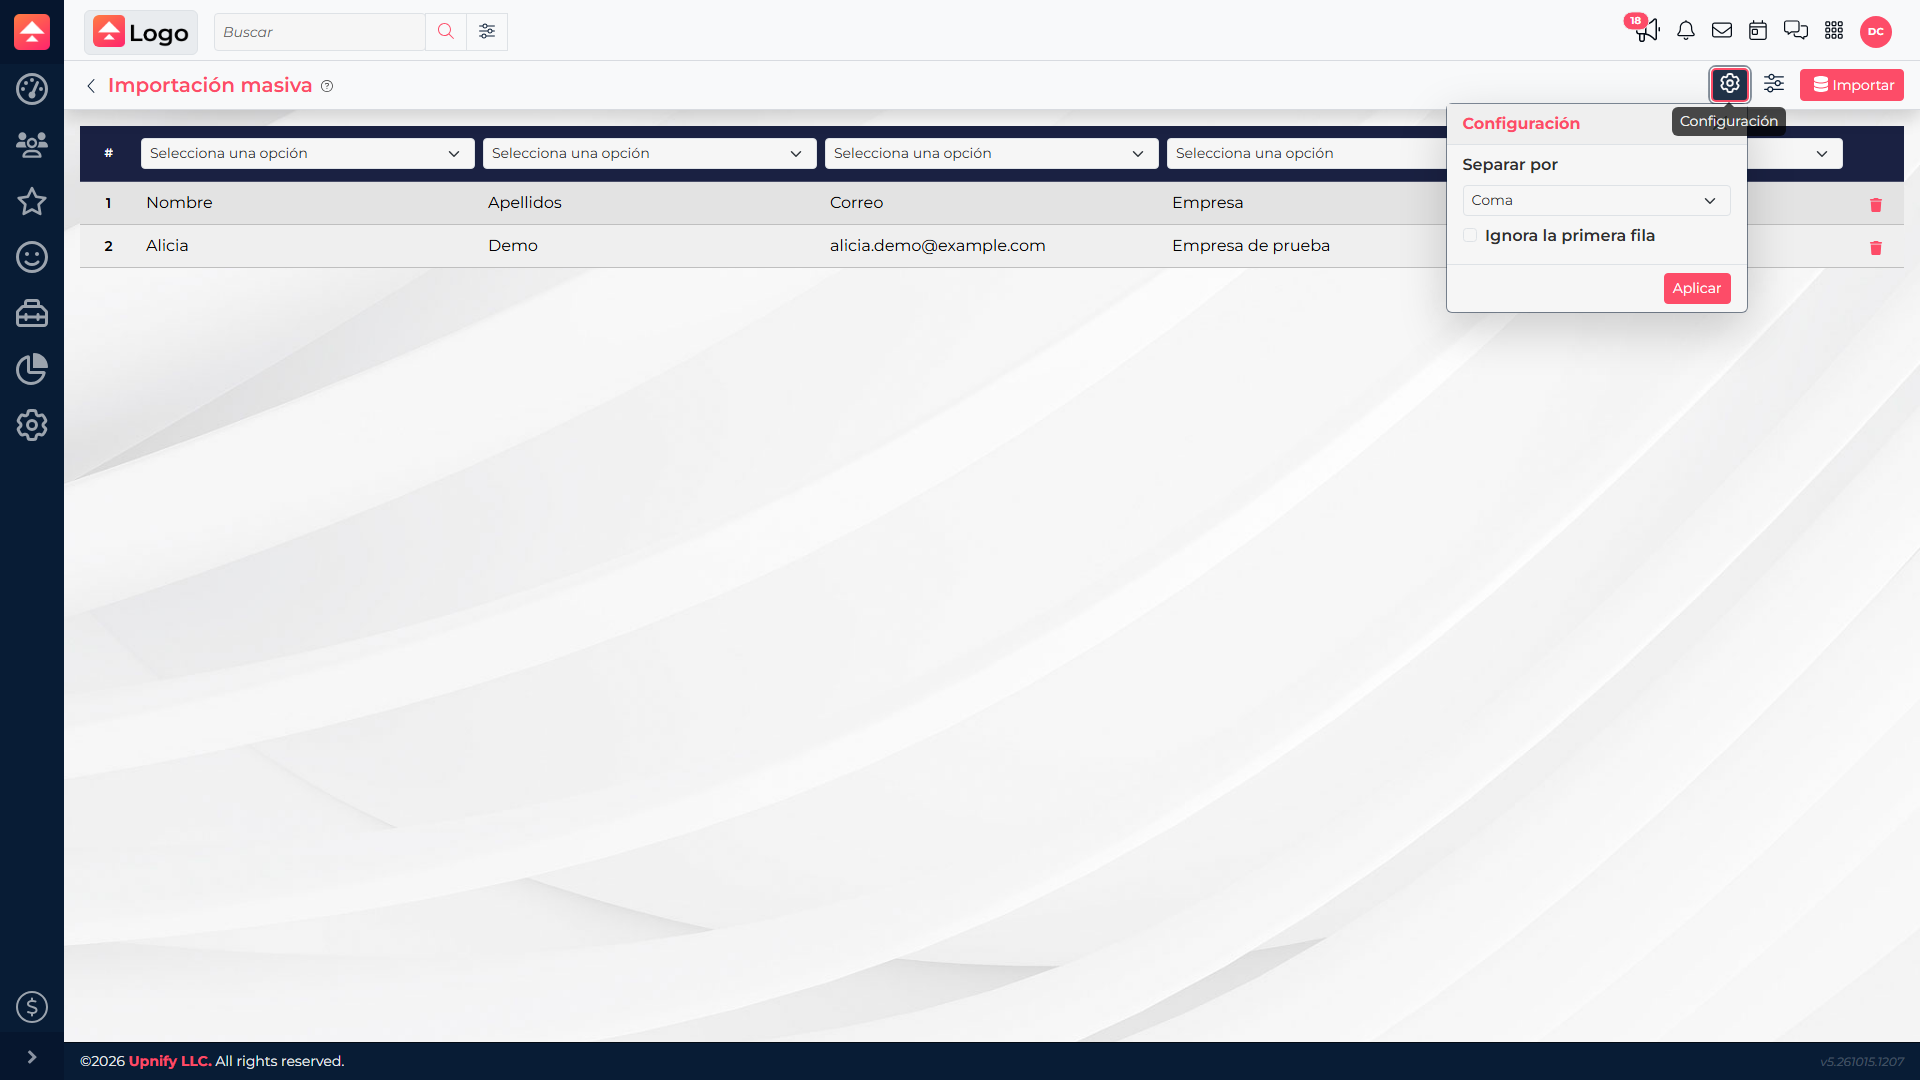
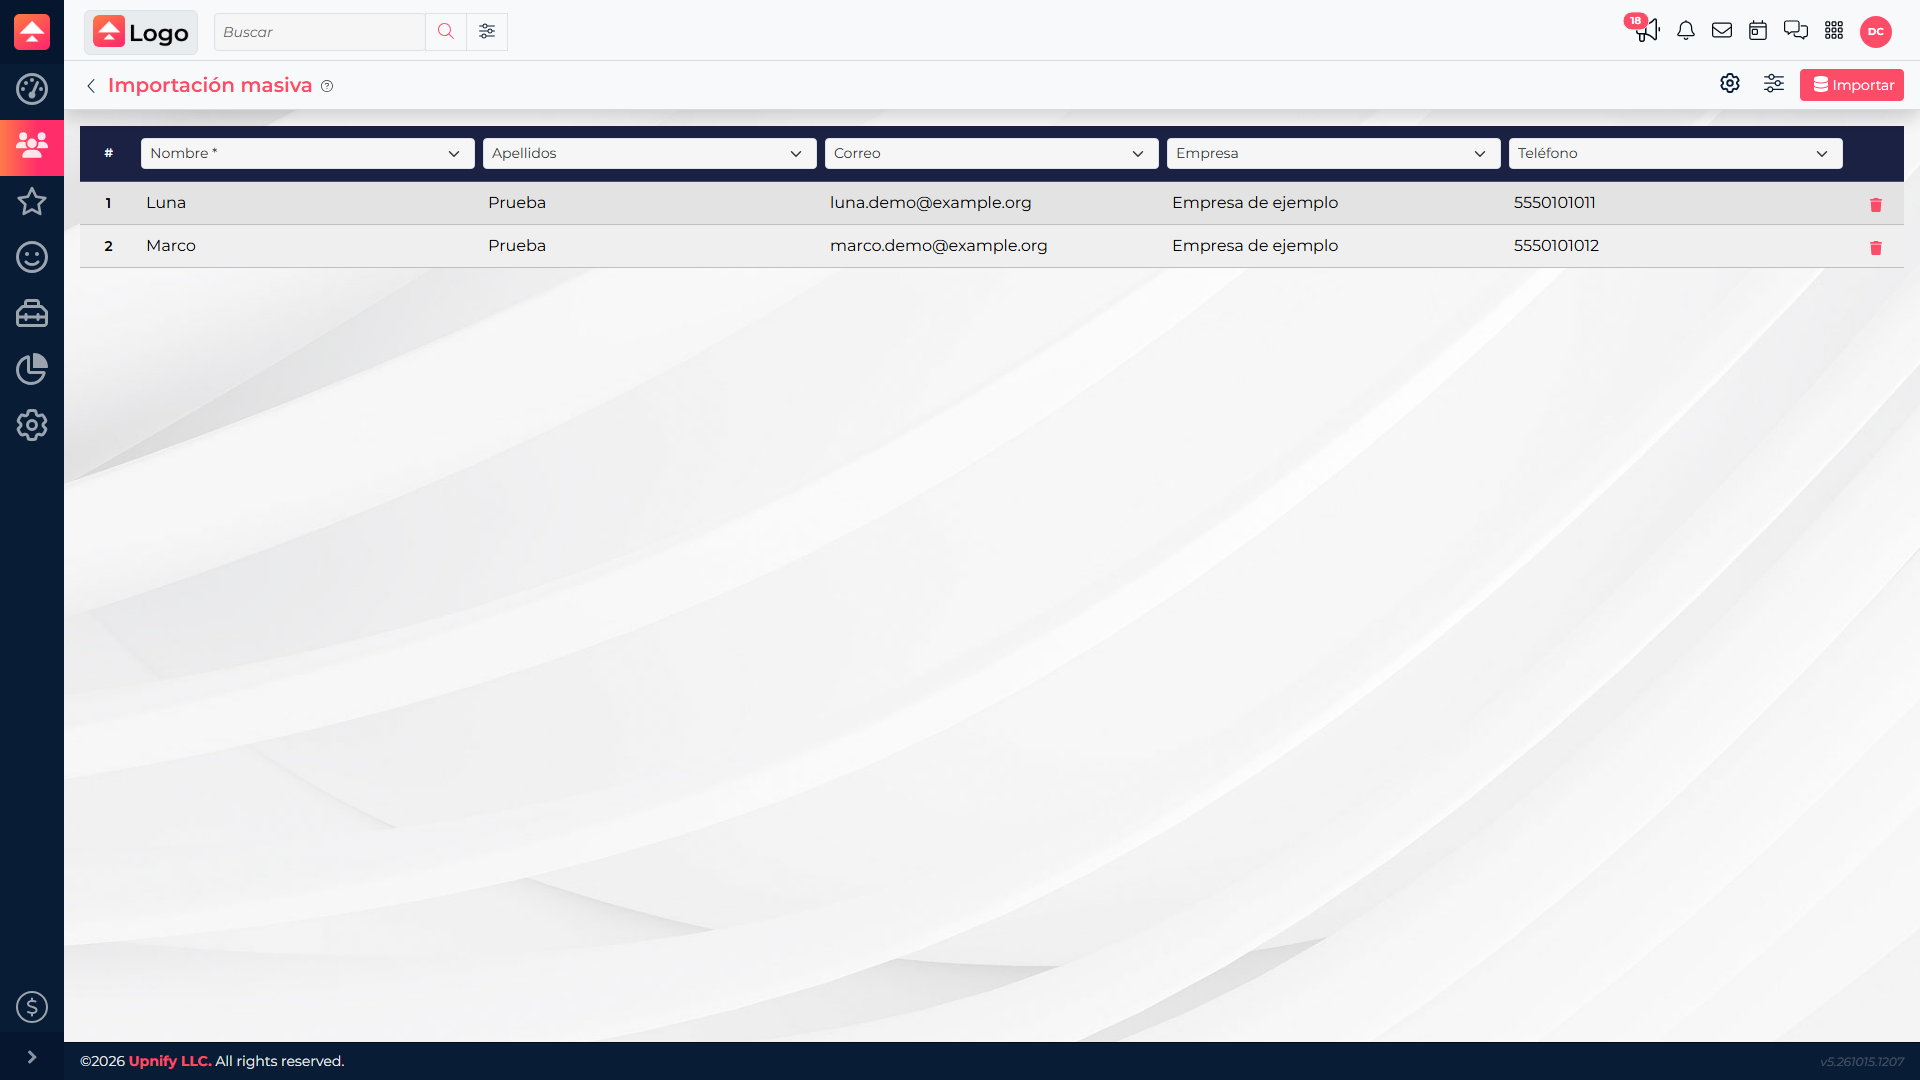
In the preview, open Settings using the gear icon. If you uploaded a CSV, choose the separator used in the file. Turn on Ignore the first row when that row contains column headers; leave it off when the first row already contains data. The header can remain visible in the preview, but it will not be imported as a record when you ignore it.
4. Match columns to fields
At the top of each column, open the list and select the CRM field that matches its values. The assistant may recognize some headers, but verify every mapping: a column named \u201CE-mail\u201D is not necessarily linked to the correct field yet.
- Assign each column once; the same field cannot receive two columns.
- Required fields have an asterisk, such as First Name *. Map them to continue.
- If you do not want to import a column, select Skip column. Every column must be mapped or skipped.
- Pay special attention to catalog fields such as country, phase, or origin. Values in the file must match a valid option for that entity.
Also confirm that values appear under the right heading and that e-mail addresses, phone numbers, and identifiers were not shifted. You can edit cells directly in the preview before starting.
5. Download a sample template
If you do not have a file ready yet, start with one of these CSV templates. Choose the one that matches the record type selected in CRM; it shows sample headers and a structure for organizing your columns. Replace the sample values with your own and keep the header row so you can map the columns in the import assistant.
- Prospects sample template (CSV)
- Customers sample template (CSV)
- Opportunities sample template (CSV)
- Sales sample template (CSV)
- Companies sample template (CSV)
- Products sample template (CSV)
6. Set advanced import options
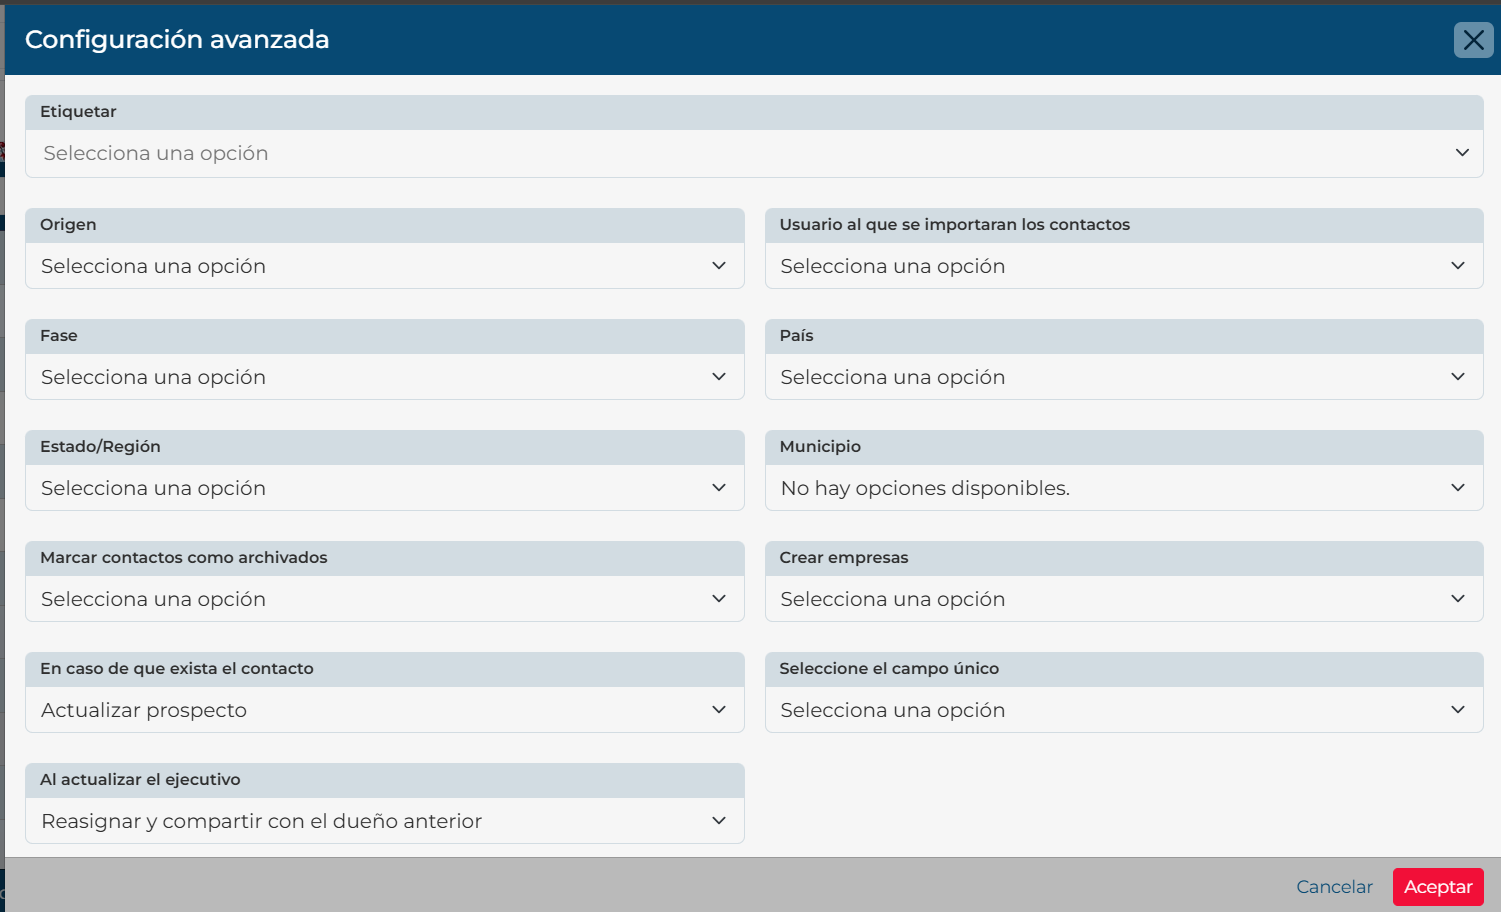
After mapping the columns, open Advanced configuration using the sliders button. This panel adds values or rules to the import, and its options vary by entity. Select only what applies to this file, then select Accept to apply the settings.
| Record type | Available advanced options |
|---|---|
| Prospects and customers | Tags, origin, assigned user, phase, location, archived status, company creation, and handling of existing contacts. |
| Opportunities and sales | Product line and the user assigned to the records. |
| Products | Choose what to do when a product already exists: ignore it or update it. |
| Companies | Map company fields in the column-mapping step; this import does not show the contact advanced options. |
For Prospects or Customers, you can apply one or more Tags to the records in this import, set their Origin, and choose the assigned user. The phase option depends on the selected entity. Country, state, and municipality provide default location values; if your file has these fields, map them too so each row can keep its own value.
Mark contacts as archived lets you import records in an archived state. If you are updating contacts, review this option carefully: the import can also change the archived status of matching records. Turn on Create companies when you want CRM to create company records from names in the Company column.
If the assigned user changes during an update, choose Reassign only to remove the previous executive\u2019s assignment, or Reassign and share with previous owner to preserve that person\u2019s access to the contact. For Opportunities and Sales, set the product line and assigned user. For Products, decide whether to ignore or update existing items. Review these choices before continuing because they can affect information already saved in CRM.
7. Review before importing
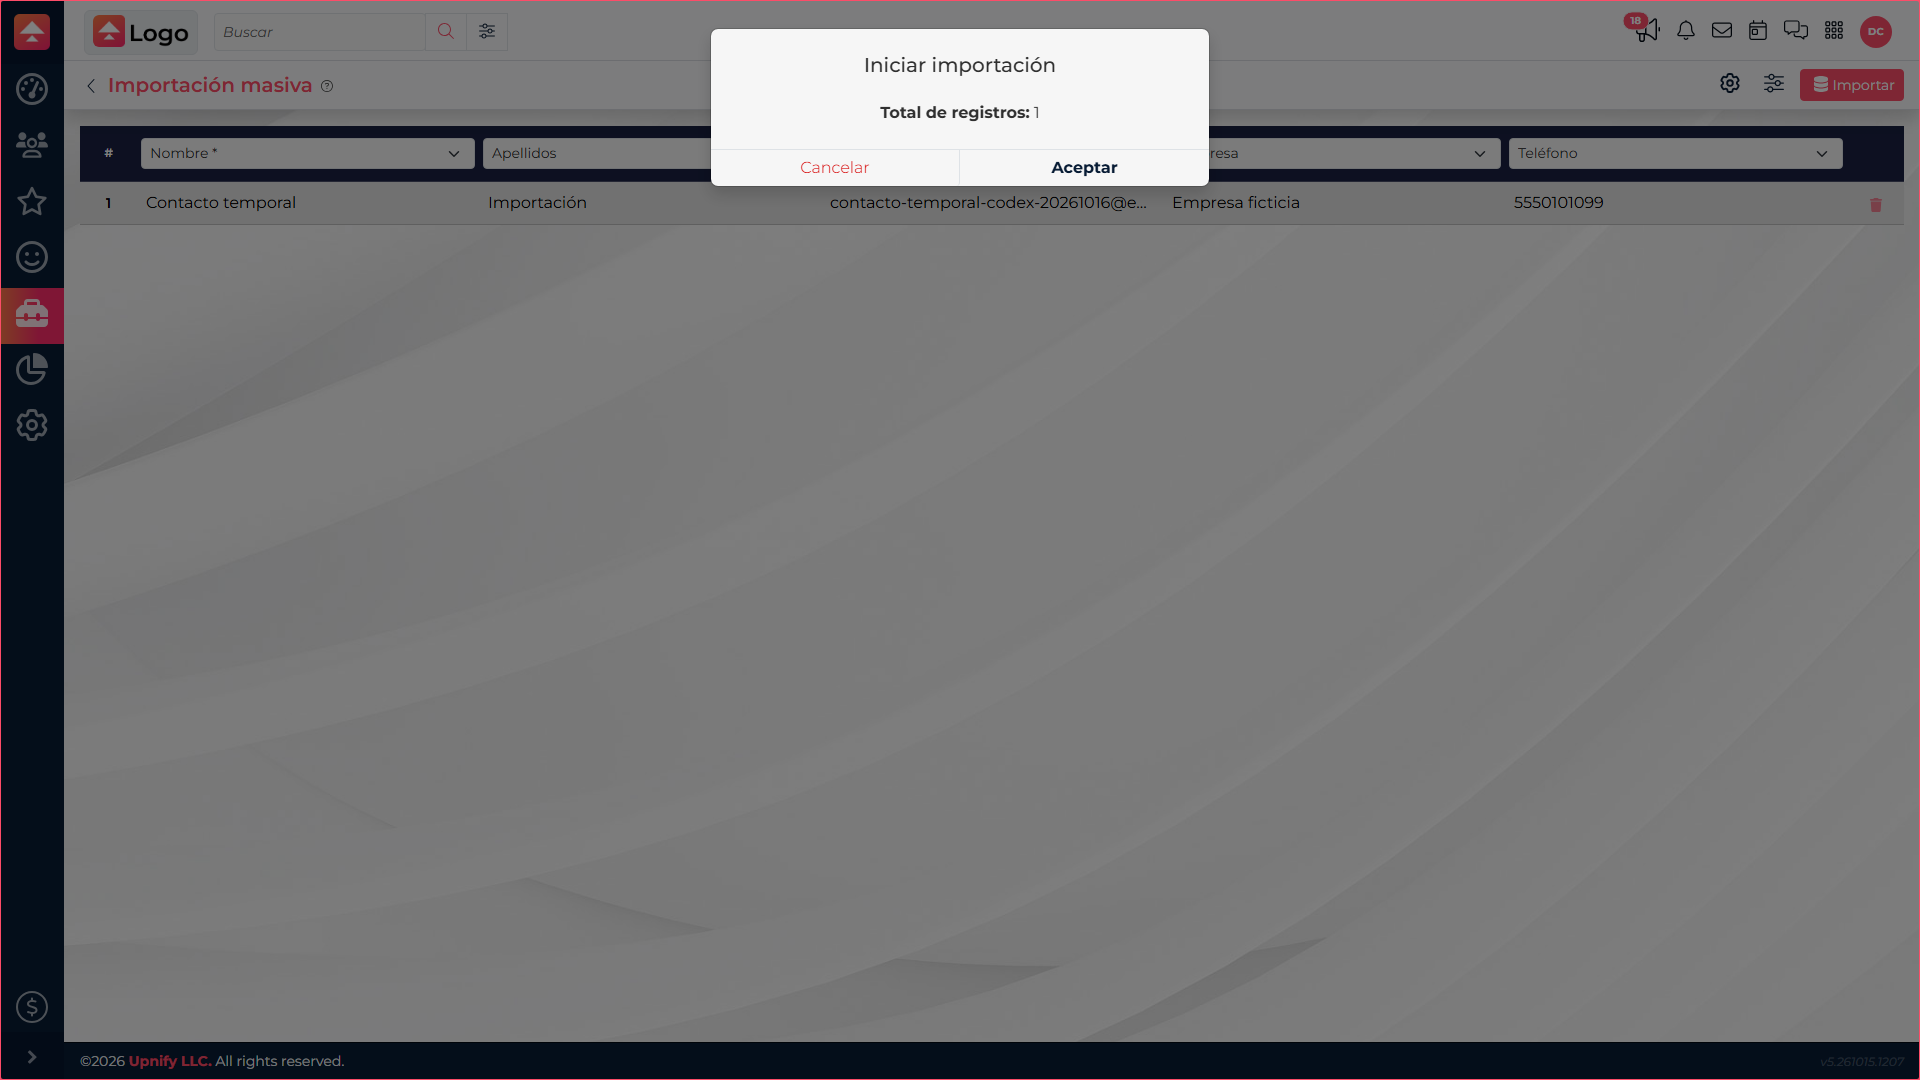
Review the first rows and confirm that each value is in the expected field. When you select Import, CRM shows a confirmation with the total number of records and, when applicable, how many rows will be skipped because they contain errors. Review it and select Accept only when you are ready; saving does not begin until then.