

The Webchat widget adds a chat window to your website where visitors can start a conversation. It can answer questions while someone explores your services, guide a request, or make it easier to contact you without searching for an email address or phone number.
Create the widget and choose a channel
In Engage > Sites > Widgets, select Web chat. Give it an internal name and choose the project or website where it will appear. Under Webchat settings, set the available channel, language, welcome text, and, depending on enabled options, whether the chat opens automatically or plays a sound.
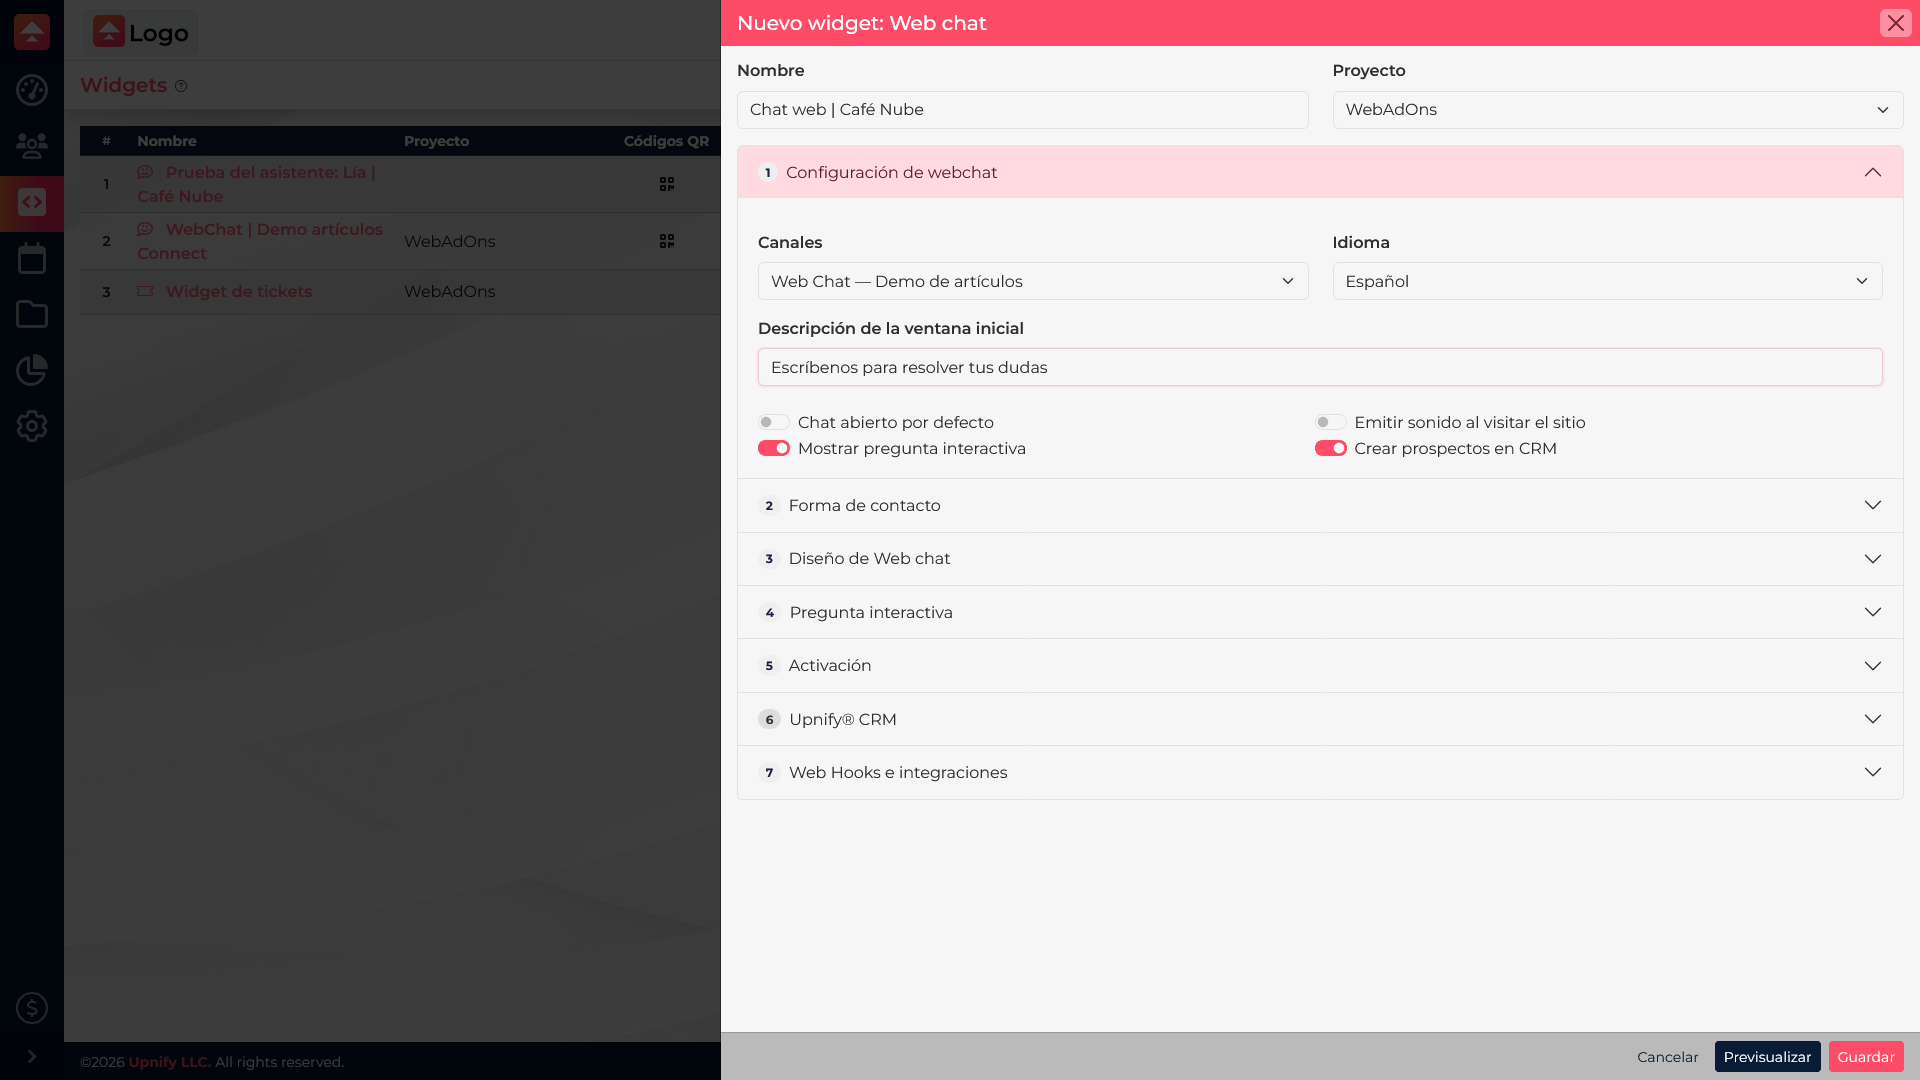
The channel determines where the chat is handled. Choose an active channel with a team ready to respond. If you later change the channel connection or its owners, test the widget again from your website.
Customize the greeting and guidance
Under Web chat design, adjust the title, waiting message, size, and colors so the chat fits your website and explains what visitors can do. For example, a café could show “Café Nube” and greet visitors with “Hi, how can we help?”. Avoid promising an immediate reply if the team is not always available.
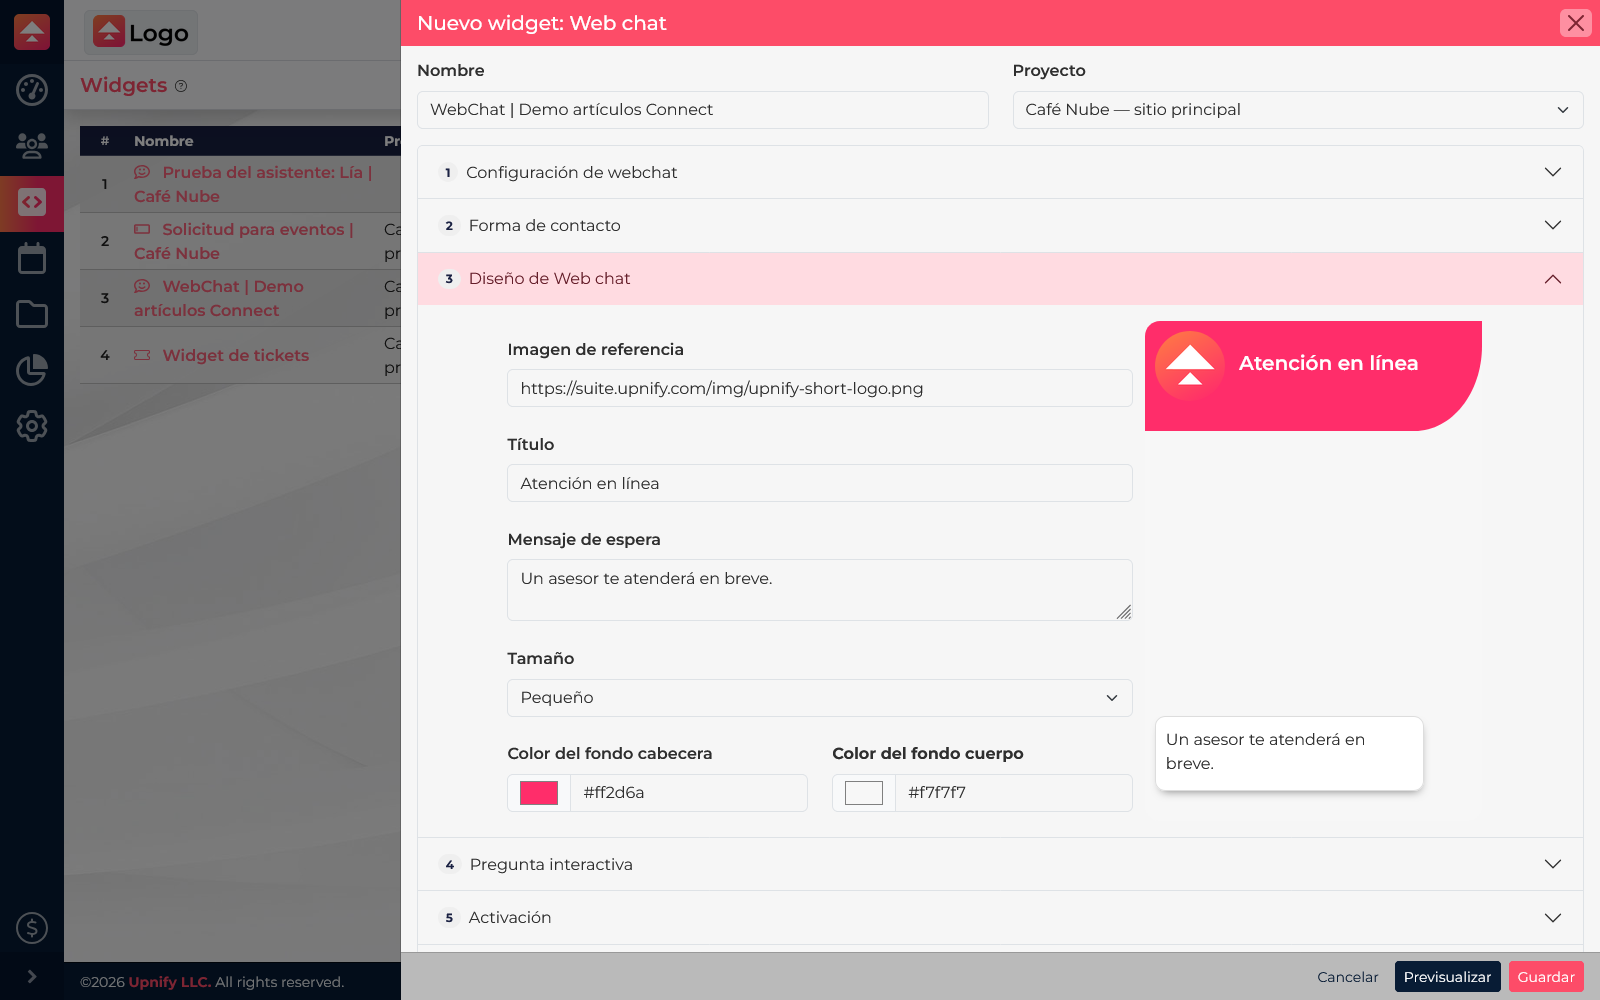
The reference image can show your business logo in the chat window. The title identifies the chat, and the waiting message tells visitors what to expect while they wait. Adjust the size and header and body colors so the widget is readable and fits your website. Use the preview to review how those settings will look.
If Interactive question is enabled, start with a short question that helps identify the reason for contact, such as “What can we help you with?”. Configure a contact form or CRM connection only if you need details for follow-up, and ask only for what is necessary.
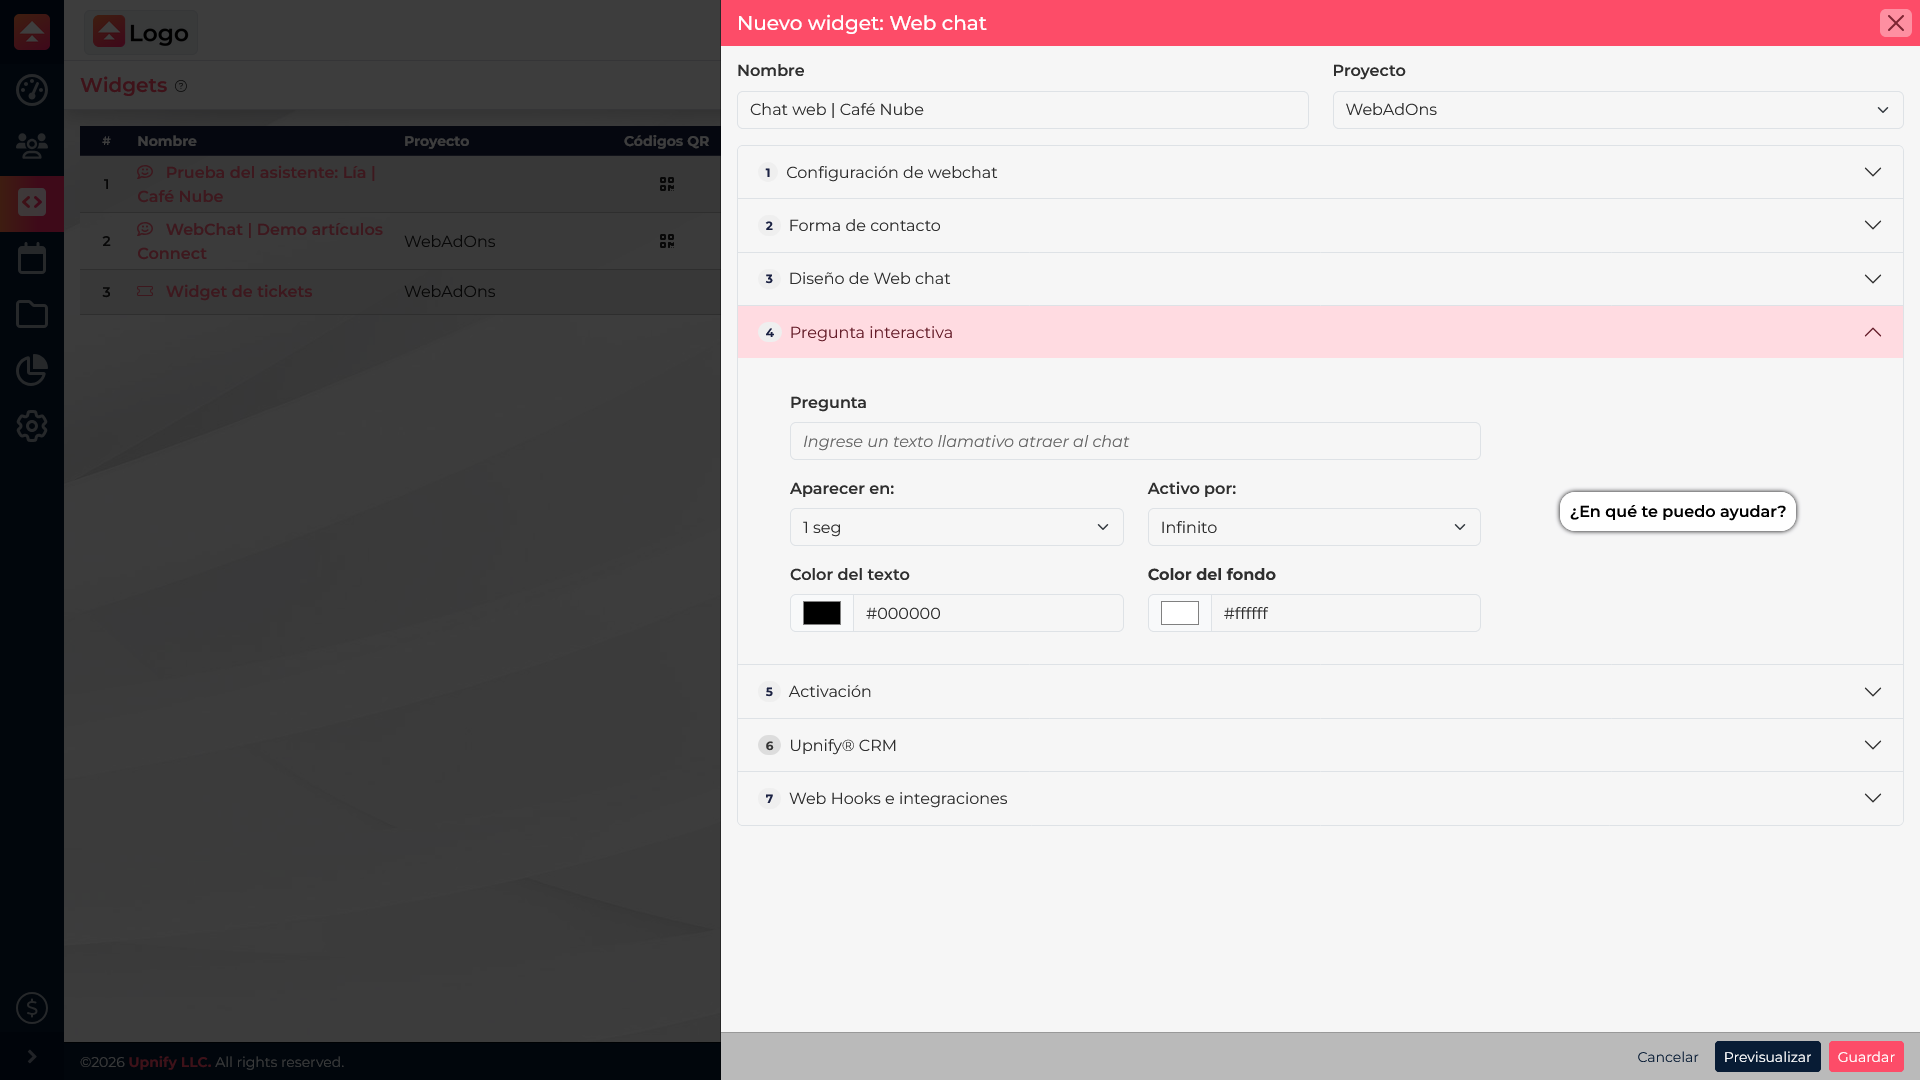
Also review Activation to decide when the widget appears and whether it is limited to certain pages.
Test the full experience
- Save the widget and confirm it is active and linked to the correct website.
- Open the website in a private window on a computer and phone.
- Check the welcome text, opening question, and selected channel.
- Send a test message and confirm the team receives it through the configured channel.
If the chat appears but messages are not received, check the channel connection and team access. If it does not appear, review activation options and confirm the Engage code is installed on the website.