
The Engage Tickets widget publishes a form on your website and can turn each submission into an Upnify Flow task. Use it to receive support, maintenance, warranty, or service requests and give each one an owner, a phase, and a due date.
Prepare the form visitors will use
In Engage > Sites > Widgets, create a Tickets widget, give it a name, and choose the website where it will appear. Under Contact form, arrange the fields needed to identify the person and understand the request. In the example, name, company, title, and description help open the case; email and mobile number let the team contact the customer. Enable attachments when a photo, document, or screenshot can help investigate the issue.
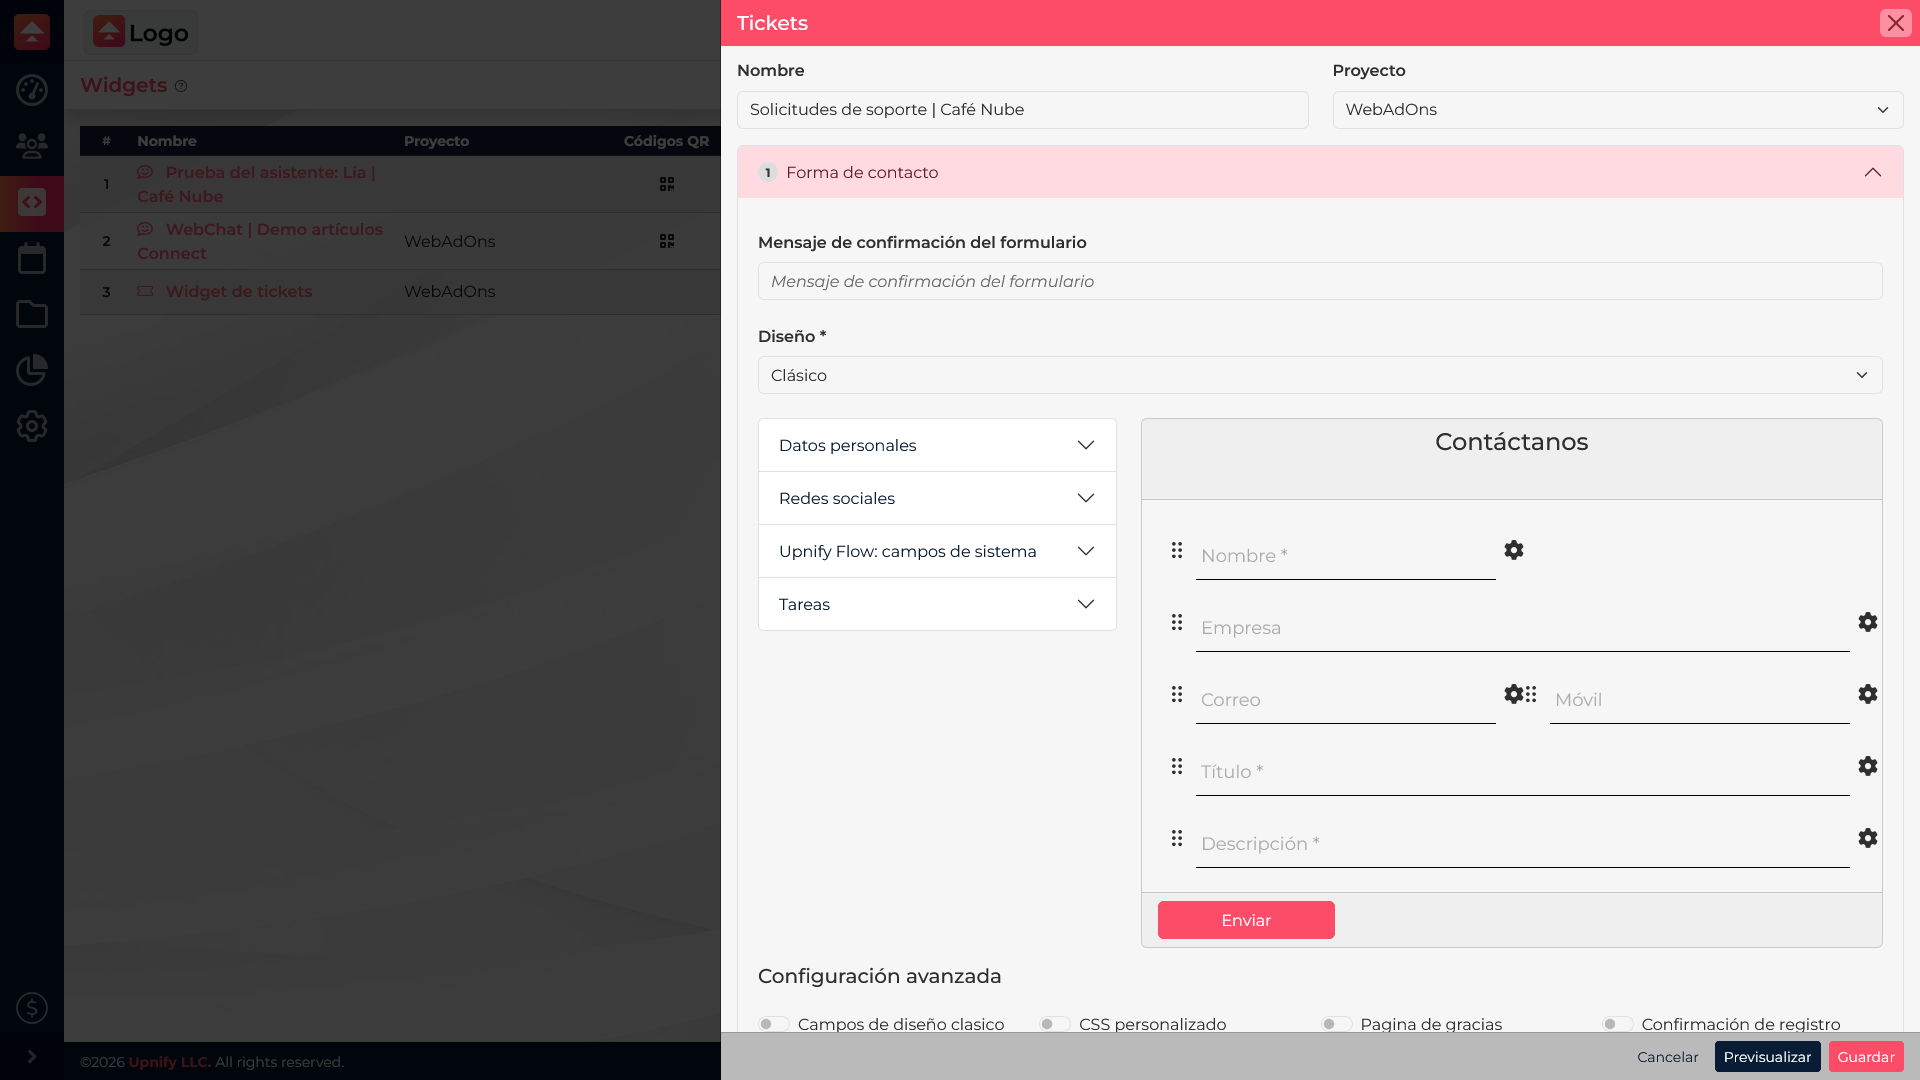
Ask only for information your team needs. A maintenance request might need a branch and equipment type; software support might need the product name and what happened. If you also need contact details saved in CRM, configure that option separately in the form.
Choose how Flow creates the task
Open the Upnify Flow section. Here you choose which process receives each request and how it is organized when it arrives. The workflow and phase must already exist in Flow; then you can set labels, a deadline, and participants.
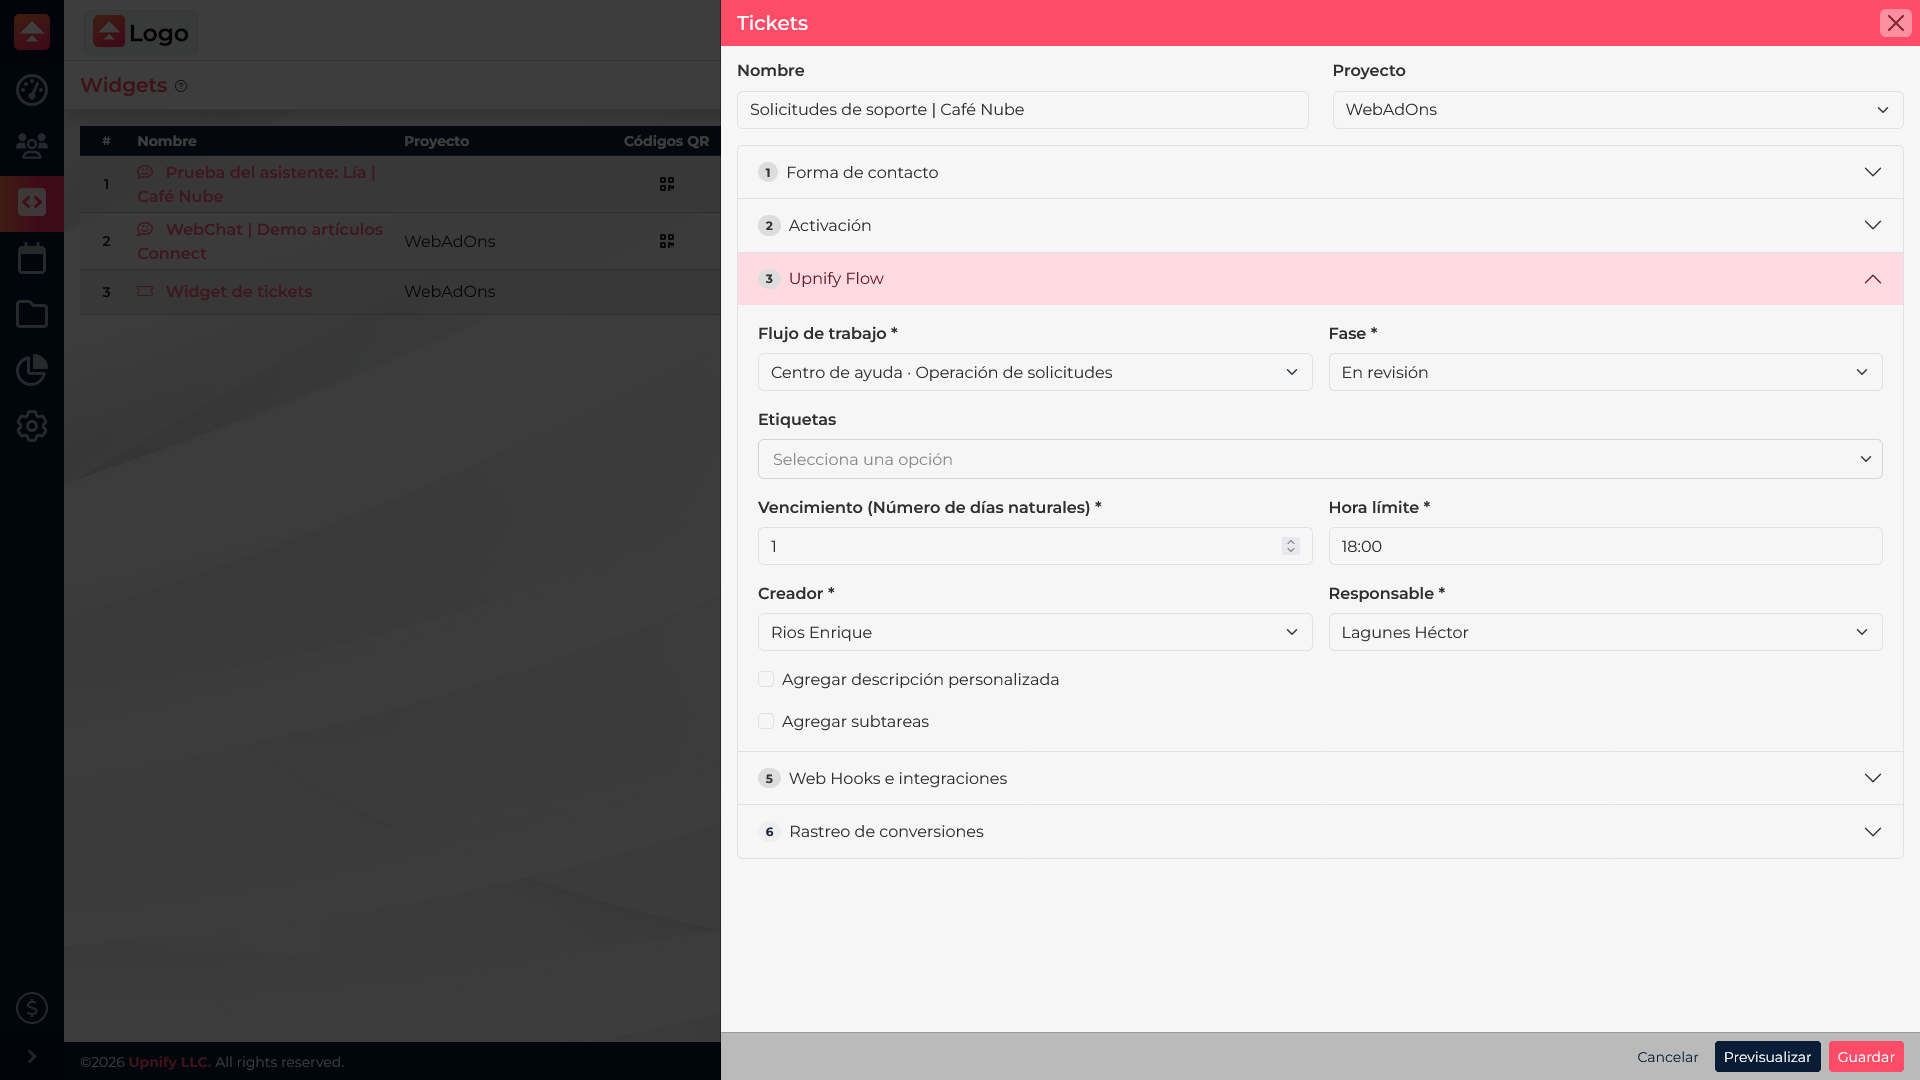
Each field has a different purpose:
| Field | What it does |
|---|---|
| Workflow | The Flow process that receives requests. Choose one dedicated to support or service so cases do not get mixed with other work. |
| Phase | The starting point for each task. For example, use \u201CRequest received\u201D so the team can review and classify reports before handling them. |
| Labels | Add Flow labels to tasks to distinguish request topics or types, then find or filter them more easily. Select labels your team already uses. |
| Due date (number of calendar days) | Sets how many calendar days the task has before it is due. These are calendar days, not business days, so weekends count when they fall within the period. |
| Cutoff time | The time of day when the task is due on its calculated due date. Set it according to your team\u2019s follow-up schedule. |
| Creator | The person shown as the creator of tasks generated by the form. This provides context about the record\u2019s origin; it is not the person expected to resolve it. |
| Assignee | The person who receives the task to work on it. Choose someone with access to the workflow and the ability to handle these requests. |
| Add a custom description | When enabled, you can write a standard description for tasks created by this widget. Use it for shared instructions, review criteria, or service context. Visitor-submitted details are collected through the form fields. |
| Add subtasks | Adds a checklist based on a Flow template to the task. Use it when every request should follow the same steps, such as reviewing evidence, contacting the customer, and recording the diagnosis. |
Check that requests reach the right team
- Save the widget and confirm it is linked to the website where requests are collected.
- Submit a test request from the website using fictitious details.
- In Flow, check that the task was created in the selected workflow and phase with the expected labels, due date, and assignee.
- Review whether the description and, if configured, checklist help the team continue the work.
The widget starts the process; the team is still responsible for reviewing and updating the task in Flow. If a task does not appear, check that the widget is active and the selected workflow, phase, and users are still available to the company.