

For an online session, Engage can create the Zoom event while you prepare the invitation, keeping the event and meeting details together.
1. Link Zoom to Engage
In Engage, open Settings > Integrations and choose New > Zoom. Give the integration a recognizable name and fill in the defaults it requests\u2014phase, source, category, and user\u2014for records created from this connection. Tags are optional.
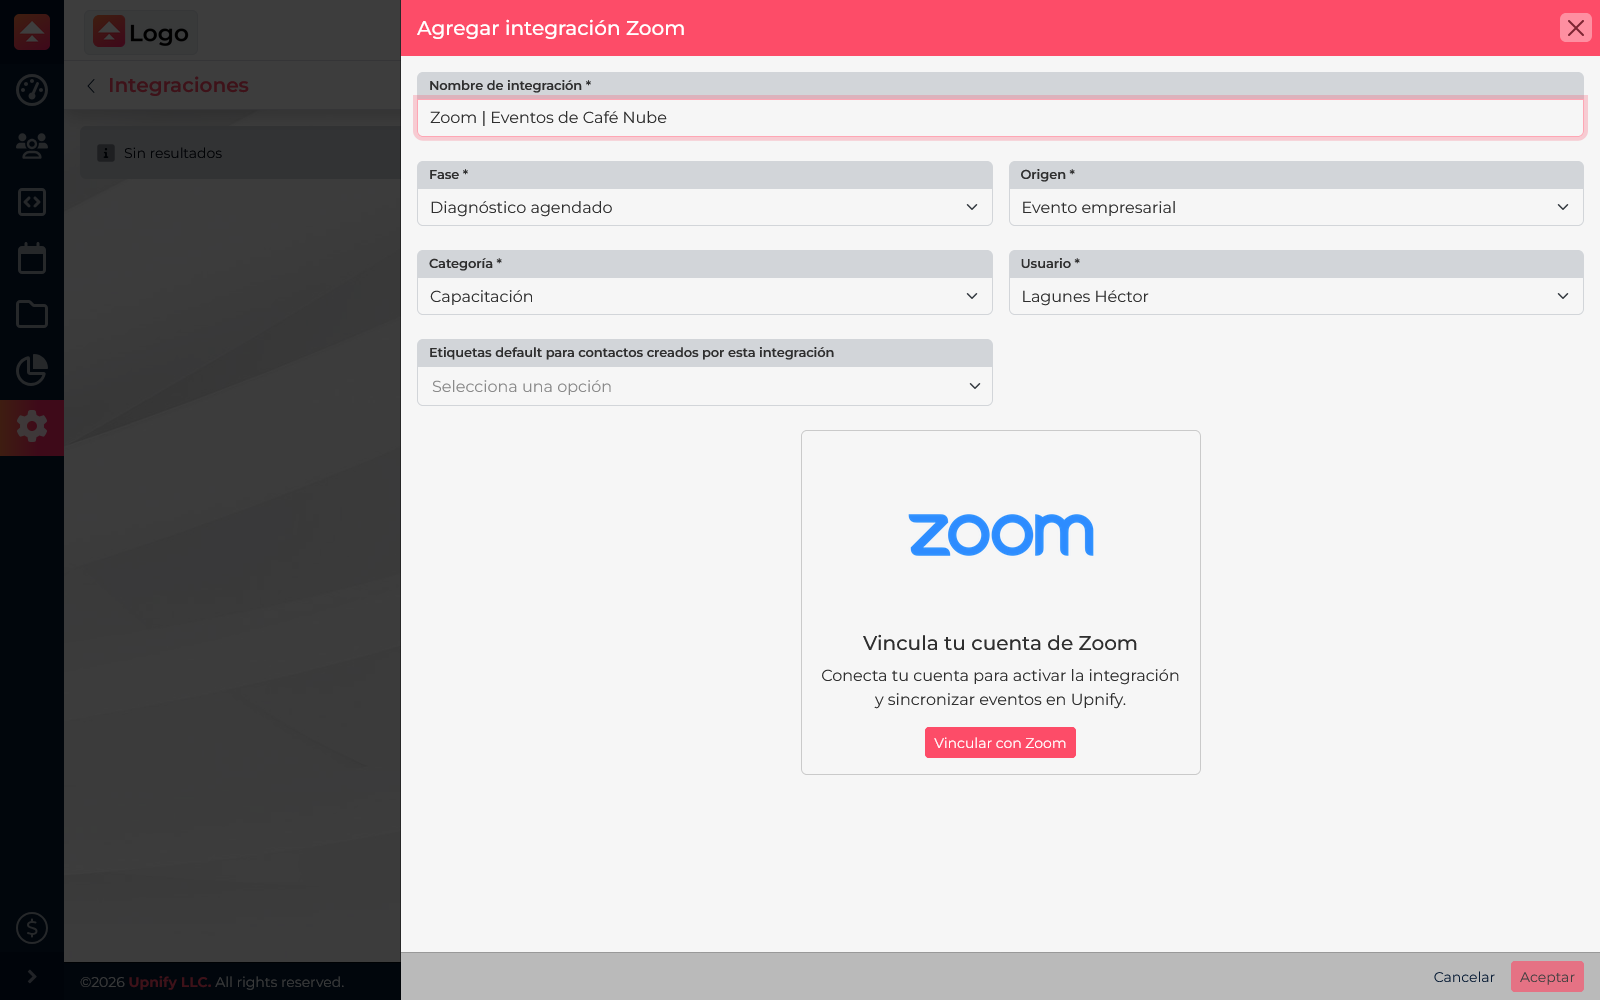
Select Link with Zoom. Sign in with the account that will create the meetings and review the requested permissions before approving them. If Zoom shows Request instead of Add, or says approval is required, ask a Zoom account admin to review the app in Marketplace. After authorization, save the integration in Engage.
Zoom lets the account owner or an admin control which Marketplace apps users can install. See Zoom\u2019s official guide to adding Marketplace apps and its overview of roles, permissions, and app approvals.
2. Set up the virtual event
Go to Sites and Events > Events and select New. Enter the title, category, type, date and time, capacity, and description. For a remote session, choose the category your team uses for online events and set the type to Virtual. For example, enter the date and capacity for a Café Nube product demo.
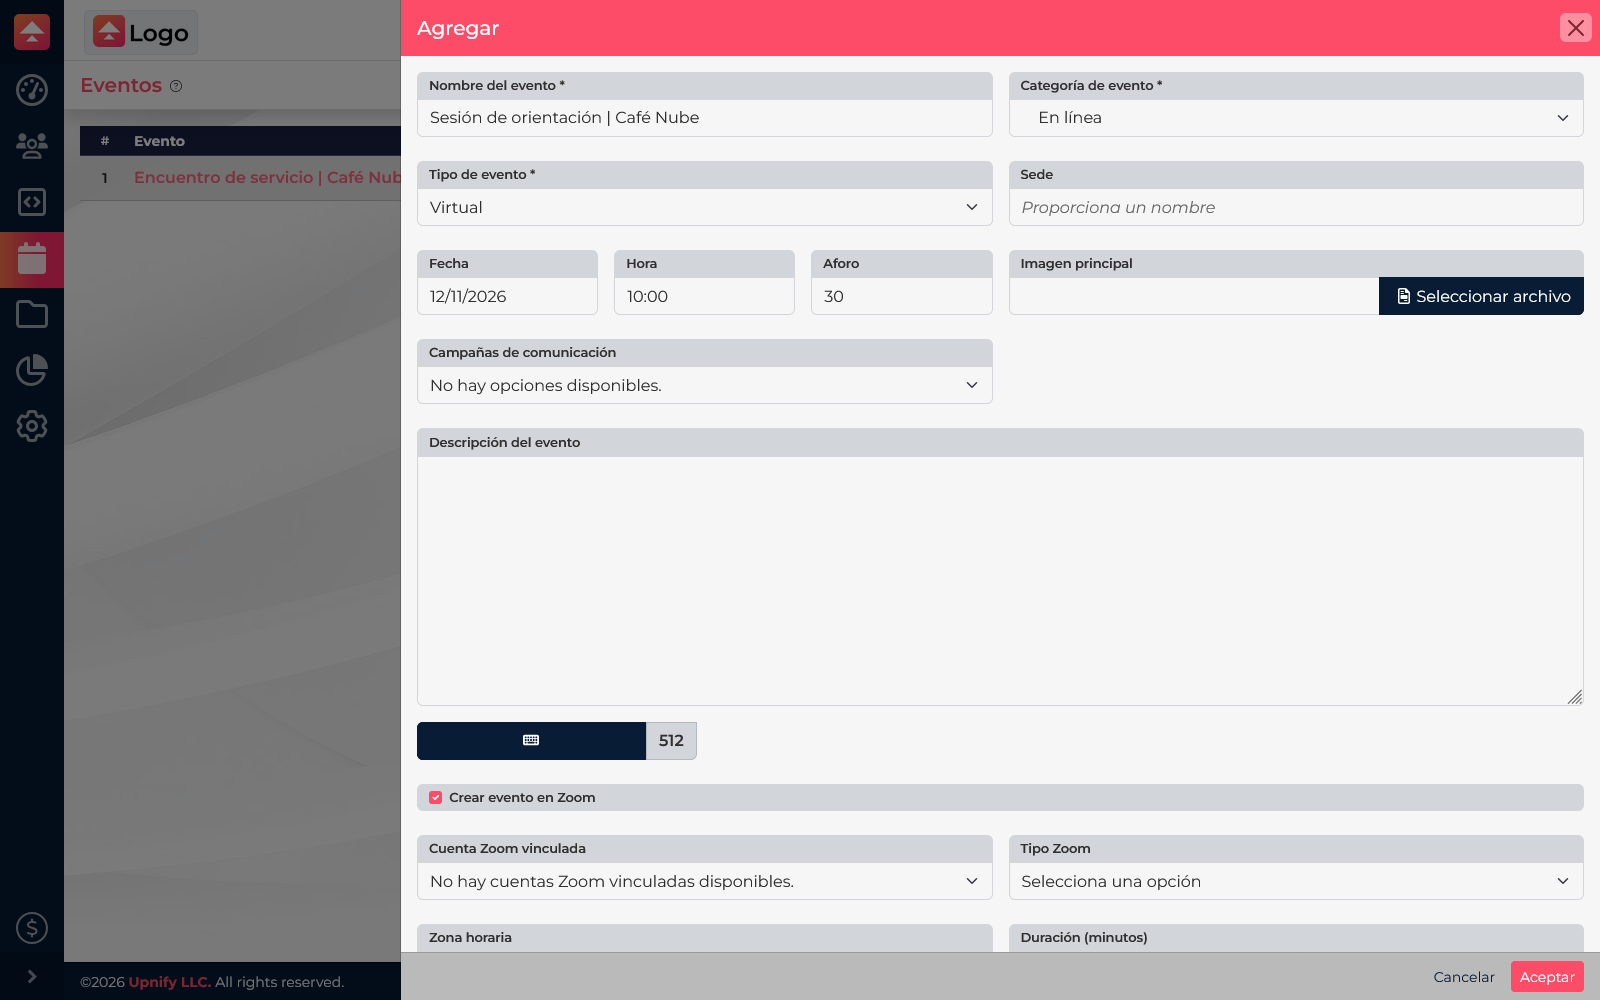
Turn on Create event in Zoom. Select the authorized account, choose Meeting or Webinar, then set the time zone and duration.
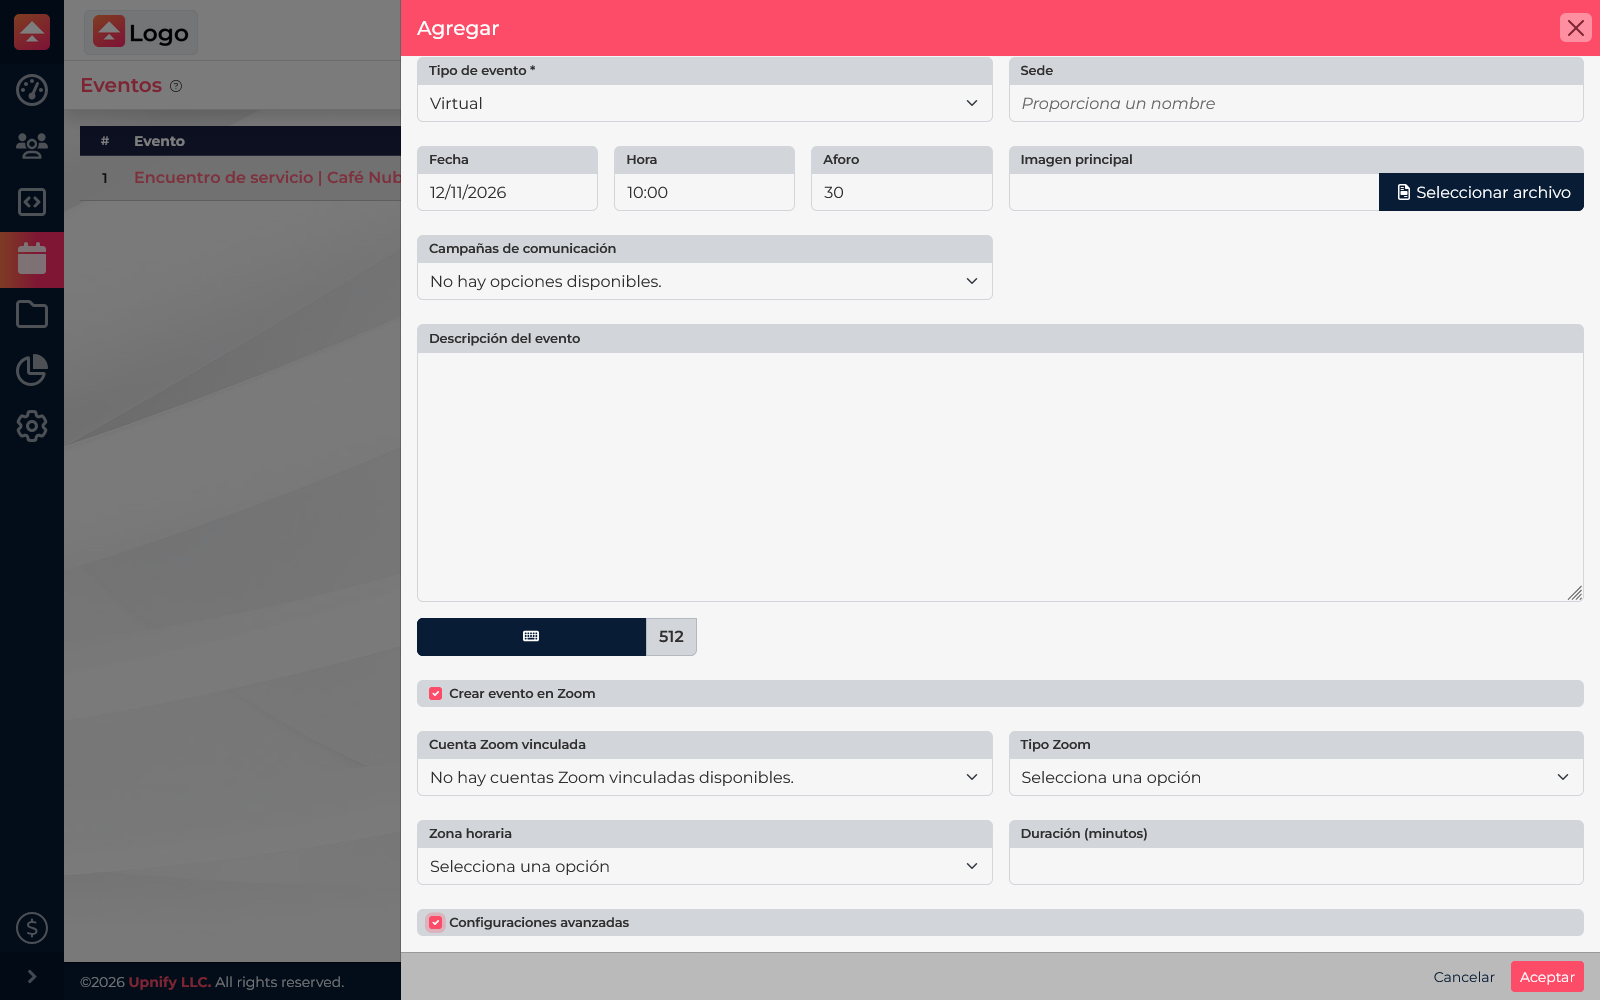
A webinar requires the Zoom Webinars add-on. See Zoom\u2019s official webinar licensing information. Automatic recording also depends on Zoom settings and permissions; see its guide to enabling it. For meetings, see the meeting scheduling guide.
3. Save and review
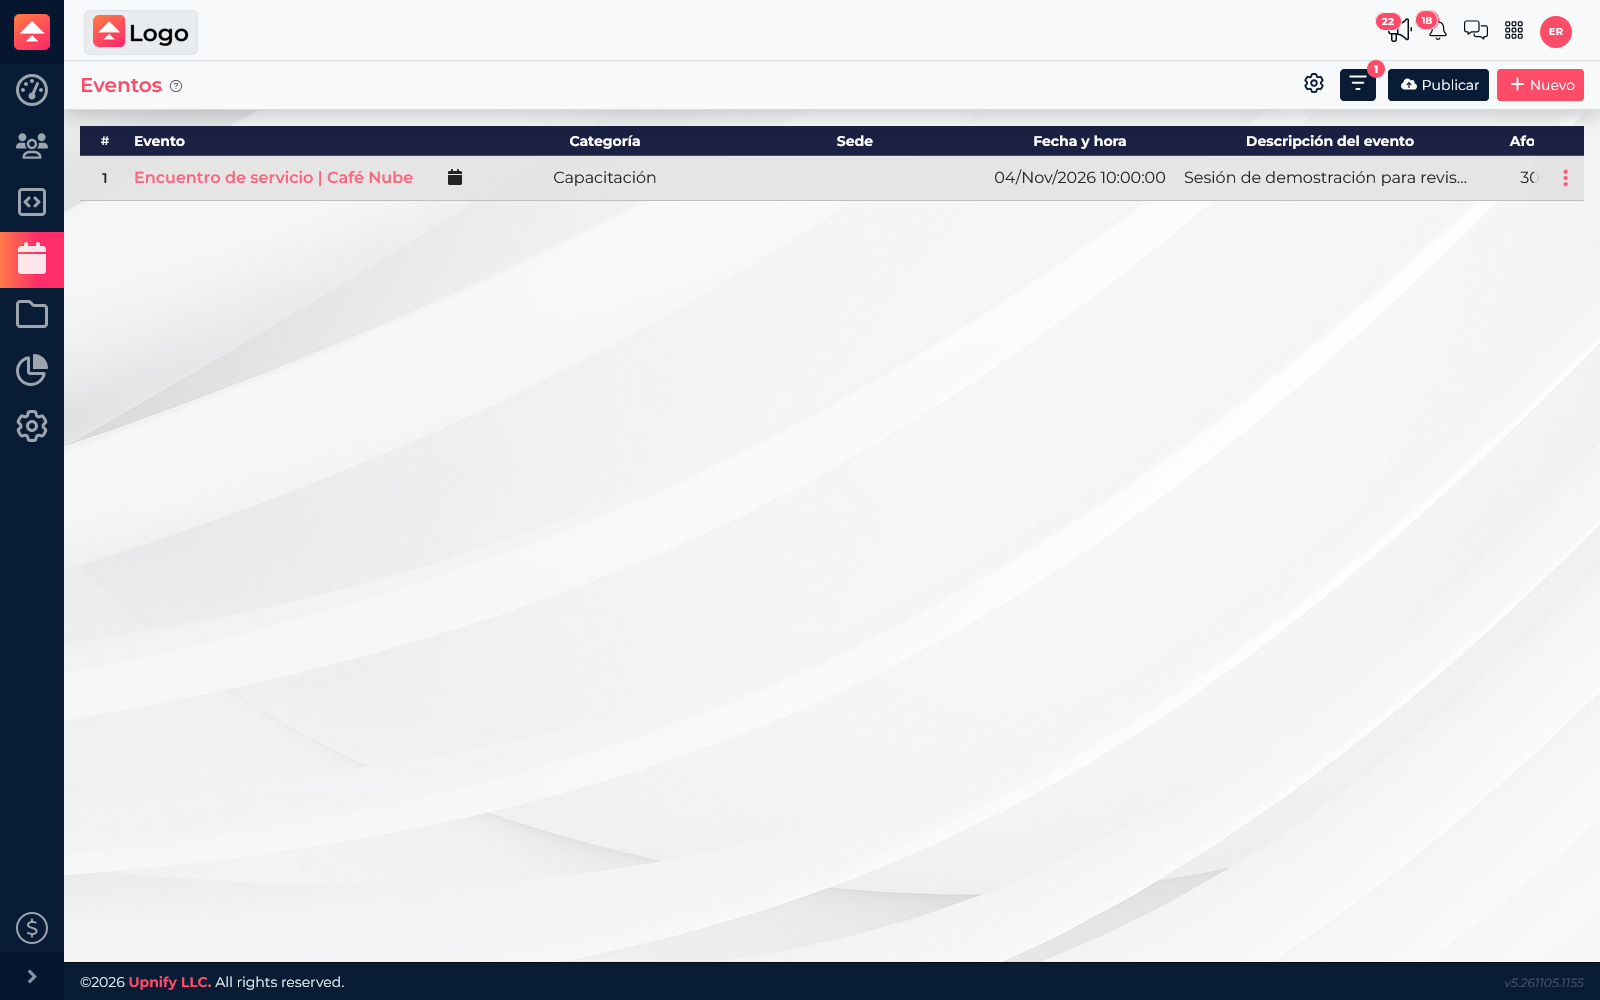
Before accepting, check the title, date, time, capacity, category, and Zoom settings. When saved, Engage records the event and asks Zoom to create the meeting or webinar with the selected account and options. Return to the list and open the record to confirm the date and details.
If no Zoom account appears, finish authorization under Settings > Integrations first. If Zoom asks you to authorize again, use an account that still has the required permissions. If Webinar is unavailable, confirm the Zoom license and account restrictions.