

An Engage form turns a website visit into a request your team can follow up on. You can ask only for the details you need, explain what happens after submission, and\u2014if CRM is enabled for your account\u2014save the entry as a prospect with useful follow-up information.
For example, a maintenance company could use a \u201CRequest a visit\u201D form to collect a name, phone number, equipment type, and service area. When connected to CRM, the team receives a prospect with those details and can continue the follow-up through its sales process.
1. Create the form
In Engage, go to Settings > Widgets and select New. Choose Form. Give it an internal name that identifies its purpose and location. Add the title and description visitors will see, set a confirmation message, and adjust the style to fit your page.
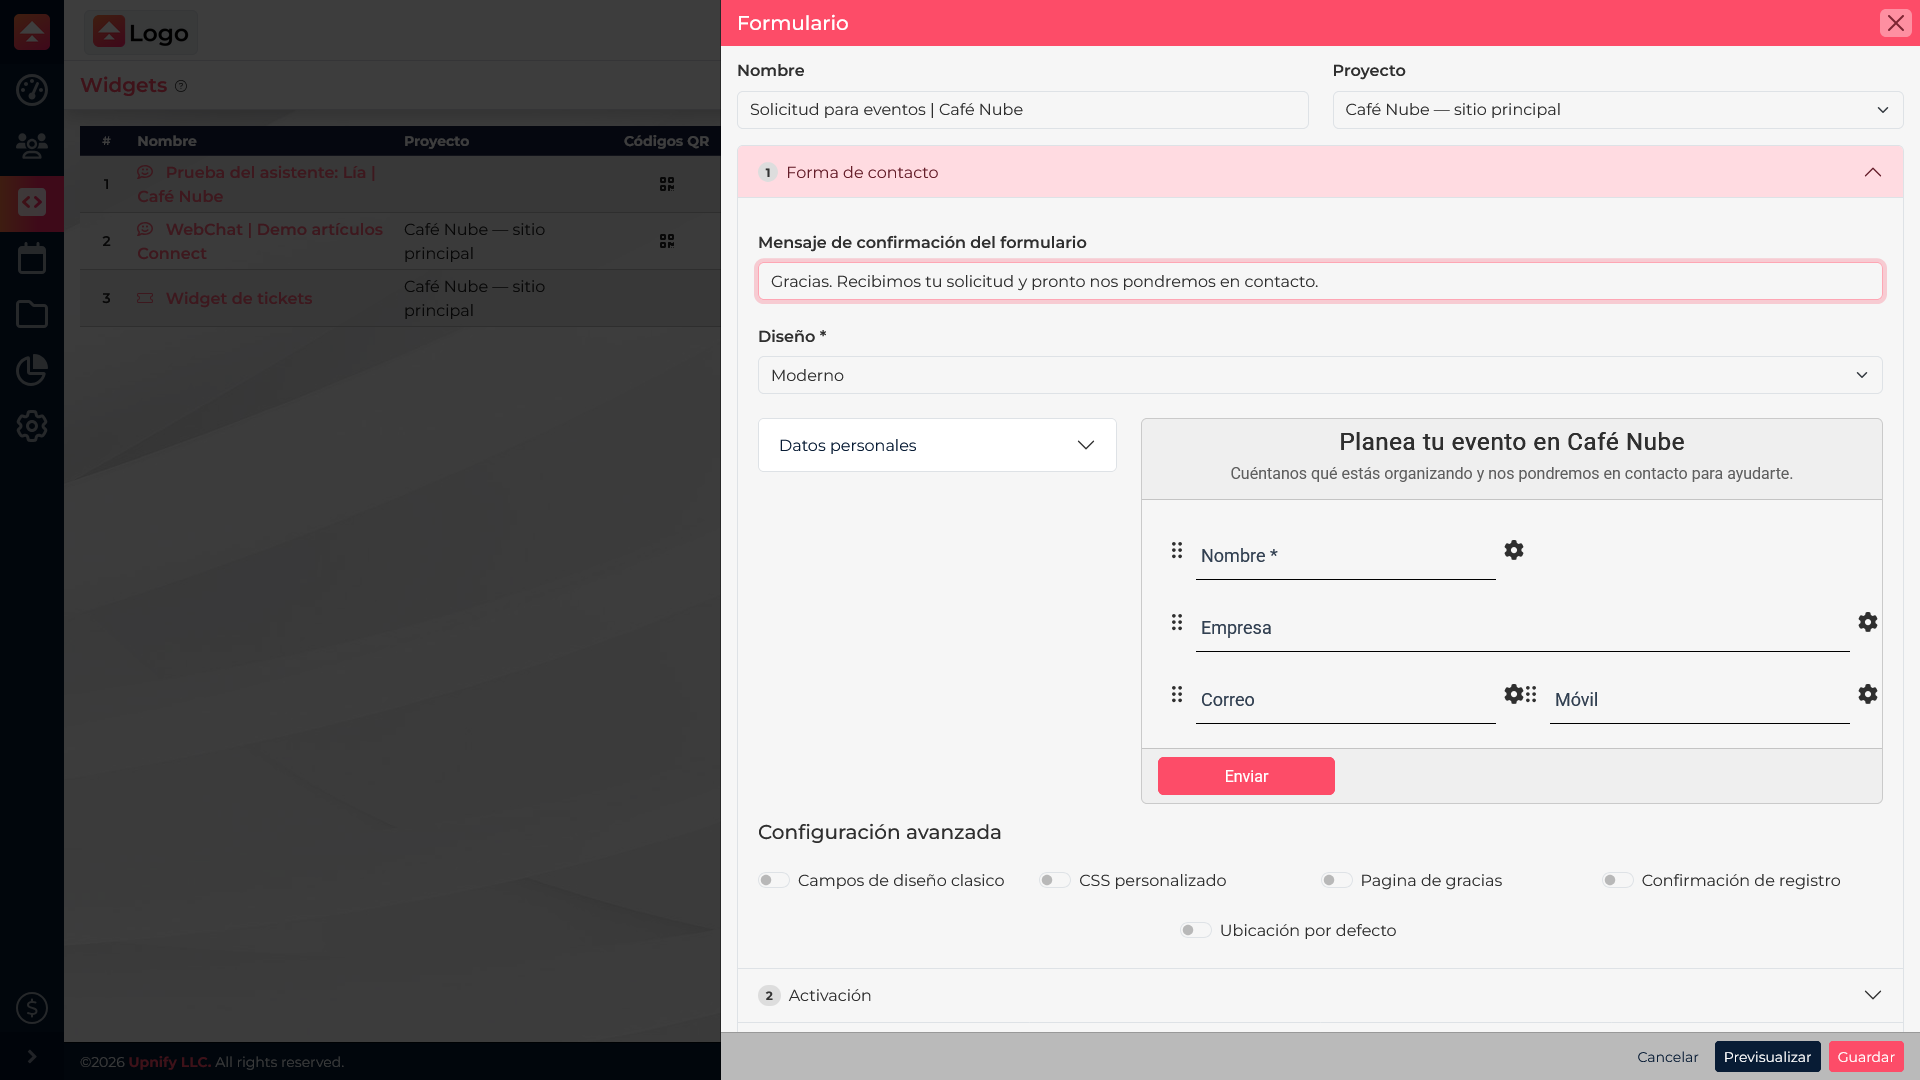
Add only the fields you will use. A demo request may need a name, email, phone number, and a question about the visitor\u2019s interests. Asking for too much can reduce submissions and create unnecessary work. Check which fields are required and what information should be visible before publishing.
Review the fields and activation
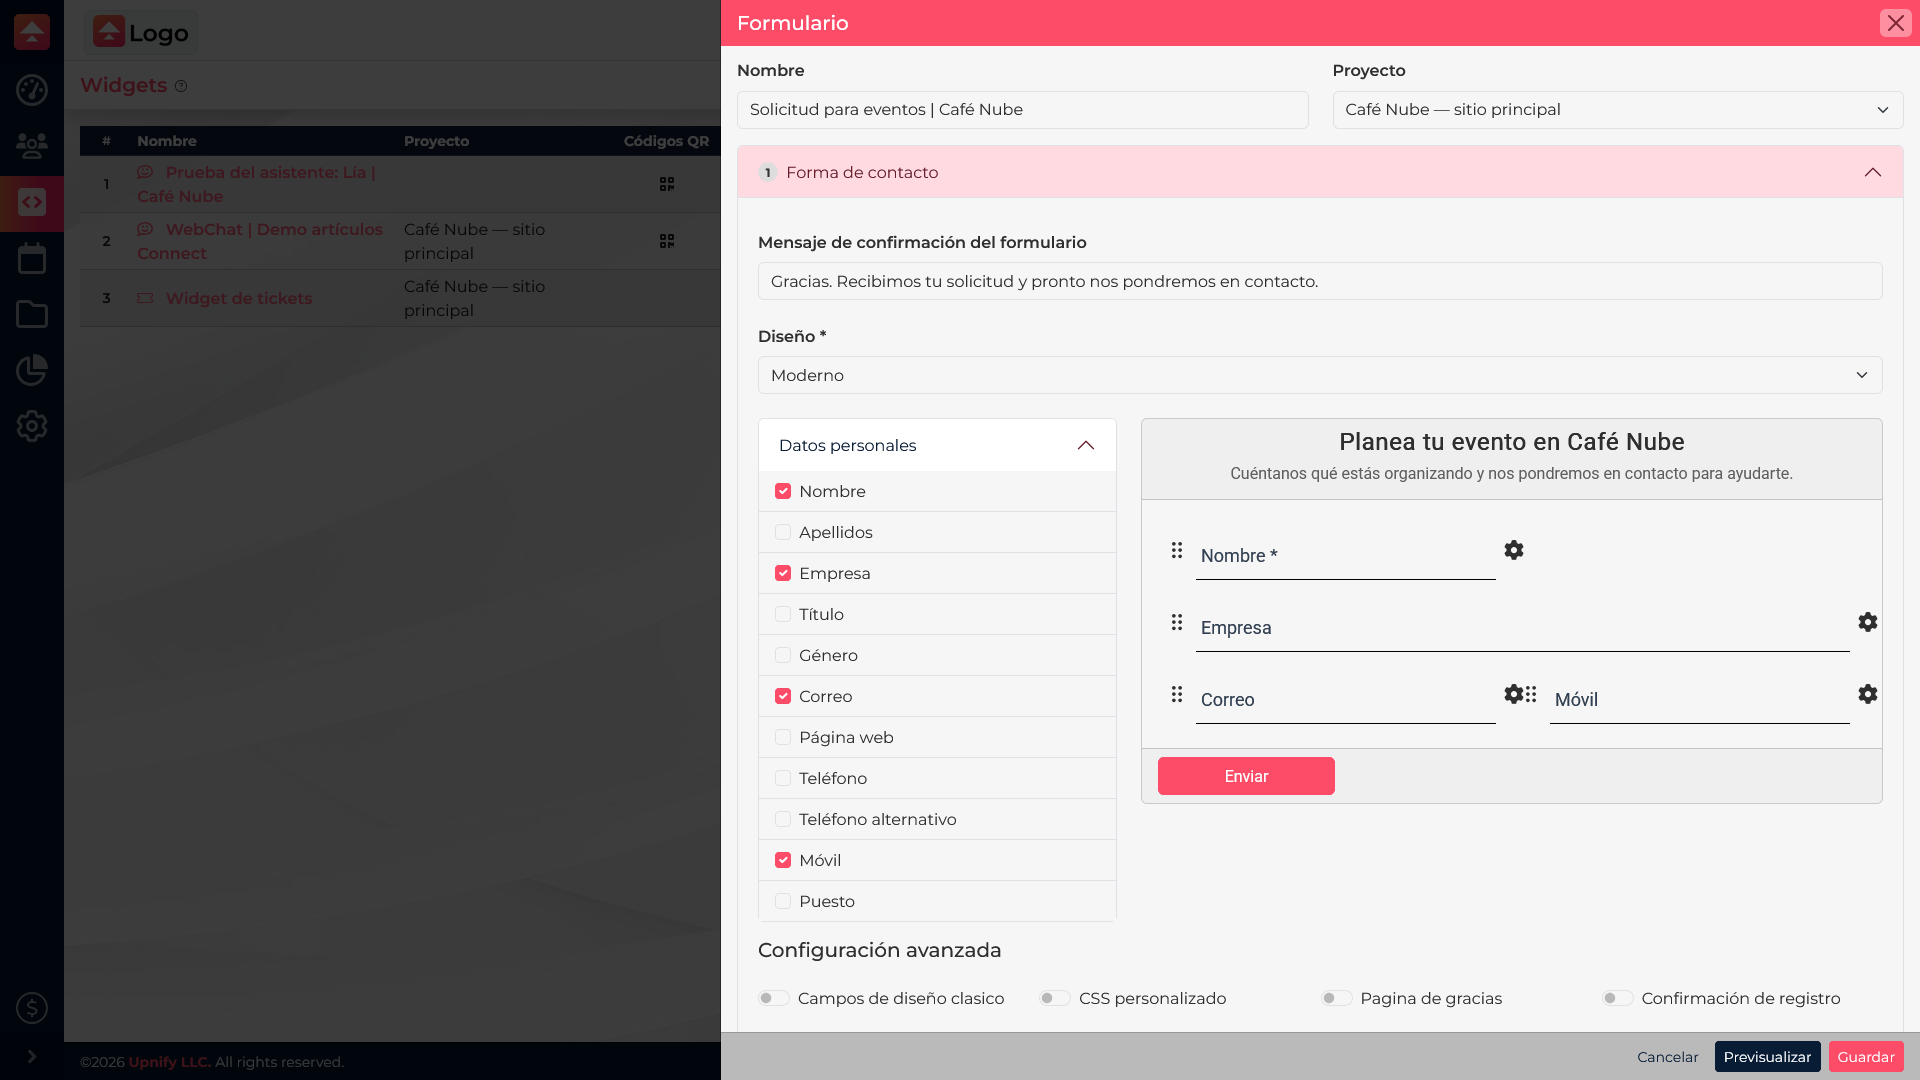
Use the field selector to choose which details to request and the order in which they appear. Open each field’s options to check its label, width, and whether it is required. Ask only for what you need to respond: an event inquiry may need the date and number of guests, while a budget question can be optional.
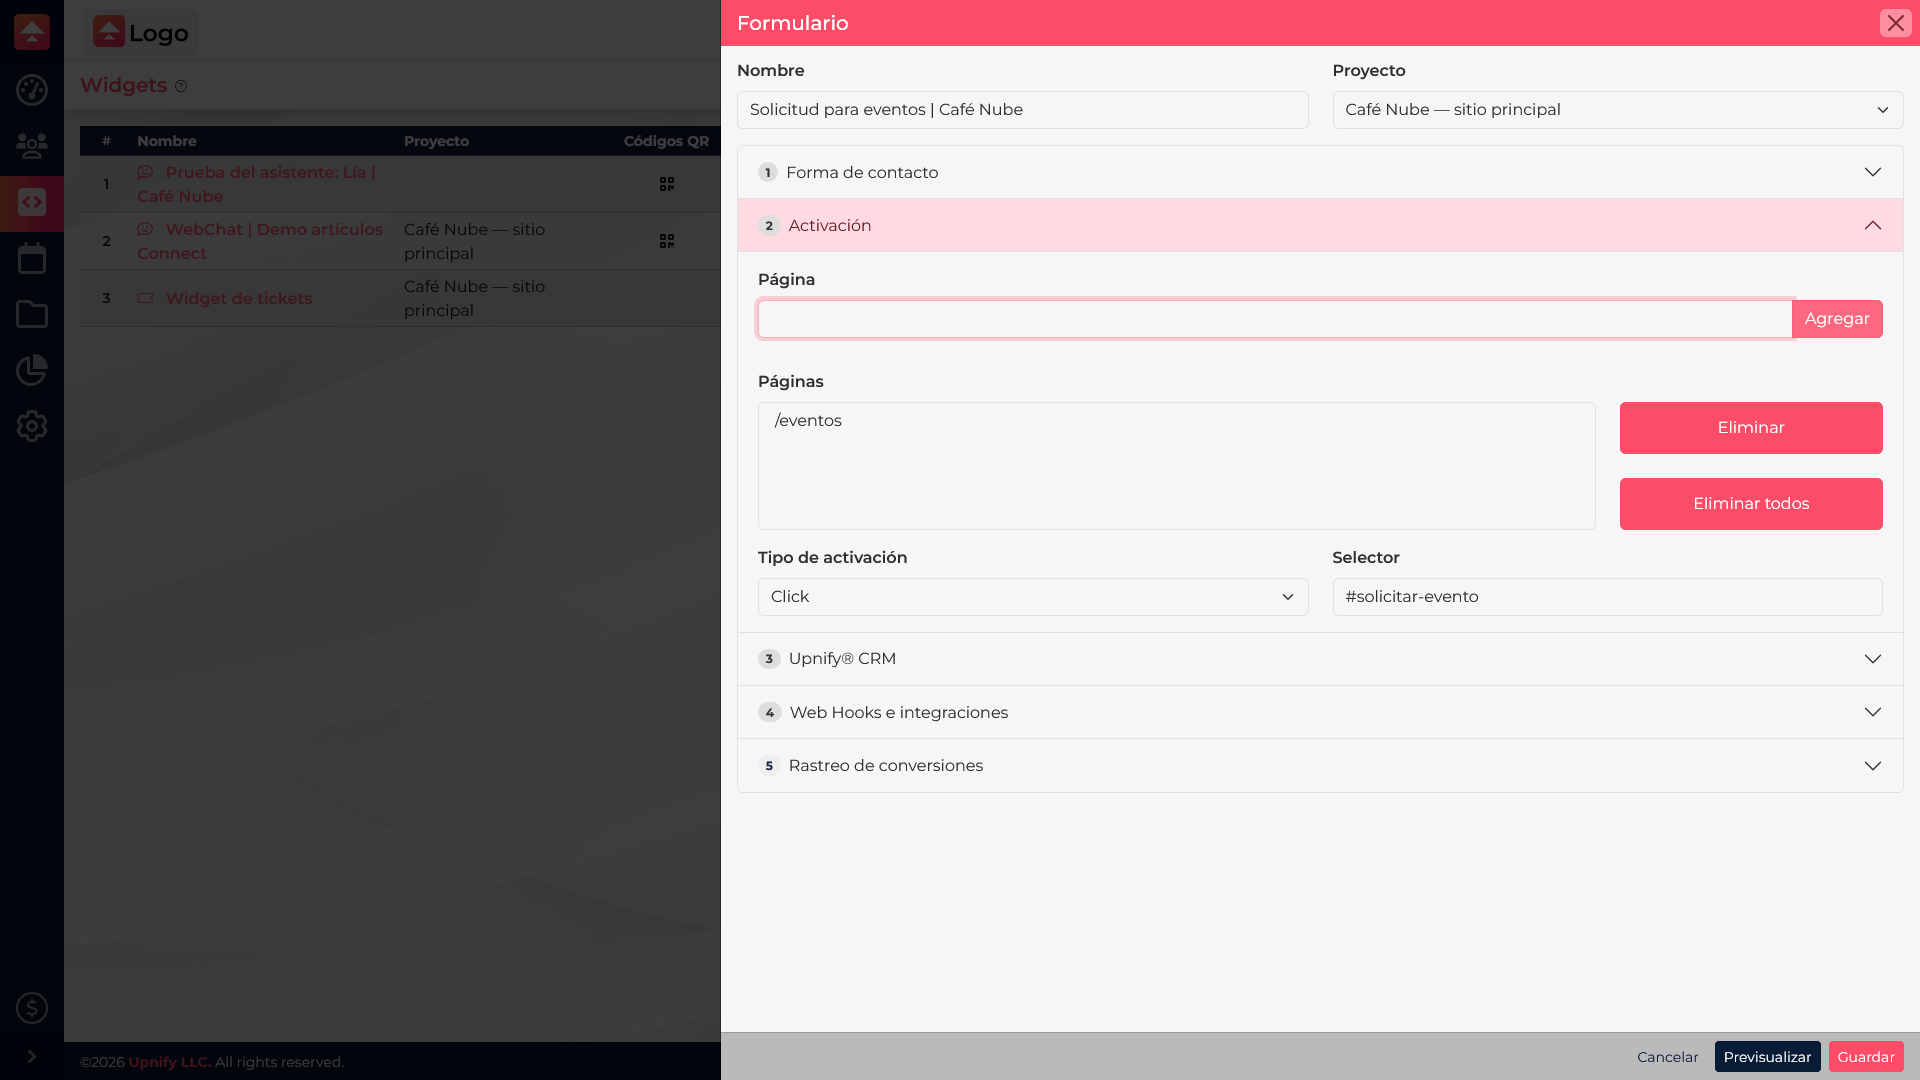
Also choose the page where the form appears and how it opens. This example activates on a click on the /events path using the #request-event selector. The selector must match the ID of a button or element on your website; otherwise, clicking it will not open the form.
2. Decide what happens to the CRM entry
In the form\u2019s CRM section, choose the appropriate phase and origin, as well as tags or an owner if those options are available in your account. This helps classify each prospect and tells the team where it came from. For example, use the \u201CWebsite\u201D origin, an initial qualification phase, and the \u201CDemo request\u201D tag.
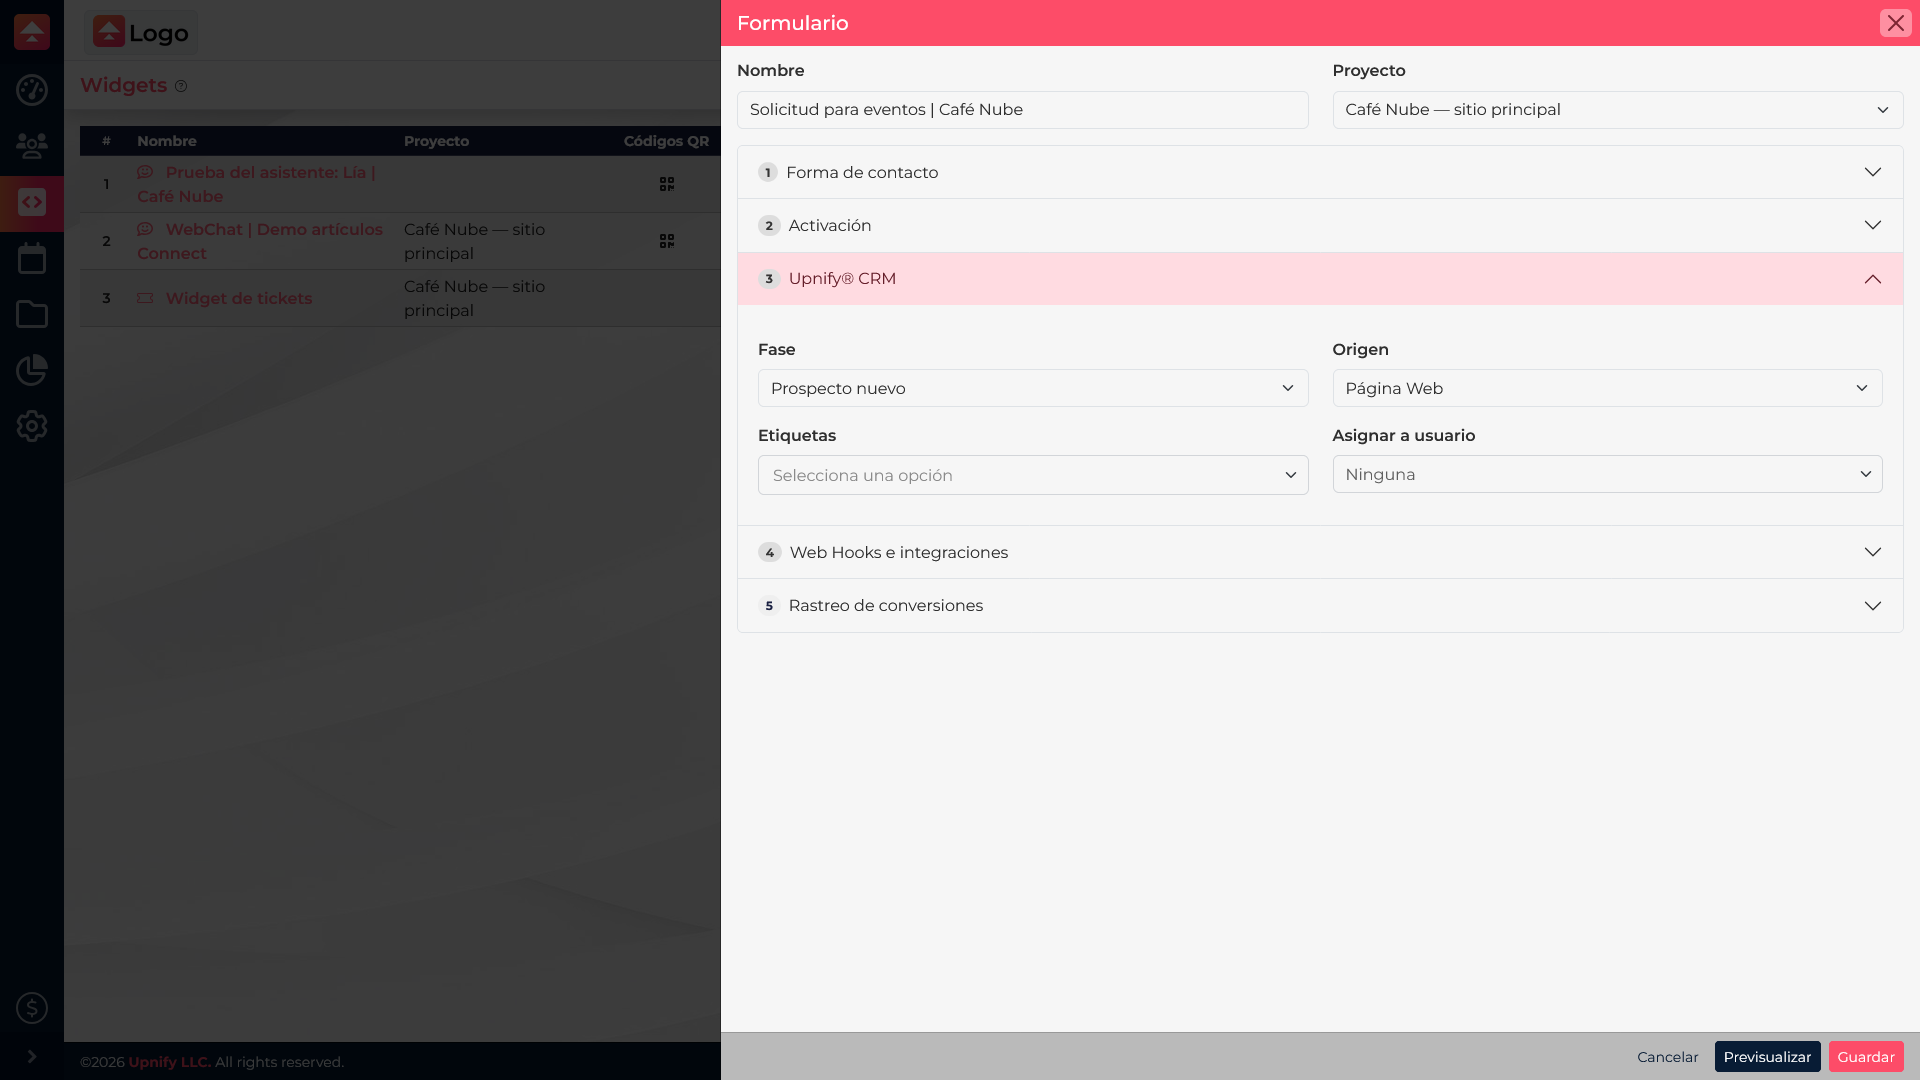
When submitted, the widget creates a CRM prospect using the captured details and configured classification. Before publishing, confirm that the stage, source, labels, and assignment match the team that will handle these requests.
3. Publish and test the full journey
- Save the widget and confirm it is associated with the right site or project.
- Install Engage code on the page where the form should appear.
- Open the page as a visitor and submit a test entry.
- Check the confirmation message and verify in CRM that the prospect was created with the expected phase, origin, and classification.
If the form does not appear, check code installation, widget status, and site association. If it appears but creates no record, confirm CRM is enabled and that form submission to CRM is configured. Before publishing, verify both the visitor experience and the record received by the team.