

Engage events bring together the information people need to attend: what the event is, when and where it takes place, how it will be held, and how many seats are available. Creating the event in Engage keeps its details and presentation organized so you can later share it or display it in a widget.
Enter the main details
In Engage > Events, select New. Enter a name attendees can recognize, choose a category, and select In person or Virtual. Complete the venue and location details as applicable, then set the date, time, and capacity.
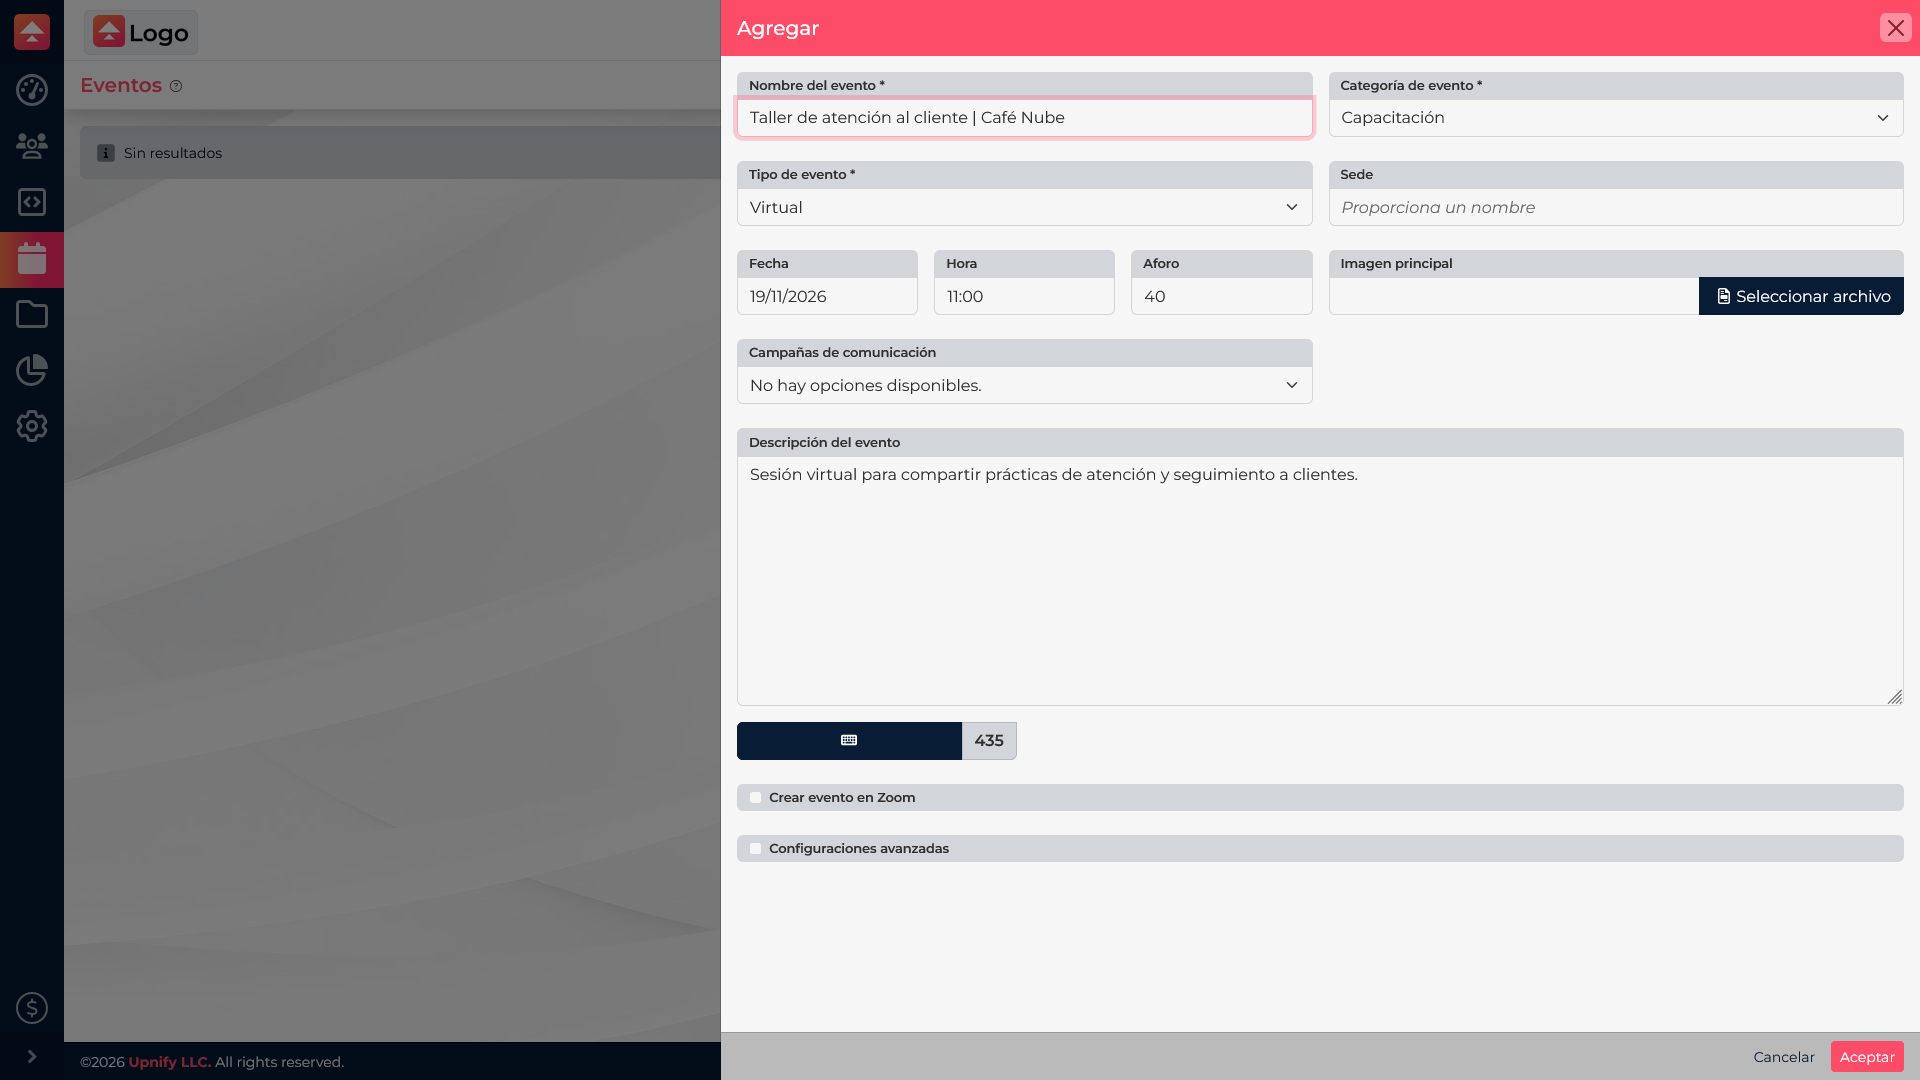
Add a concise but useful description explaining who the event is for and what attendees will do or learn. If available, choose a main image and review associated communication campaigns. For in-person events, make sure the location details help people find the venue.
Set the virtual format and advanced details
If the event is virtual and the integration is connected, enable Create event in Zoom if you want Engage to create it there too. This option depends on your account connection and permissions. If you use another platform or manage the meeting separately, leave it disabled.
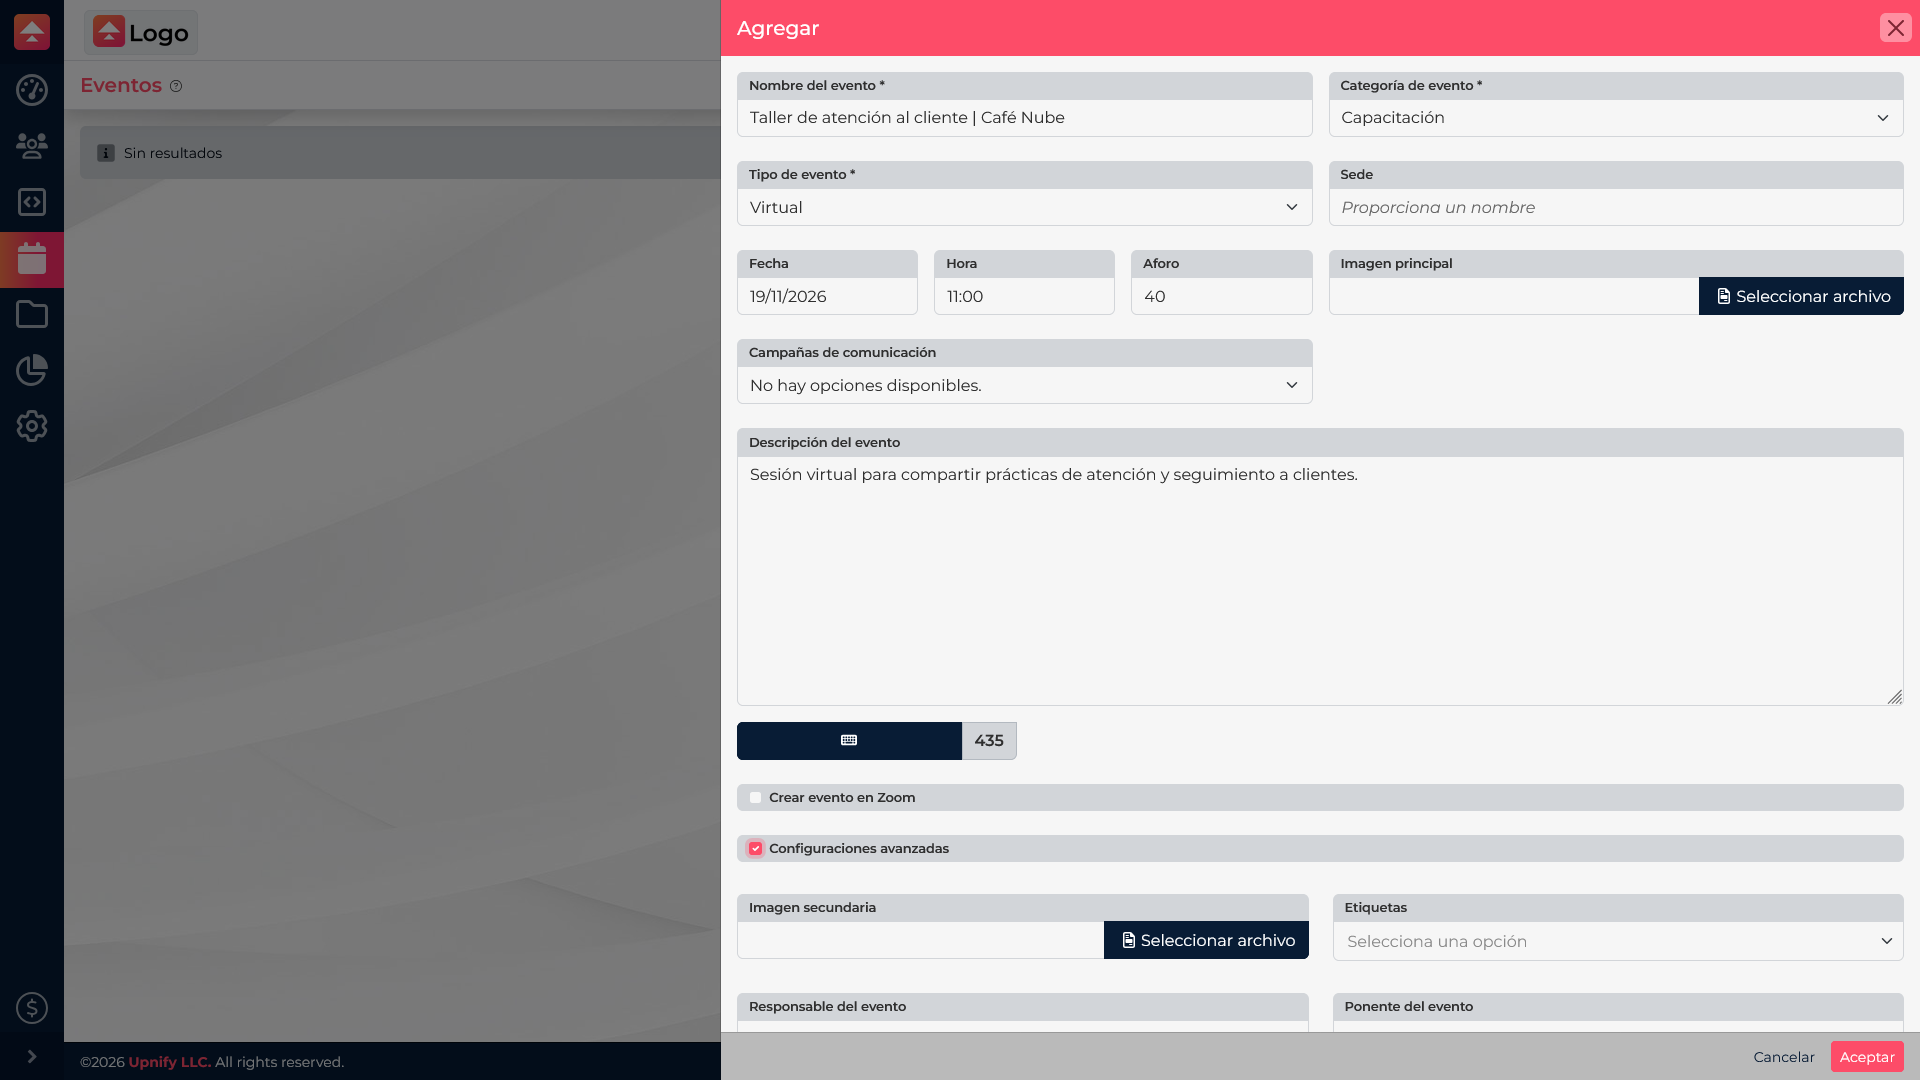
When you enable Advanced settings, you can add fields such as a secondary image, labels, and event owners. Use them when they help organize or present the event; they are optional for the main event details.
Save and review the event
- Check the name, category, format, date, time, capacity, and description.
- Confirm the images, campaigns, and advanced settings you selected.
- Select Accept to save.
- Reopen the event from the list and verify its details before sharing it or using it in a widget.
For example, for a virtual customer service workshop, choose the Training category, enter its date and time, set the number of attendees, and describe the topics. If you want Engage to create the Zoom meeting, first confirm the integration is configured.