

Event registrations show who expressed interest; attendance tracking distinguishes those who confirmed from those who actually showed up. Reviewing both helps prepare check-in, follow up with people who could not attend, and measure the event afterward.
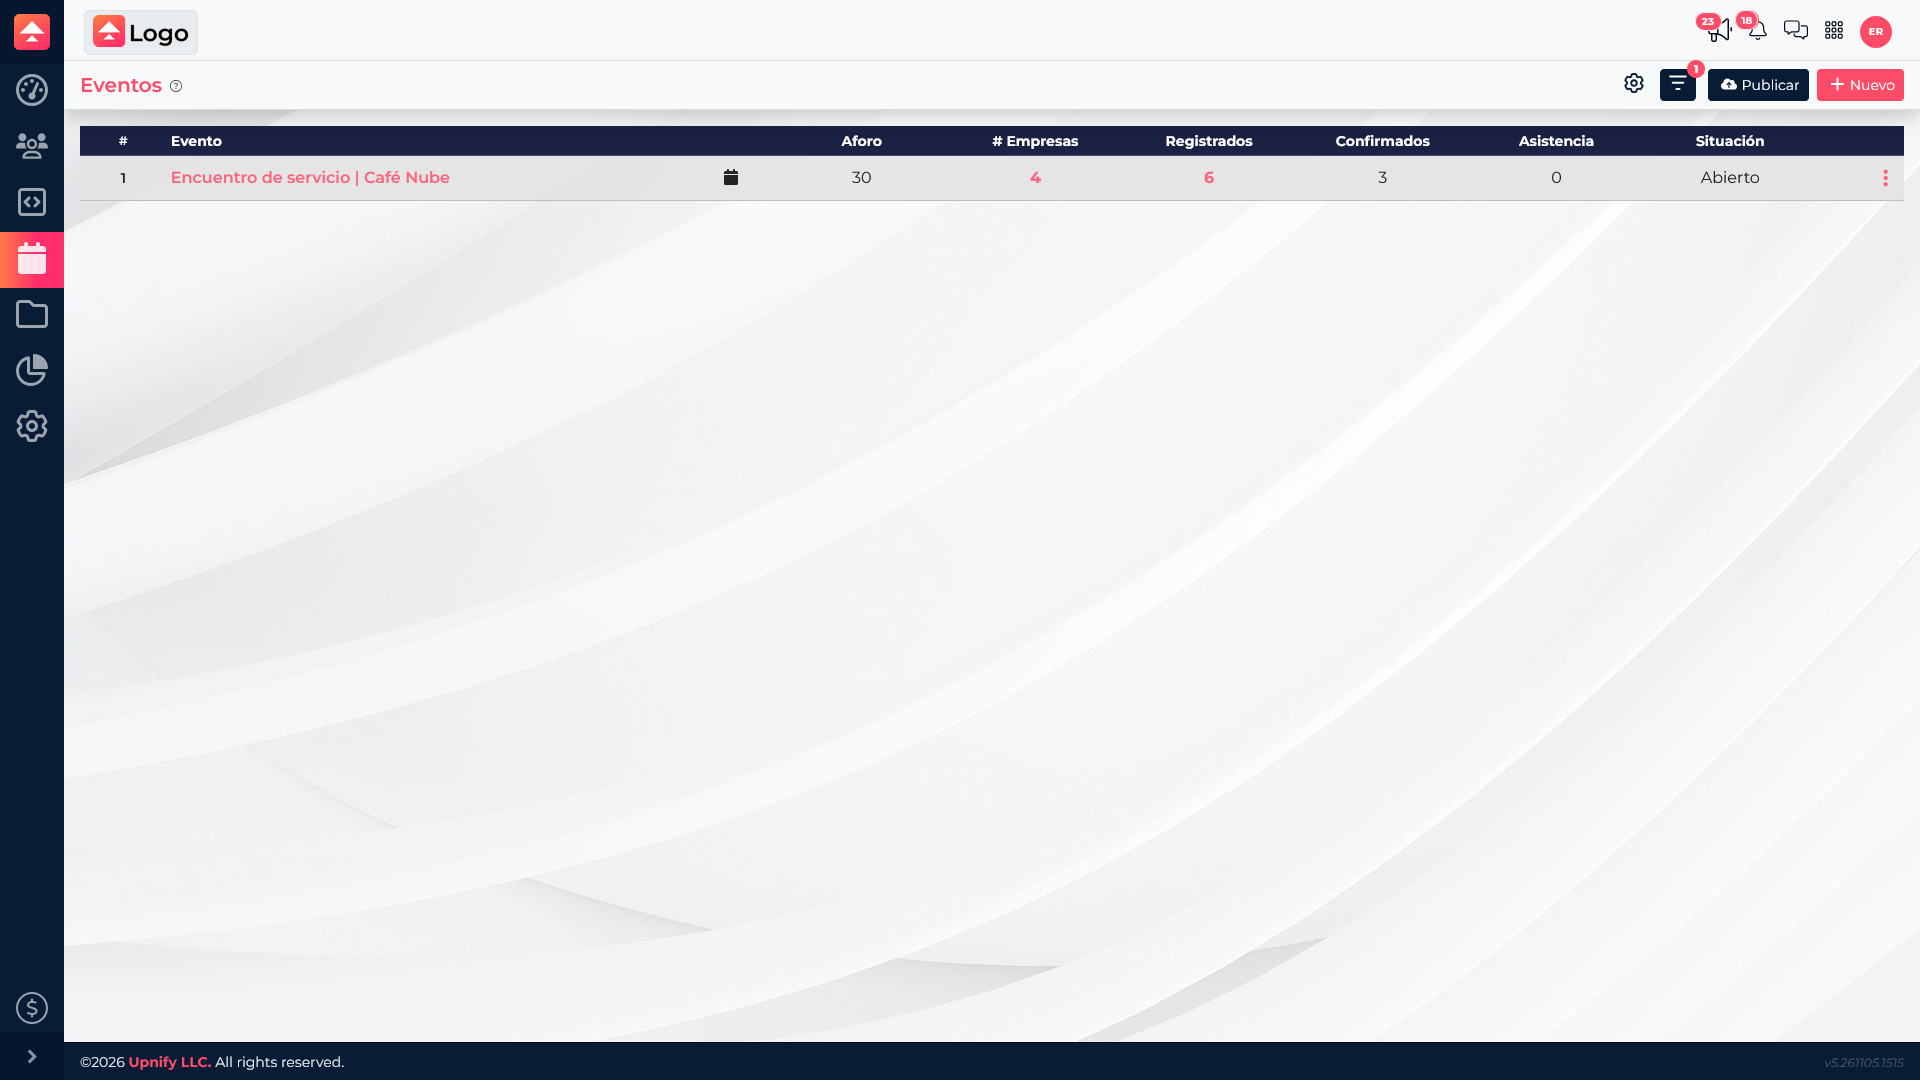
Compare the indicators in the events list
Before opening an event, the main table lets you quickly review how many companies are represented, how many people registered, how many confirmed, and how many attended. You can also compare registrations with the capacity. In this example, Café Nube has six registrations, three confirmations, and no attendance recorded; the Registrations button opens the people list.
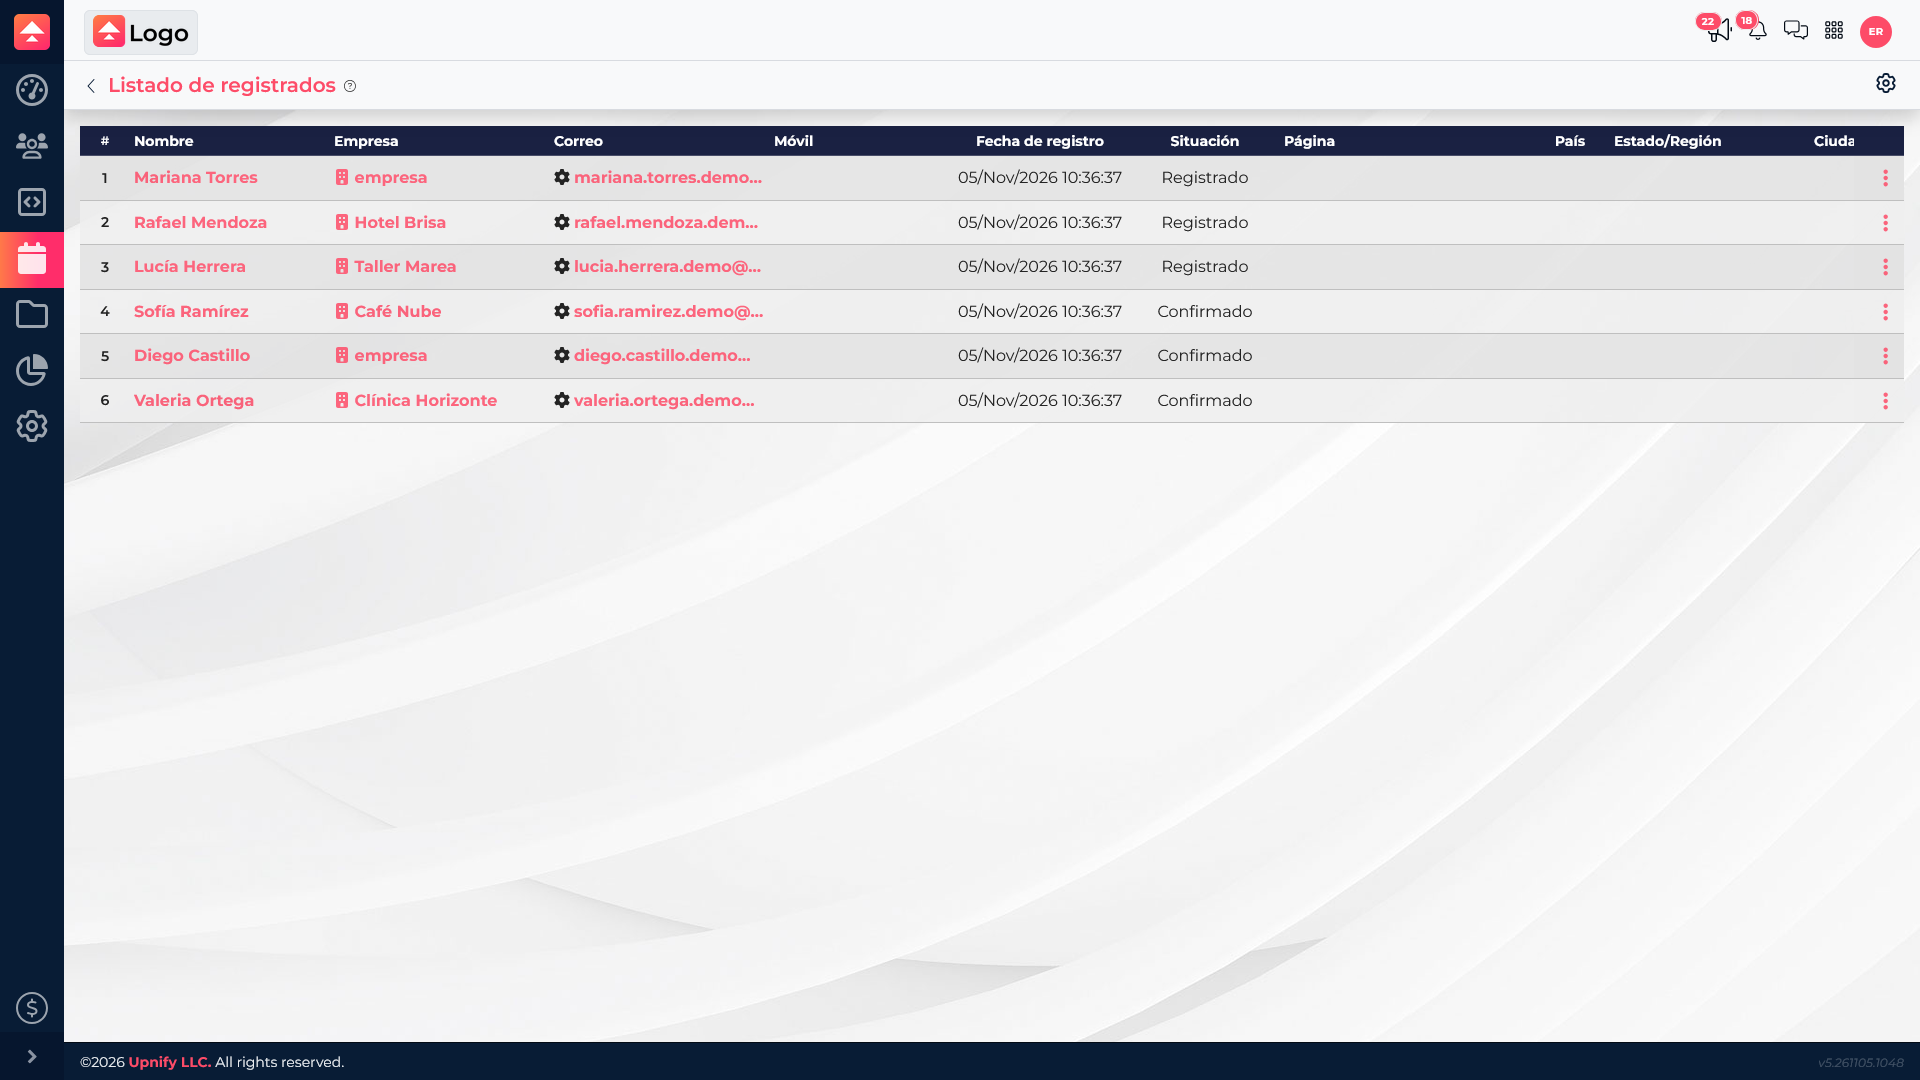
Review registrations
The list shows submitted details such as name, company, email, date, and status. Before the event, use it to see who signed up and prepare to welcome them. In this example, six people registered and three are confirmed. Confirmation helps with planning, but it does not mean someone attended.
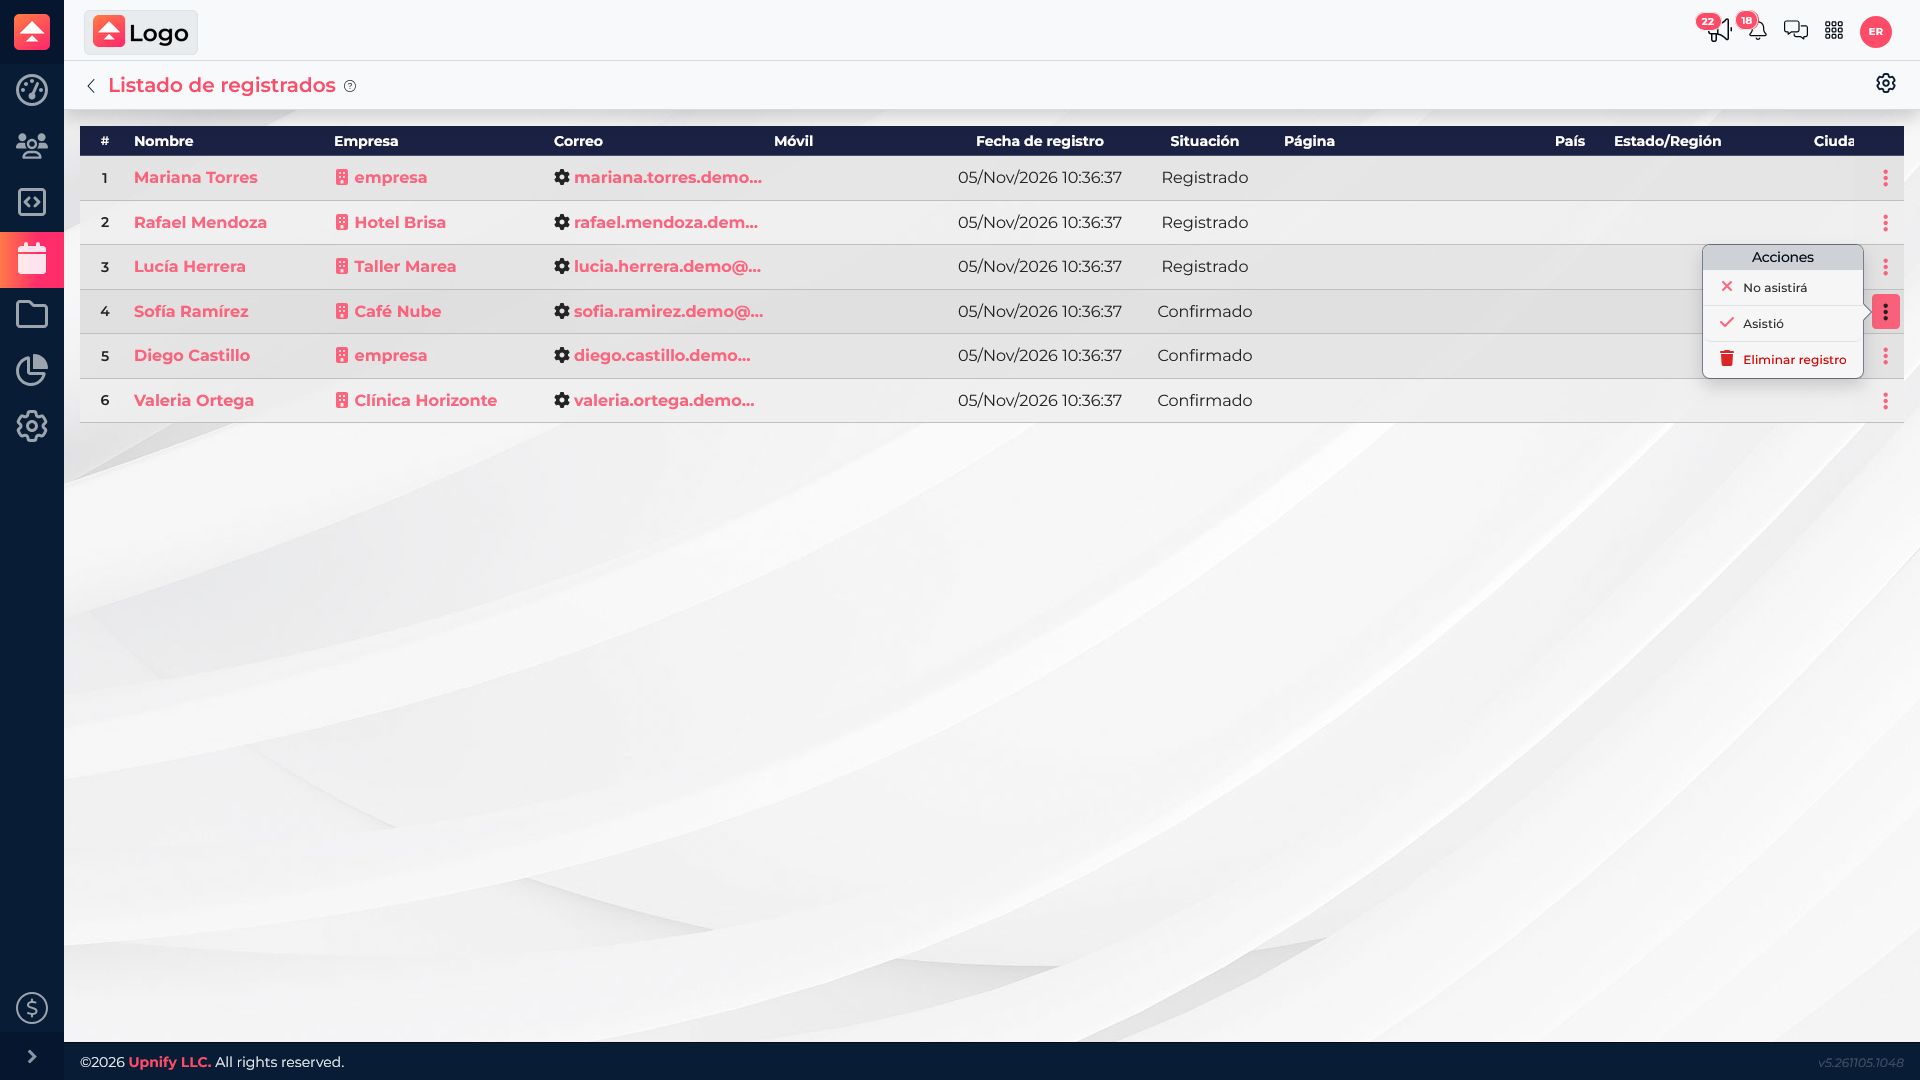
Update status after checking what happened
Each registration\u2019s action menu offers Will not attend, Attended, and Delete registration. Use each option for the matching situation:
| Option | When to use it |
|---|---|
| Will not attend | The person let you know they cannot take part. |
| Attended | You verified the person was present at the event. |
| Delete registration | The entry is a duplicate, a test, or must be removed under your team\u2019s process. |
Use attendance for follow-up
After the event, separate attendees, people who confirmed but did not show up, and people who said they would not attend. For example, the Café Nube team can thank participants and separately contact people who asked for information but could not join.
Agree on who will update attendance and do so after checking the actual participant list. If the event has a capacity, compare registrations with the limit to prepare the venue or online access.