

If your company issues electronic invoices from ERP, set up the issuer (the person or company issuing them), its branches, and the fiscal series and folios. This configuration provides the tax details used when generating invoices.
Follow this order: first set up an issuer and validate its tax information; then add branches and configure their applicable series and folios.
Before you begin
- Have the current digital seal certificate (CSD) files ready: .cer and .key, plus the private-key password.
- You need permission to manage invoicing settings.
- Confirm tax details and the regime with your accounting team.
1. Review or configure the issuer
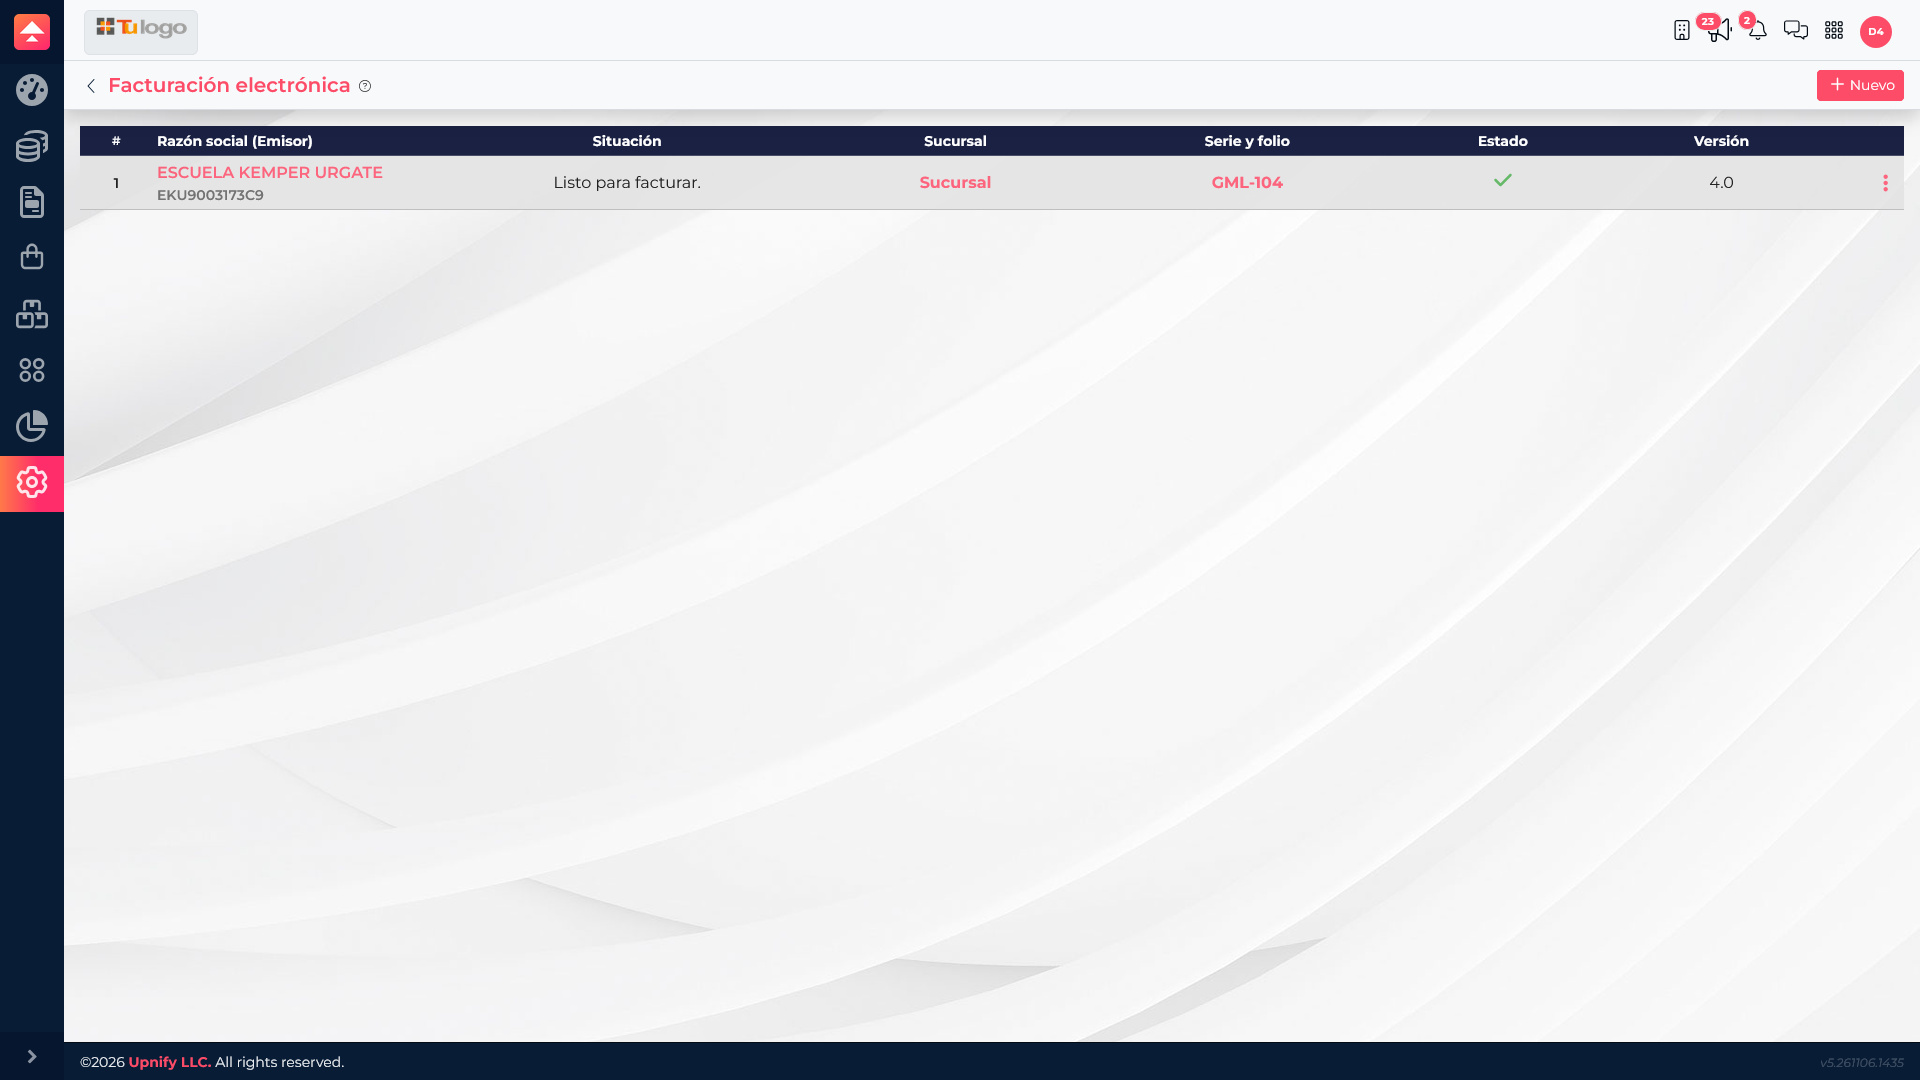
- In ERP, open Settings > Electronic invoicing.
- Review the issuer and its status. If it is ready, open its branches to continue without uploading certificates again.
- To add an issuer, select New and provide the .cer file, .key file, and private-key password.
- Validate the certificate and confirm the displayed tax details are correct. Complete the legal name or postal code if the form requests them.
- Save only after confirming the certificate belongs to the correct tax ID and is current.
2. Add a branch
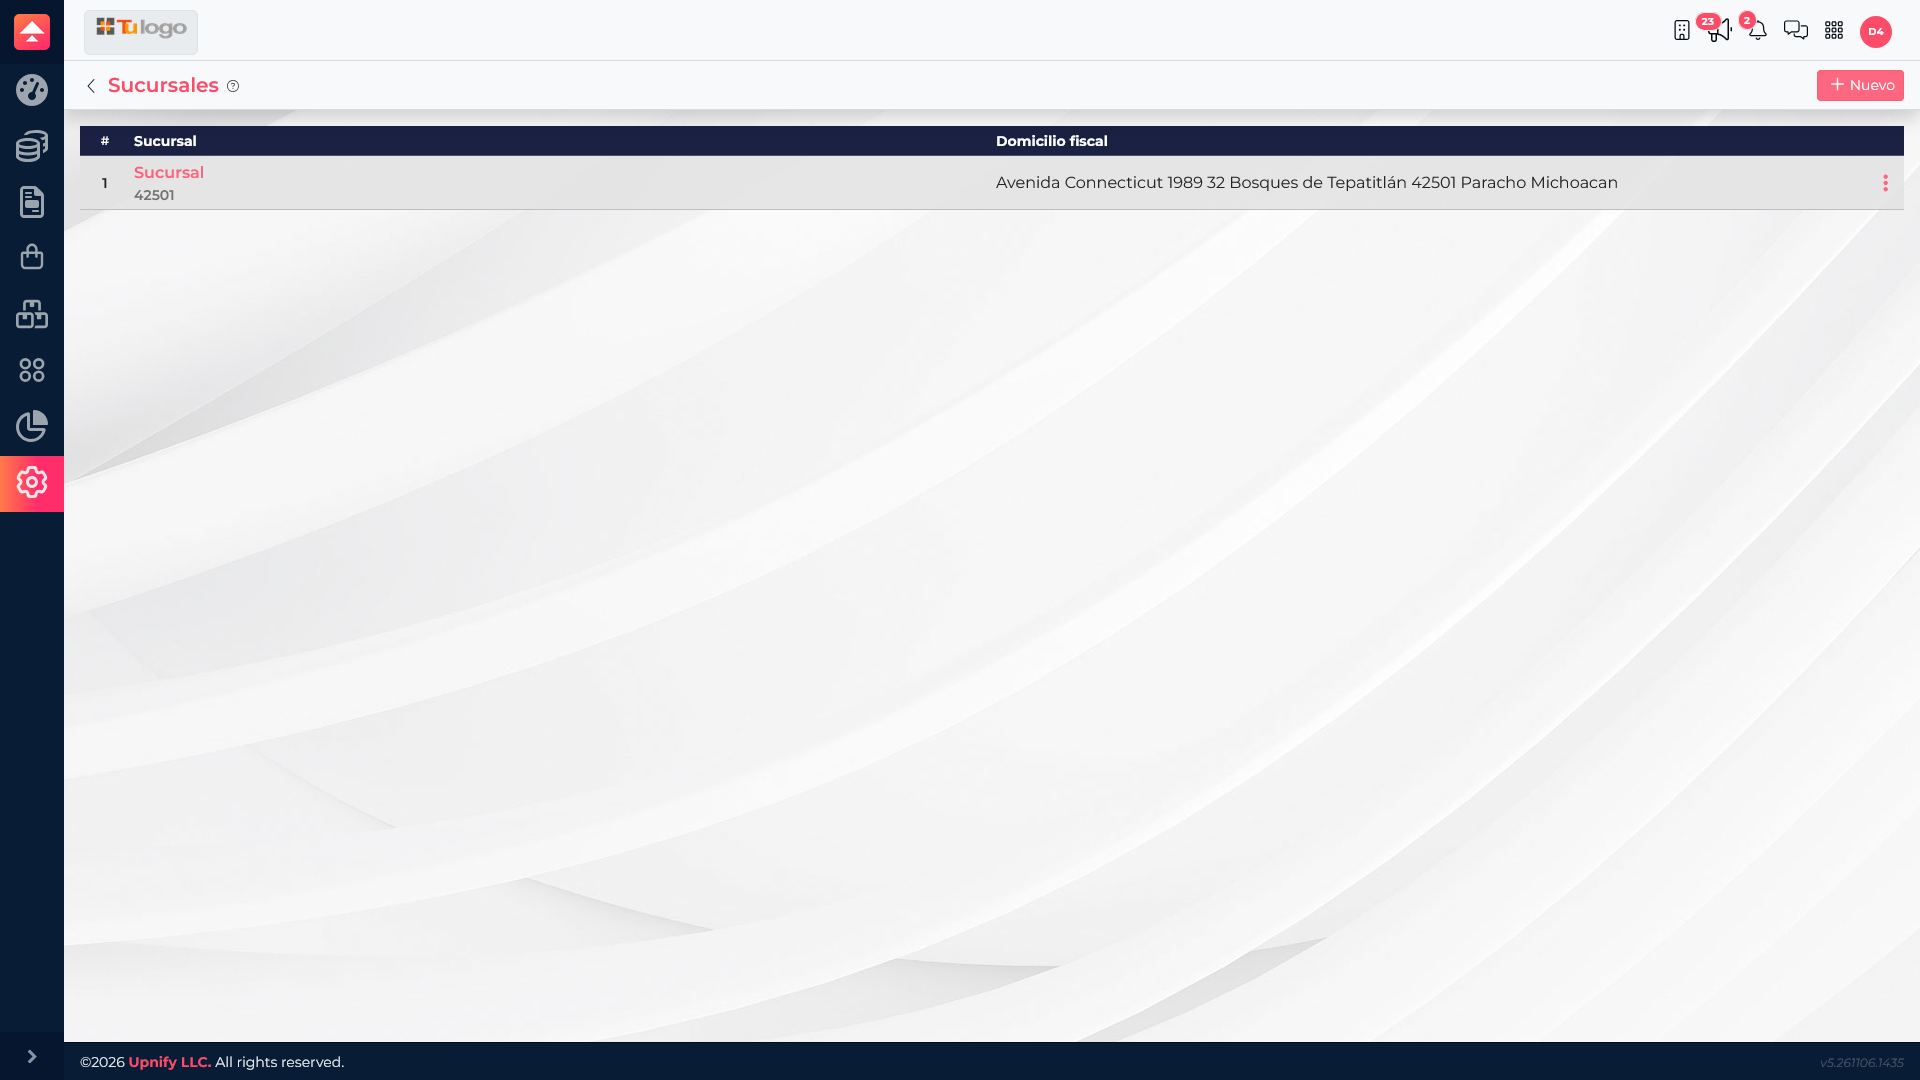
- From the issuer row, open Branches and select New.
- Enter a name to identify the branch and its postal code.
- If you need a detailed fiscal address, enable the option to capture it and complete the fields that appear.
- Save and verify the branch is under the correct issuer.
3. Configure the fiscal series and folio
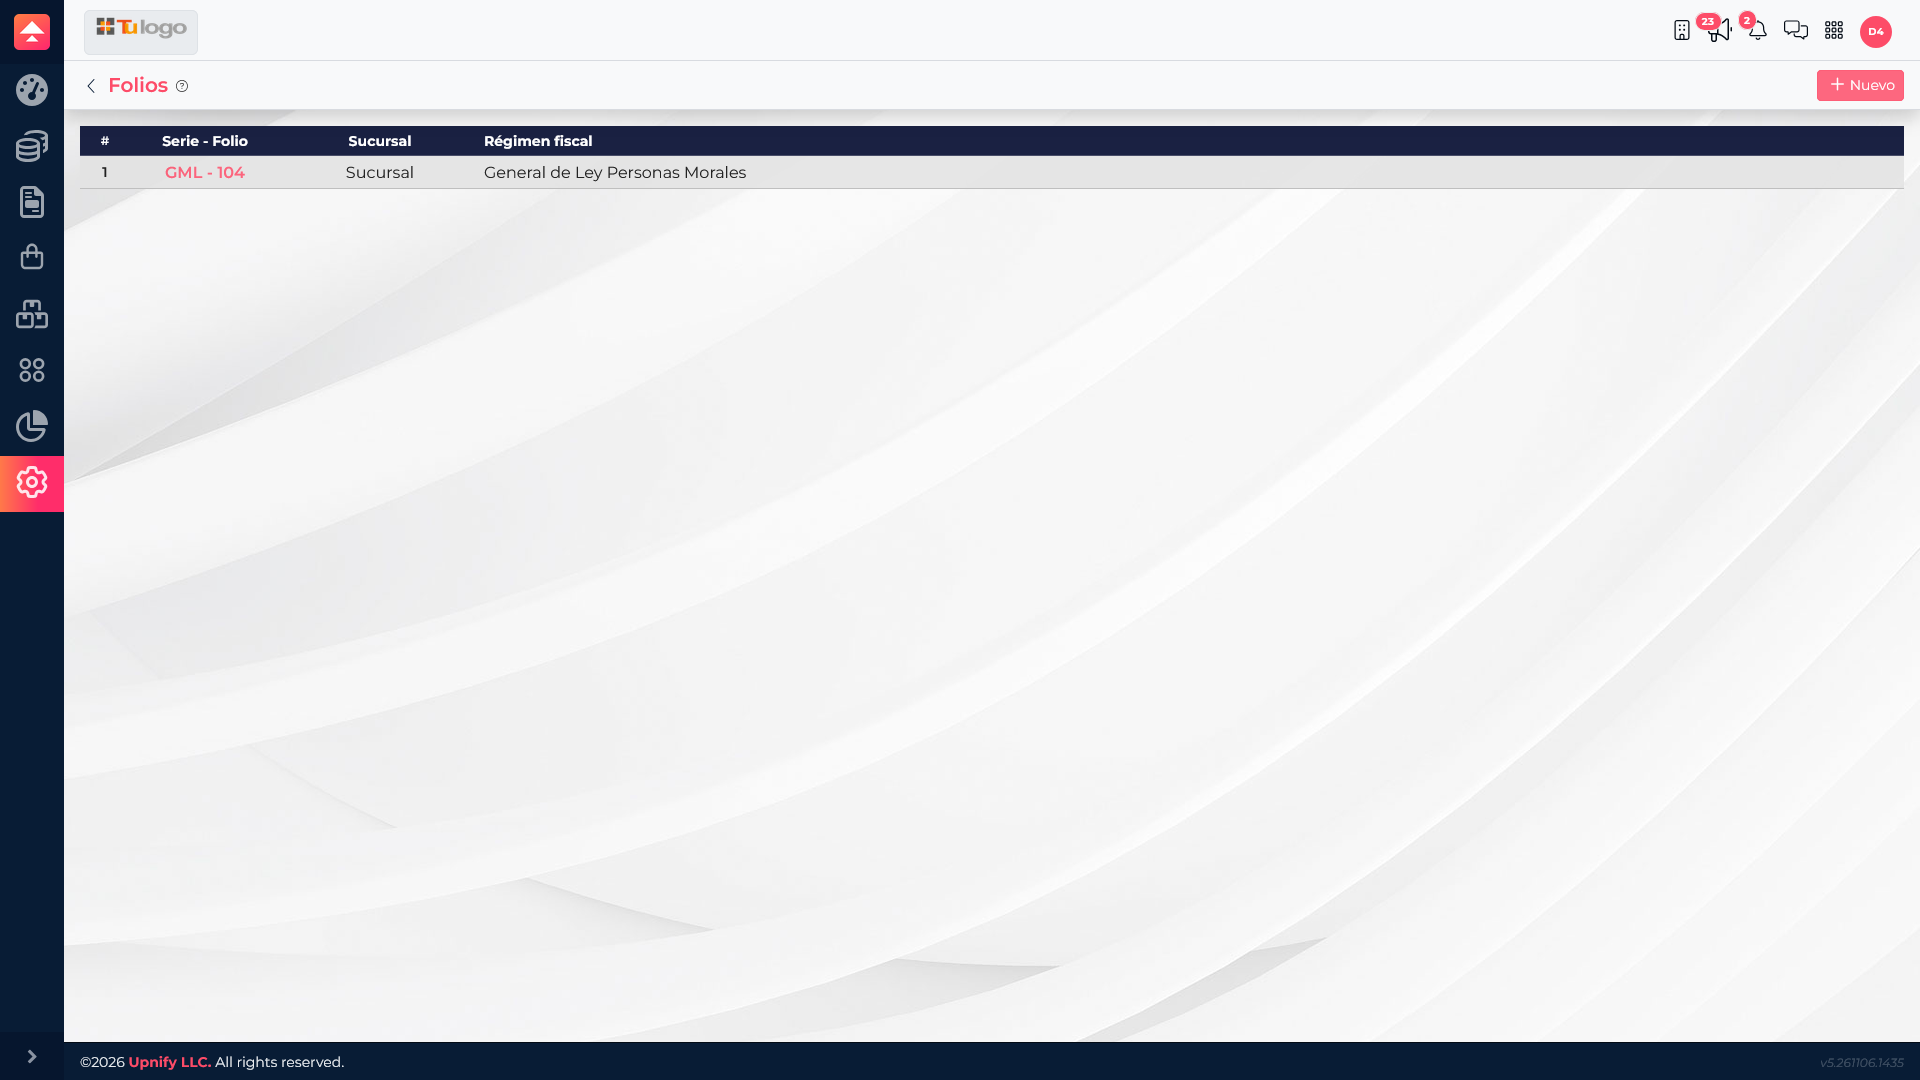
- Open the branch and select Series and folio.
- Choose the tax regime that applies to the issuer and invoice.
- Enter the series and starting folio provided by the person responsible for invoicing.
- Save and confirm the branch, regime, series, and folio appear in the list.
A company with one location may have one issuer and its main branch. If it needs to distinguish invoice locations, add the relevant branches and configure each one using details confirmed by accounting.
Do not confuse these with general document folios
This section configures electronic invoicing. Folios for purchase orders, receipts, issues, and other ERP documents are managed separately under Catalogs > Folios.