

ERP can be adapted in two different ways: general options control how selected company workflows behave, while custom fields add company-specific data to one record type. A field stores information but does not change system rules, so keep these paths separate.
Custom fields: data missing from a company, quote, order, product, or resource form.
1. Configure ERP general options
Open ERP > Settings > General system options. These rules help prevent missing information and automate repeated steps. Before enabling one, confirm with administration, purchasing, or accounting how the process should work.
| Option | What it controls | When to use it |
|---|---|---|
| Require a file when creating an accounts payable/receivable entry | Requests an attachment when the entry is created. | When each obligation or incoming payment needs supporting documentation from the start, such as an invoice or request. |
| Require a file when marking an entry as paid/collected | Requests evidence when the entry is settled. | When the team must keep proof of payment or deposit with the record. |
| Set the accounts receivable concept when attaching an invoice | Defines the concept used for the related receivable. | To keep classification consistent when invoices are attached to receivables. |
| Set the accounts payable concept when attaching an invoice | Defines the concept used for the related payable. | To classify supplier obligations consistently. |
| Update currency every day | Enables daily currency updates. | When operations need current exchange-rate references; confirm that it matches company policy. |
| Create an ERP receivable when an action is performed in CRM or ERP | Choose \u201CNone\u201D or \u201CWhen a sale is made\u201D. | Choose the sale option when recording a sale should also create its receivable. |
| Create an ERP fulfillment order when an action is performed in CRM or ERP | Choose \u201CNone\u201D or \u201CWhen a sale is made\u201D. | Enable it when recording a sale should also start an order to prepare the products. |
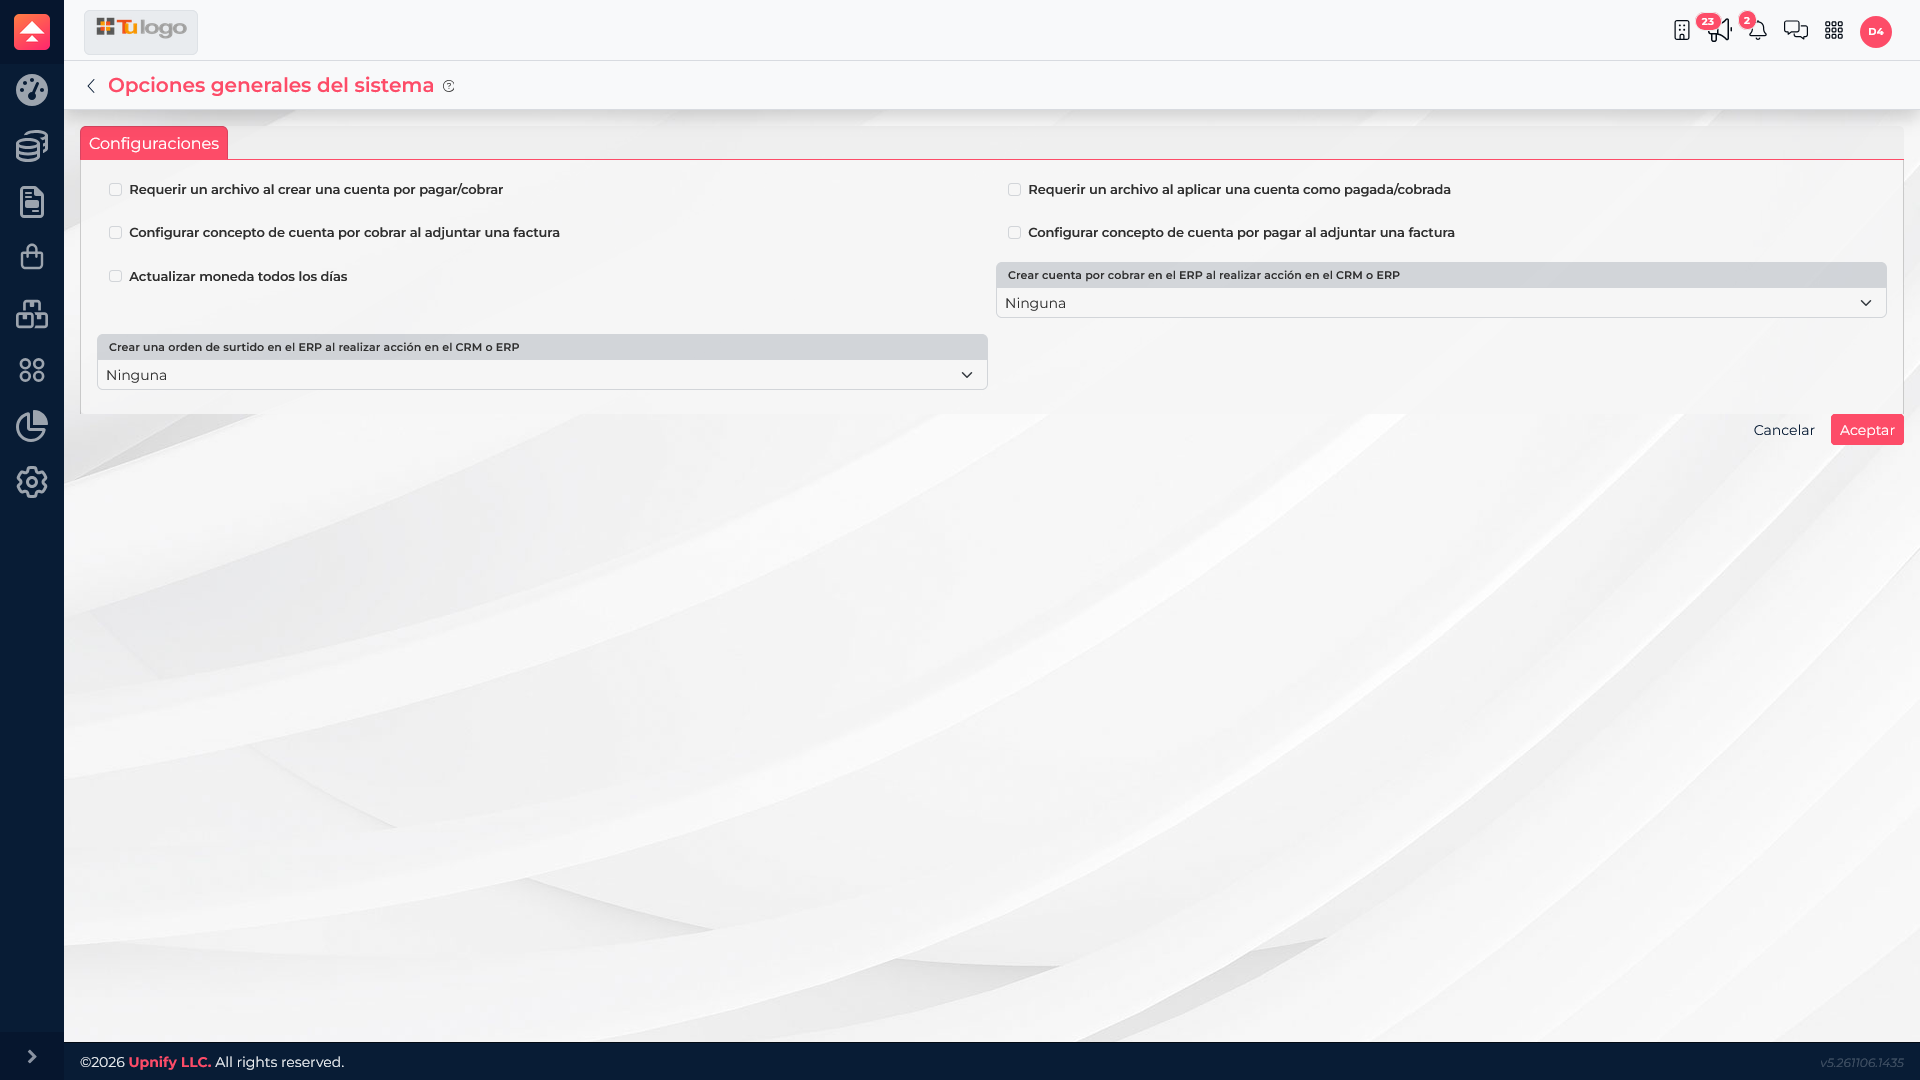
- Review each control with the team responsible for the process.
- Enable relevant checkboxes and, for automatic rules, choose None or When a sale is made.
- Select Accept to apply changes or Cancel to leave without saving.
- Run an authorized test transaction and check that ERP requests the file or creates the expected document.
2. Create custom fields
A custom field stores information your company needs that is not part of the standard fields. First choose which record type will store it, then define how users enter the value. The field belongs to that entity: one created for Products is not shared across every ERP document.
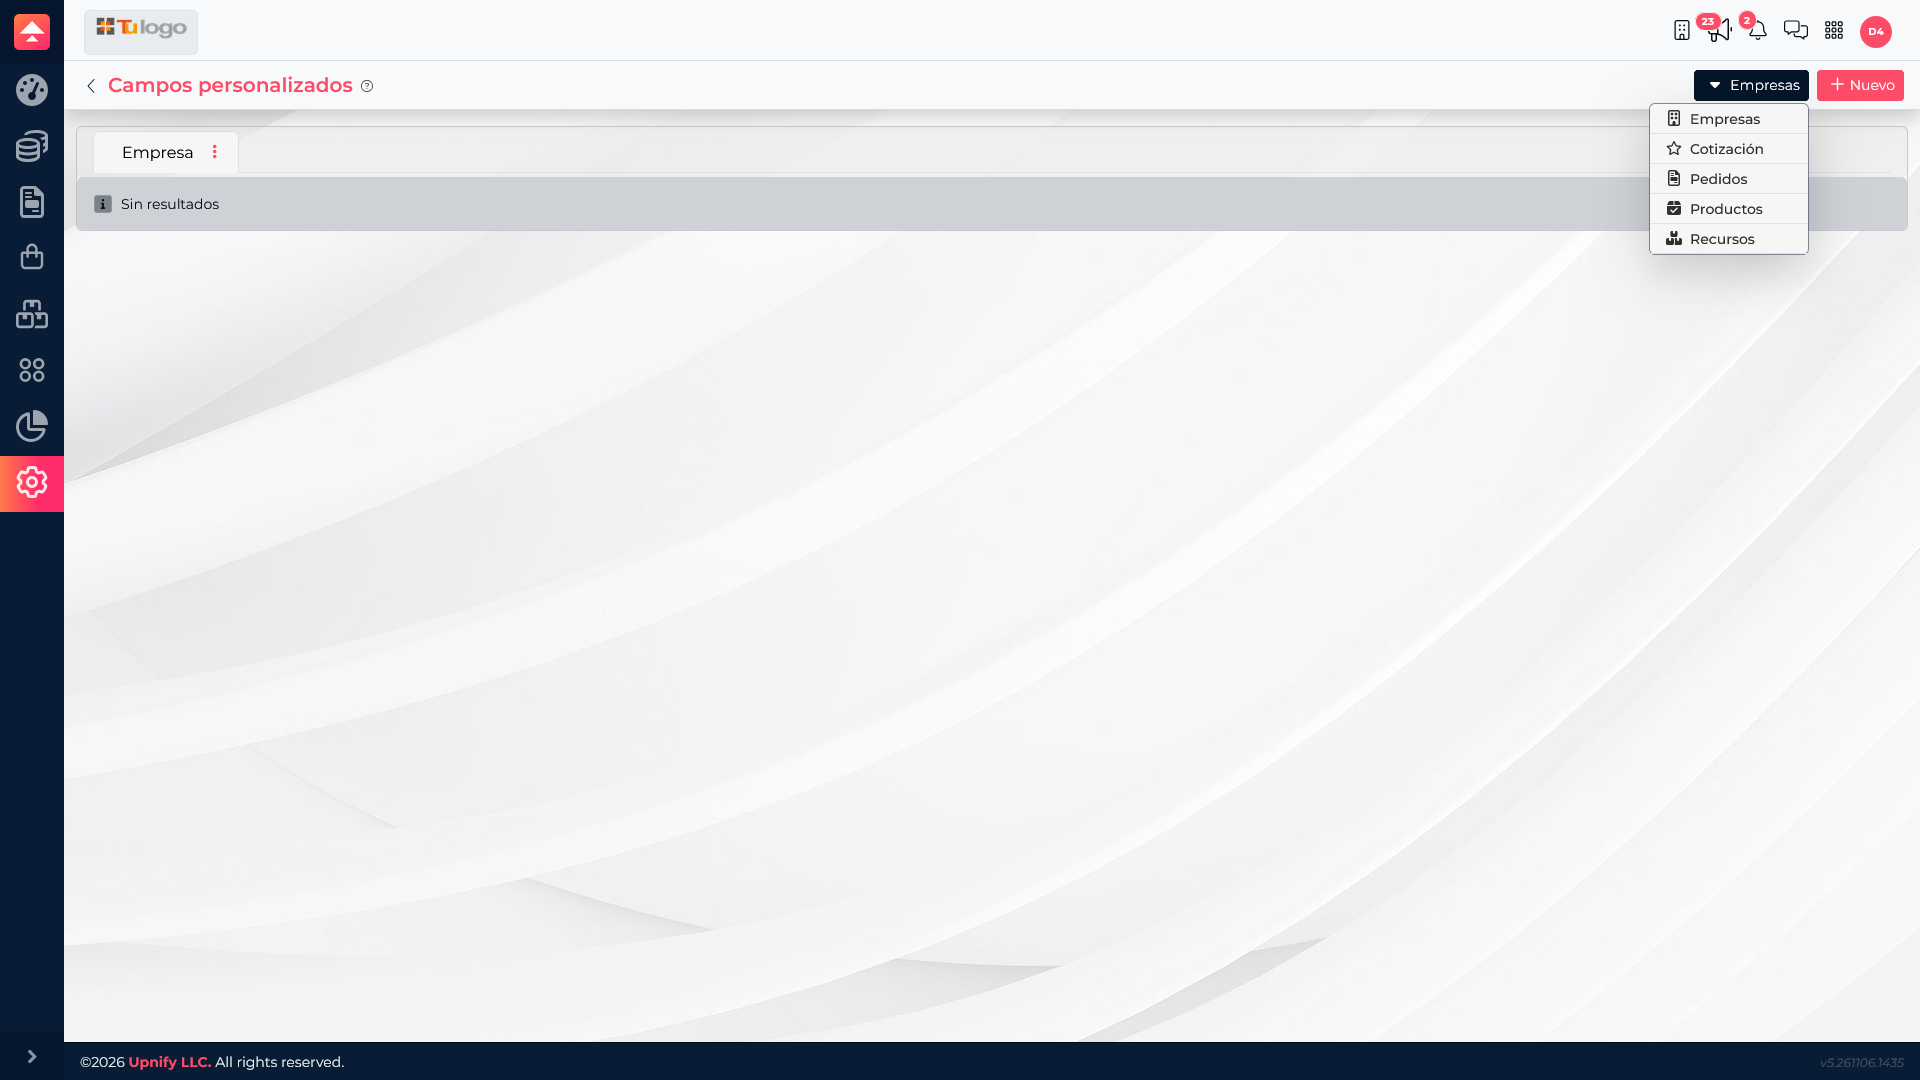
Go to ERP > Settings > Custom fields and select an entity from the top menu:
| Entity | Where it is used | Example |
|---|---|---|
| Companies | A customer company record. | Service area or support tier. |
| Quote | A sales quotation. | Special validity period or project reference. |
| Orders | An order in the operation. | Fulfillment priority or internal instructions. |
| Products | A product catalog record. | Material, technical family, or internal code. |
| Resources | A resource managed in ERP. | Custom resource classification or attribute. |
What each field setting does
| Setting | What it does | How to choose it |
|---|---|---|
| Name | The label users see on the record. | Use a short, clear name such as \u201CService tier\u201D. |
| Database name | A technical identifier generated from the name. | Review it to distinguish similar fields; it is normally generated as you type. |
| Description | Explains what information should be entered. | Describe the expected format or when to use the field. |
| Type | Defines which values users can enter. | Text for a short answer; Memo for longer notes; List for one choice; List checks for multiple choices; List radio for one visible choice; Date for dates; Integer or Decimal numbers for quantities; Percentage for rates; Check text for a checkbox; Auto-increment or UUID for generated identifiers. \u201CText list\u201D allows text options according to the available control. |
| Restriction | Controls whether the value may repeat and whether it is required. | \u201CNo restriction\u201D allows blanks and duplicates; \u201CRequired\u201D demands a value; \u201CUnique\u201D prevents duplicates; \u201CUnique and required\u201D combines both. Choices may vary by type. |
| Size | Controls the field\u2019s visual width (25%, 50%, 75%, or 100%). | Choose space based on the expected value; this does not limit its content. |
| Characters | Sets the maximum number of characters for text types that show this option. | Choose a suitable limit; it is different from visual width. |
| Read-only | Shows the value without allowing manual edits in the form. | Use when users should view the value but not change it from that screen. |
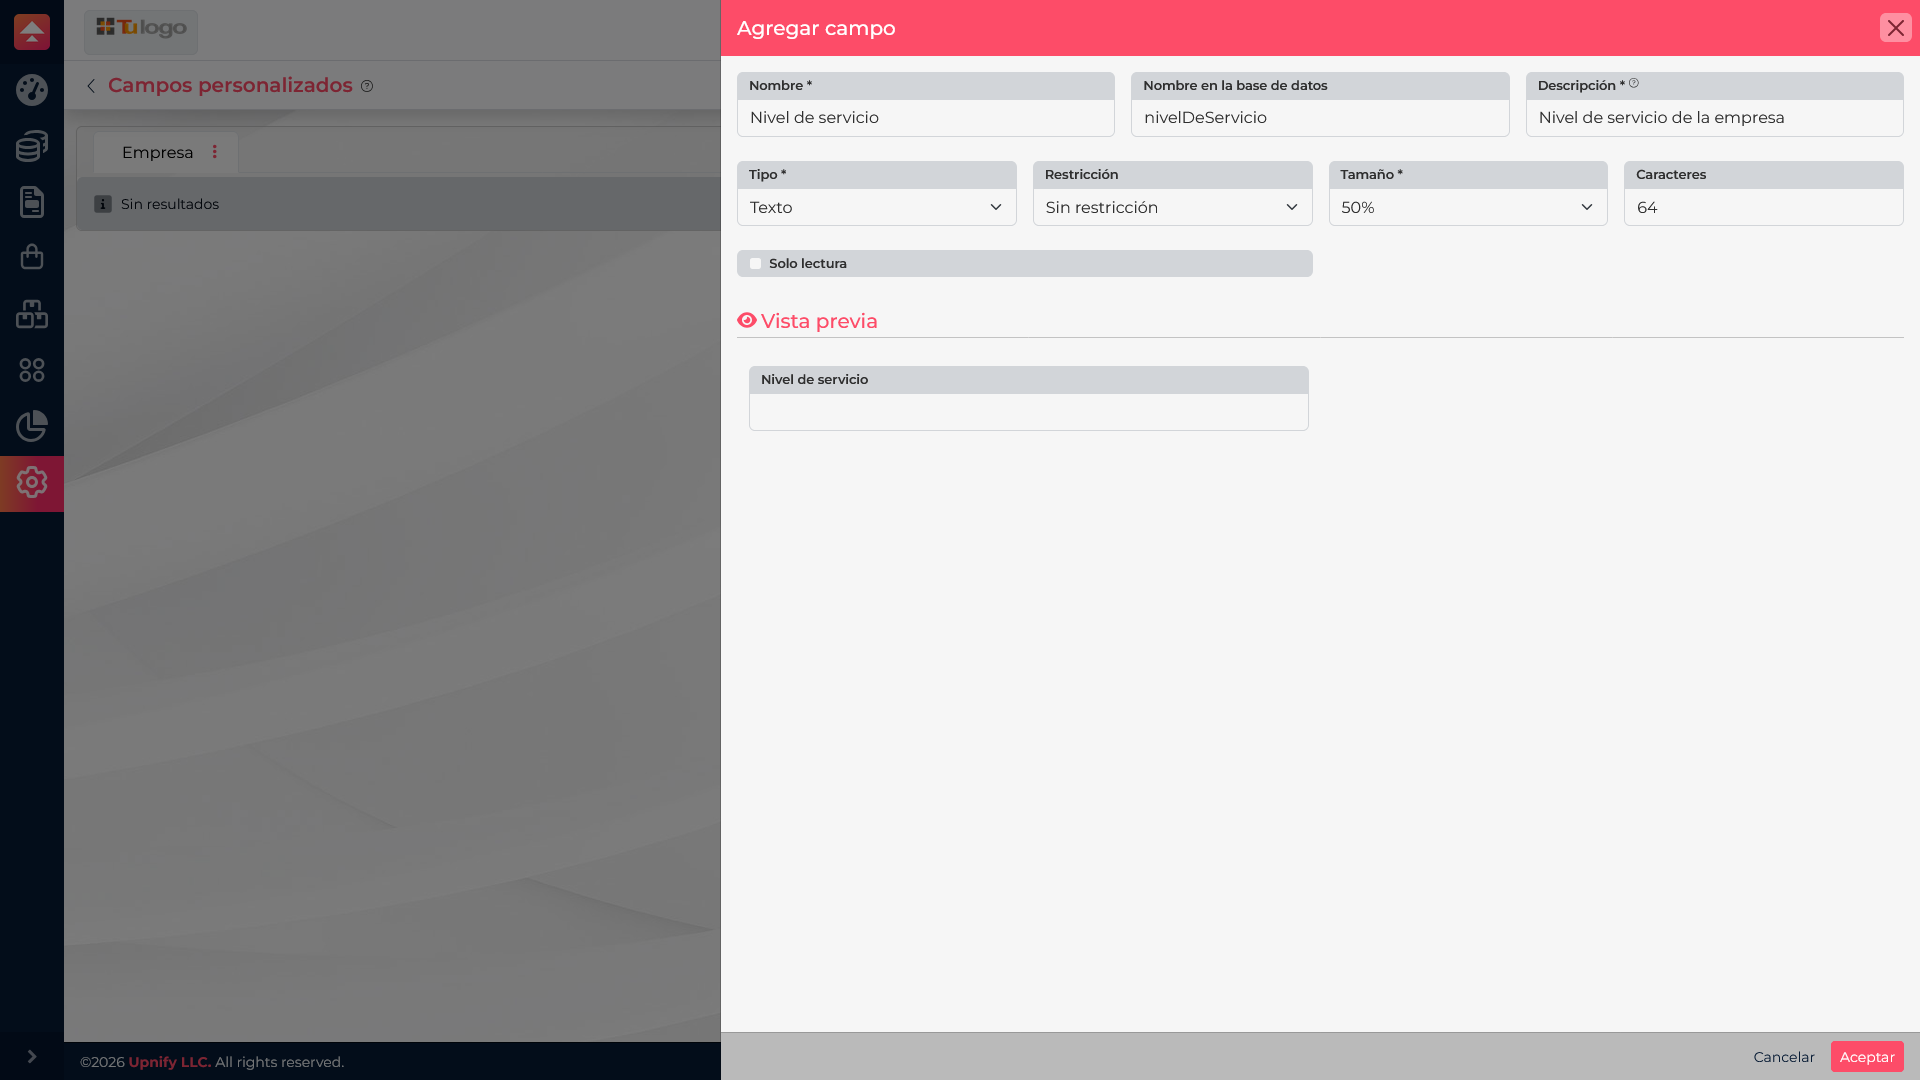
- Choose the correct entity from the top menu.
- Select New.
- Enter a name and a description that helps the team capture the value.
- Choose a type and set restrictions, size, and character limit when available.
- Review the preview and save only after confirming the field\u2019s location and behavior.
Before creating a field, agree on what information is needed and who will maintain it. A clear field on the right entity helps complete records; general options control ERP workflows instead.