

In Upnify Suite, a person’s permissions involve several separate decisions: which products they can open, which modules they can use, and which records they can view or work with. Configuring each layer separately helps provide the access they need without granting broader permissions.
The My organization screen is available to the Super Administrator. If you cannot see it or save changes, ask that administrator to configure the account. Available options can also vary by the user’s assigned level.
What each permission controls
| Layer | What it controls | Where to configure it |
|---|---|---|
| Company license | Whether the company has enabled the relevant product or capacity. | The company’s contract and licensing. |
| Product access | Whether the user can open CRM, Connect, Engage, Flow, Train, or ERP when the company has that product. | The user record, under General data. |
| Modules and actions | Which sections and actions the user can use. Additional action permissions shown here apply to CRM and ERP. | The user record, under Permissions. |
| Data access and interaction | Which users or groups can view the user’s information and with whom they can interact. | The user record, under Create access and interactions. |
Selecting a product for a user does not purchase or activate a company license. If the company has not enabled the product, licensing must be reviewed separately.
Open the user record
- Sign in to Upnify Suite as a Super Administrator.
- Open the profile menu and select My organization.
- Find and open the user record. For a new person, select New and complete the required details before assigning permissions.
- Confirm that the user is active. Assigning permissions does not activate the account by itself.
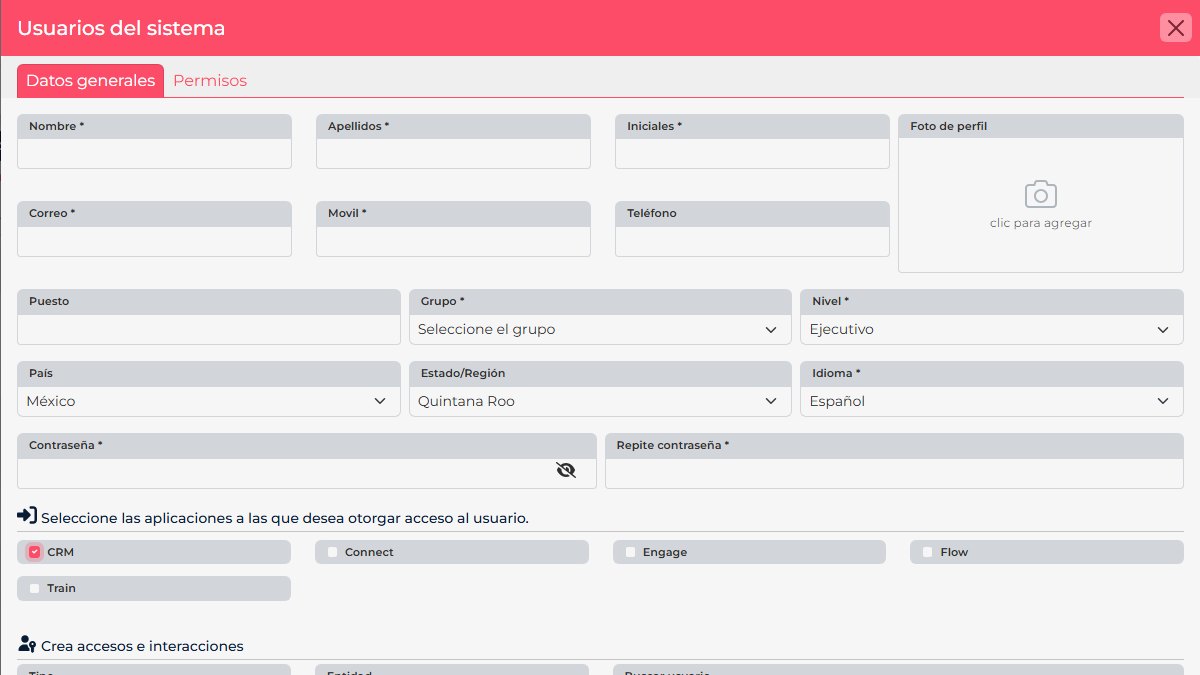
1. Assign a group, level, and products
Under General data, review the group and level that match the person’s role. A group helps organize users and can be used to grant data access; the level determines which controls the person can manage or use.
In the applications section, select only the products the person needs. Confirm that each product is enabled for the company, then save the record so the change takes effect.
2. Limit modules and actions
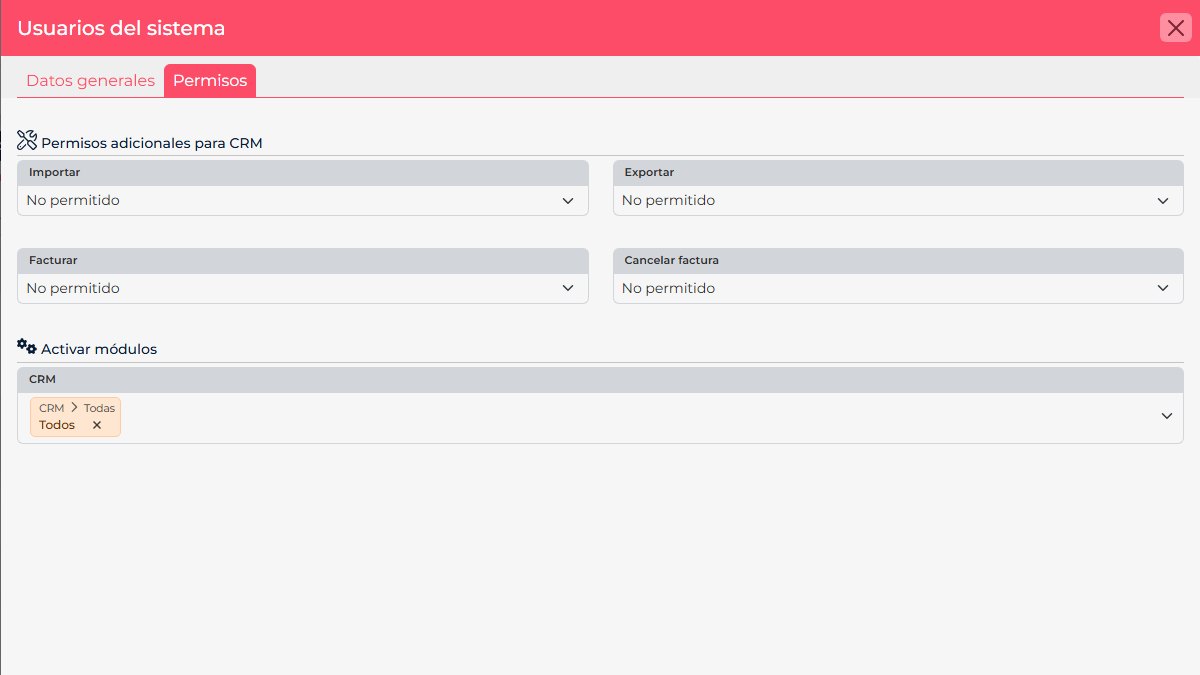
Open the Permissions tab. Under Activate modules, enable only the sections needed. Access to all modules expands access to every module available to that person; use it only when their role requires it.
CRM and ERP may also show action permissions such as importing, exporting, invoicing, or canceling an invoice. Review each option and select the appropriate value, such as Allowed or Not allowed. These capabilities are separate from product access.
Visible controls depend on the assigned level. If an option is missing, check whether the selected role manages that permission before changing the level. Avoid assigning a broader profile—especially Super Administrator—to solve a narrow access need.
3. Choose who can view or work with the user’s records
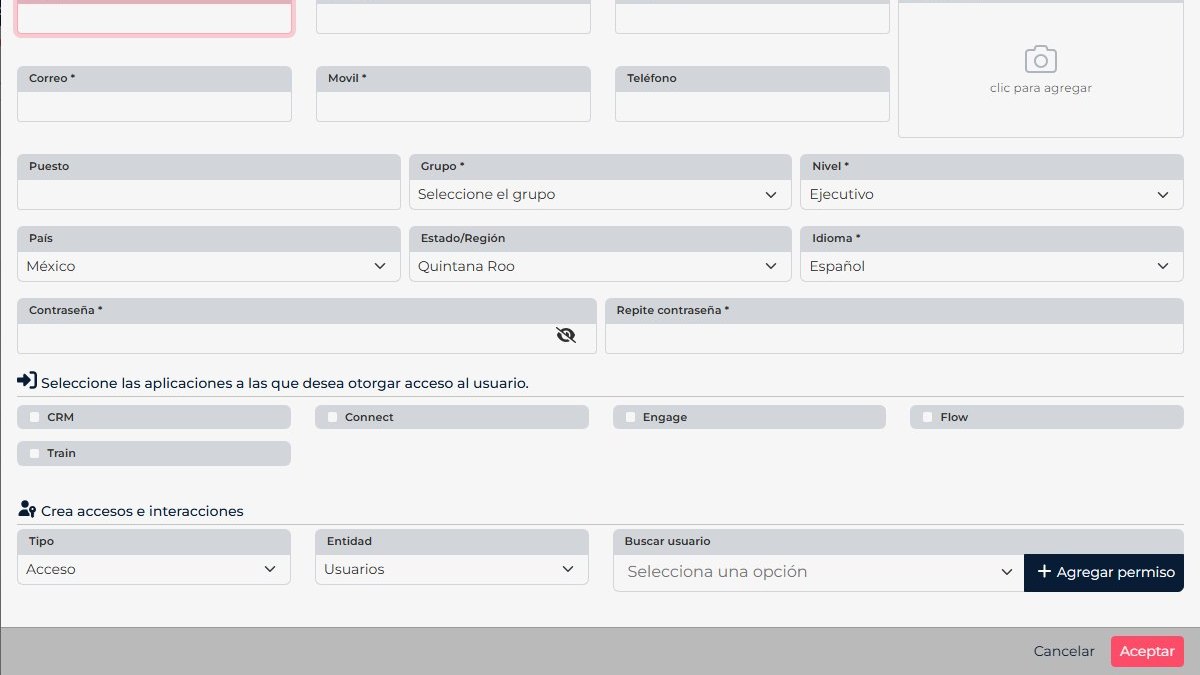
Under Create access and interactions, add specific users or groups who need to collaborate on the user’s records:
- Under Type, choose Access to allow information to be viewed, or Interaction to allow the selected person to work with it.
- Under Entity, choose Users or Groups, depending on whom you are adding.
- Search for and select the person or group, then click Add permission.
- Review the added list. Repeat the steps if you need another permission type or entity.
For example, access may let a supervisor view a team member’s records, while interaction may let a colleague participate in follow-up. The exact scope can vary by module and account configuration.
Save and verify
- Review the group, level, status, products, modules, actions, and data permissions.
- Select Accept to save the record.
- Confirm that the record reflects the changes. Ask the user to sign in again if their session was already open.
- Verify that the user can reach the expected product, module, and records. If something is missing, adjust the relevant permission layer instead of broadening every permission.
If the expected access is missing
| Symptom | What to check |
|---|---|
| A product is missing | Confirm that the company has enabled the product, the user is active, and the product is selected on their record. |
| The product opens, but a module is missing | Review the Permissions tab, assigned level, and module activation. |
| The module opens, but some records are missing | Review the user’s group and Access permissions assigned to users or groups. |
| The user can view records but cannot collaborate | Check whether they need an Interaction permission and whether the module supports the action. |
| My organization is unavailable or changes cannot be saved | Ask the Super Administrator to review the configuration. |
If the issue continues, tell the administrator which module is affected, which user is involved, and what they need to do. Do not share passwords or grant broad permissions as a troubleshooting shortcut.