Record your follow-ups
Mon Jun 13 2022 07:08:27 GMT-0500 (hora estándar oriental)
Follow-ups are the resource you have in Upnify to record the interactions you have with your prospects.
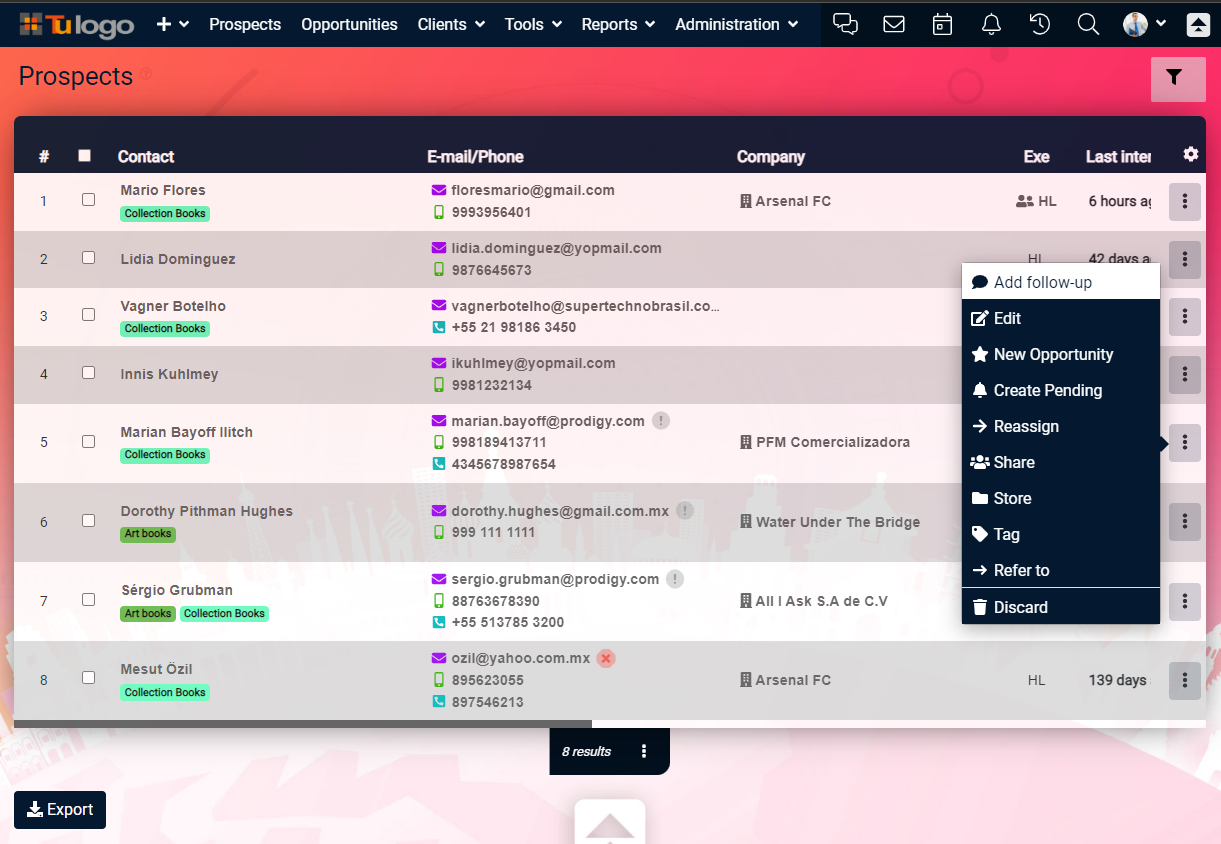
There are two ways to get to the Add Tracking window:
a. In the list of Prospects, Opportunities or Clients, click on the actions menu and select the option: Add follow-up.
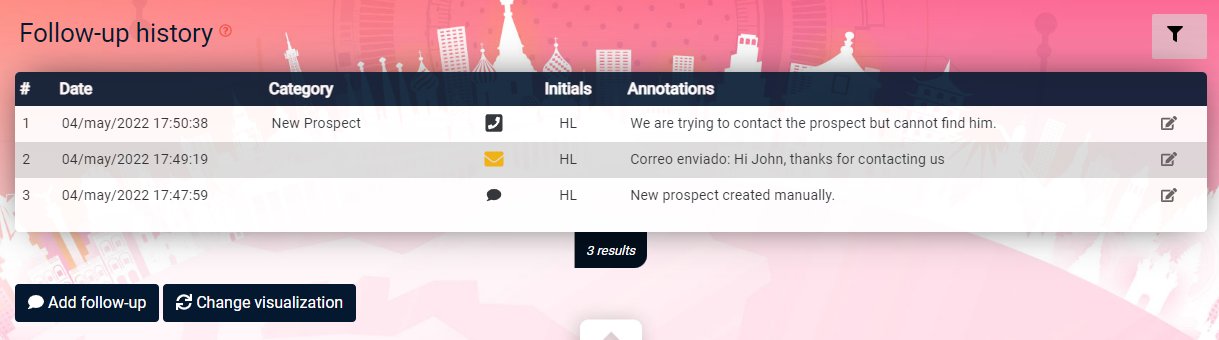
b. In the record of any contact, go to the Tracking and click the Add Tracking.
In either case, the Add Tracking. Write down what you discussed with the contact.
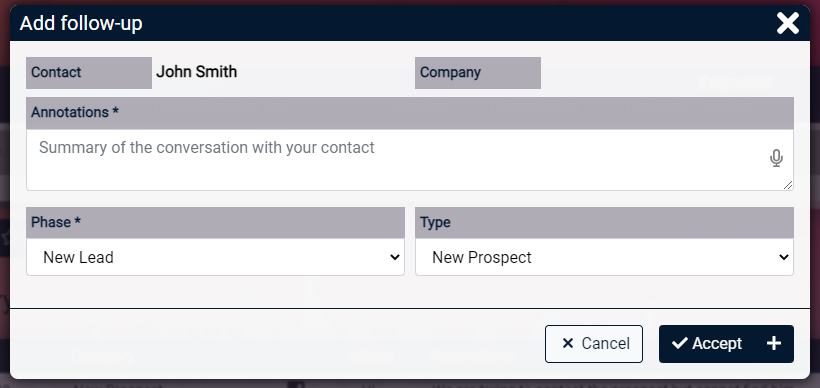
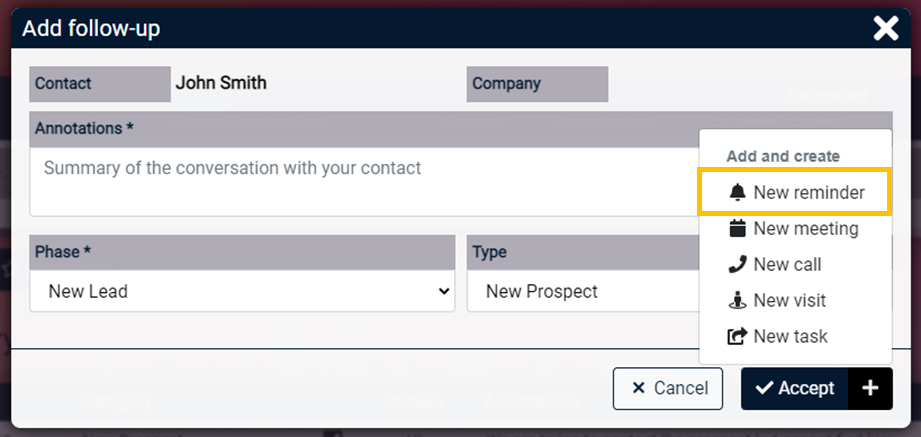
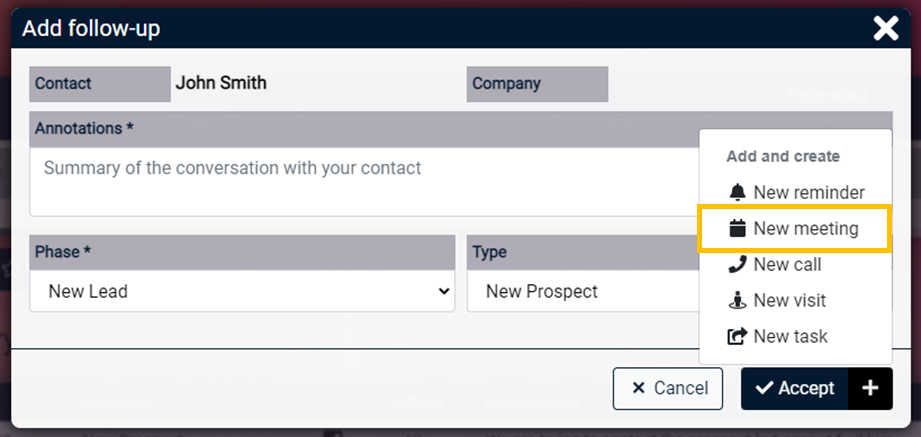
From the "+" next to Accept, you have the option to:
- Create a Reminder.
- Assign a Task to some other user of the account.
- Make an Appointment with the contact.
- Point a Call to your contact.
- Record a Visit to your contact
CREATE A REMINDER
window Add Tracking, select the Reminder. You will need to have previously filled out the follow-up and it will be saved before moving on to creating the reminder.
2.- Later, the system will show you the section for you to add what to remember. Add all the information and set the date and time.
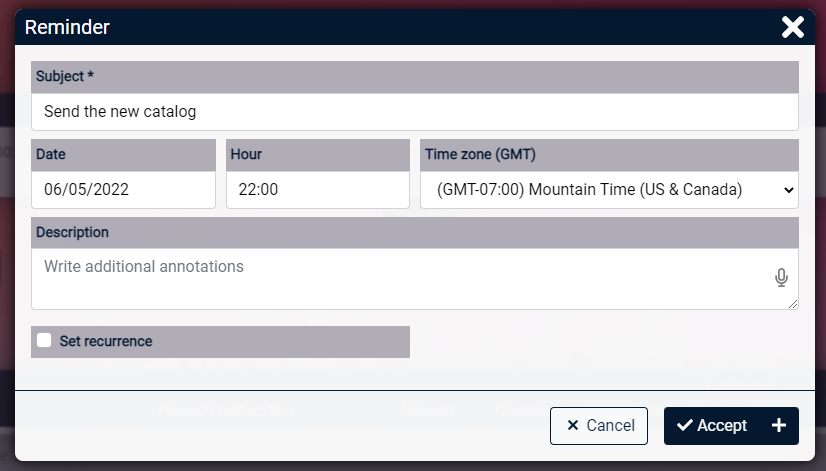
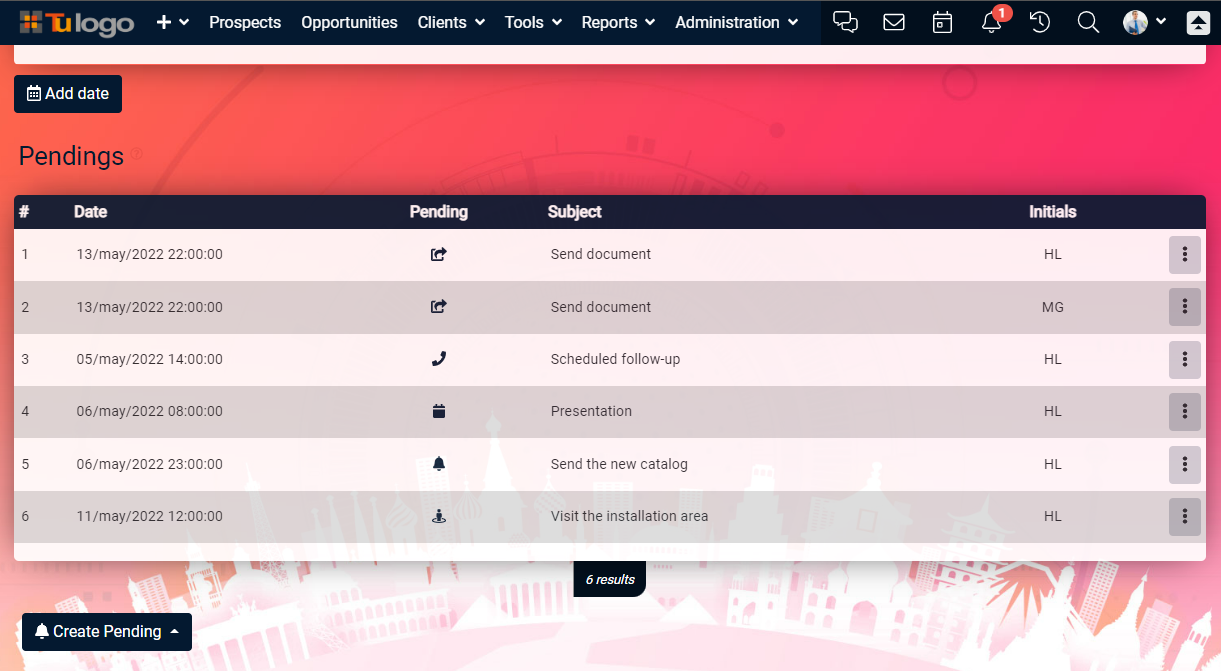
In the contact file, the reminder will be displayed in both Pending and Follow.
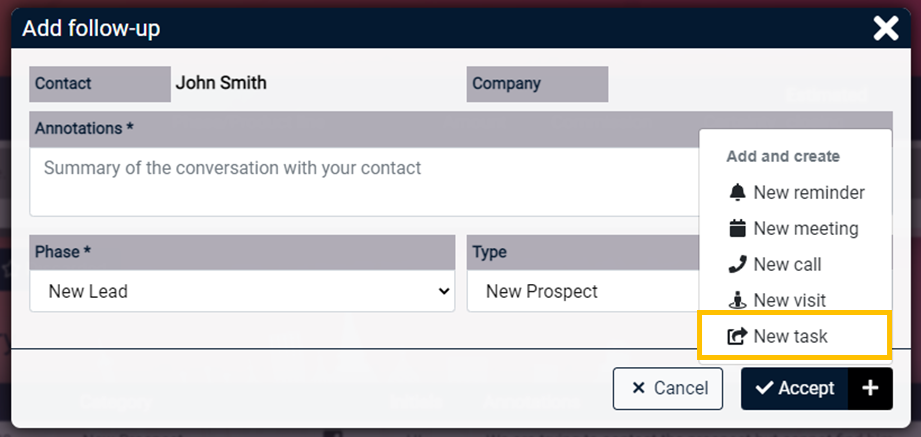
CREATE A TASK
window Add Trackingoption Task.
In the Subject, fill in what the task will consist of. In the To, select which executive within the license is assigned that task. Select the Date and Time and describe what the Task is.
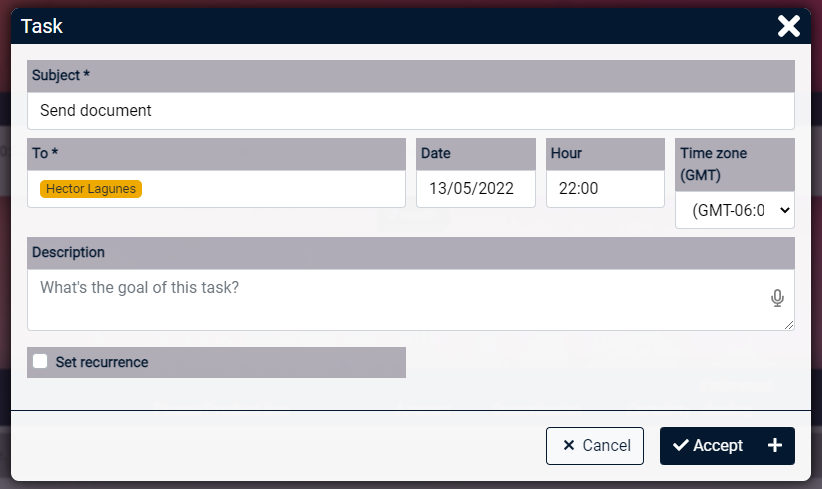
Once the information is completed, it will be saved in the Pending and in Follow-ups.
If the executive to whom the task is assigned does not have the contact shared, they will ask for your authorization to share it. Click on ?Accept

CREATE AN APPOINTMENT:
1.- To create an appointment, again from the Add Tracking section, now select the Appointment option.
2.- In this case, by default the guests will be you as the user of the account and the contact. You can add other users of the account. In addition, you can Notify and/or Remind the appointment with an SMS or through a template email, for which there must be previously created templates. The notification is sent as soon as the Pending is created. For the Reminder, you can specify in the respective window how soon you want the reminder to be sent. Once the information is complete, click on ?Accept
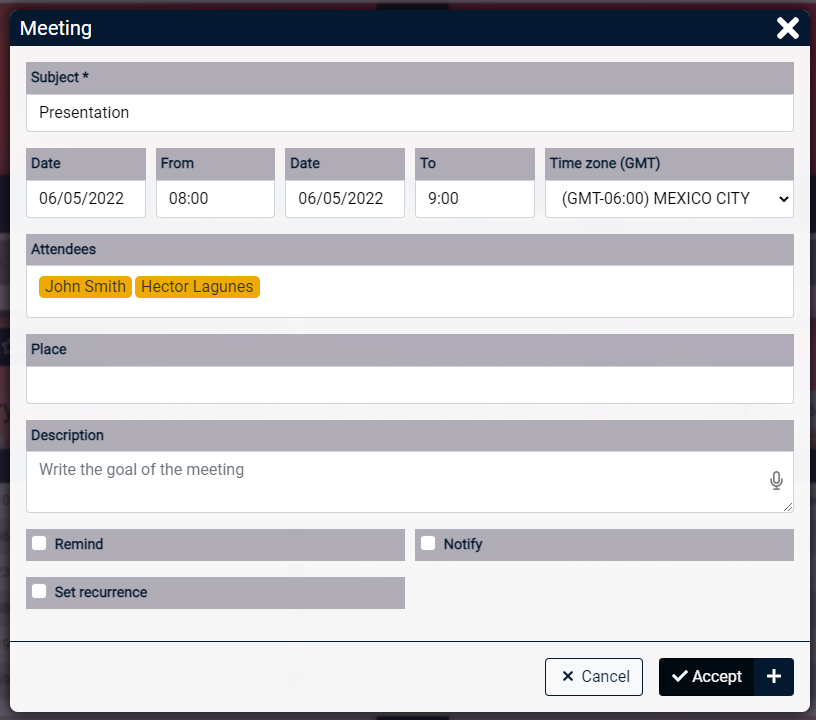
Once ready, click on Accept and it will be saved in the Pending and Follow-up section.
SCHEDULE A CALL
1.- Now, from your Add Tracking, on the new button, click on the Call.

2.- Fill in the date, time, time zone and subject to be discussed in the call. Then click ?OK.
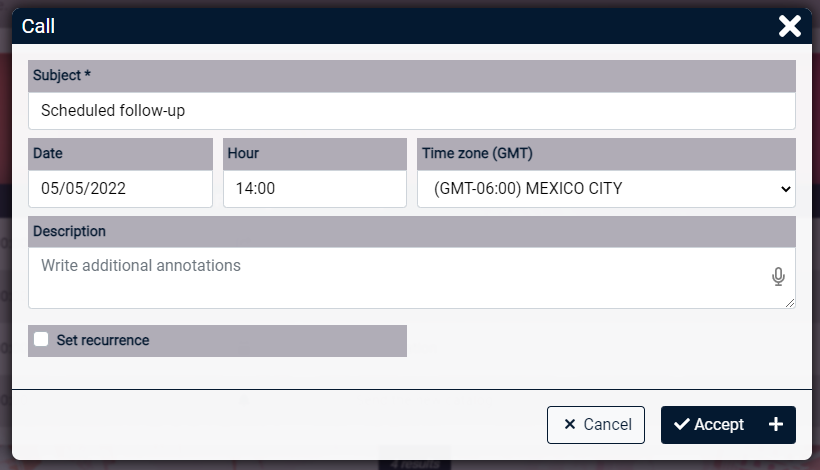
The scheduled call will be displayed in the contact file in the Pending section.
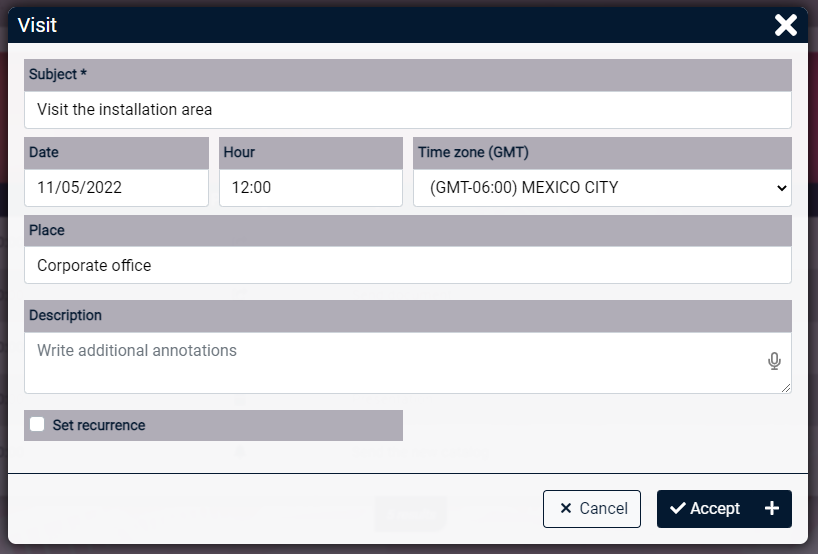
SCHEDULE A VISIT
1.- On your Add Trackingoption Visit.
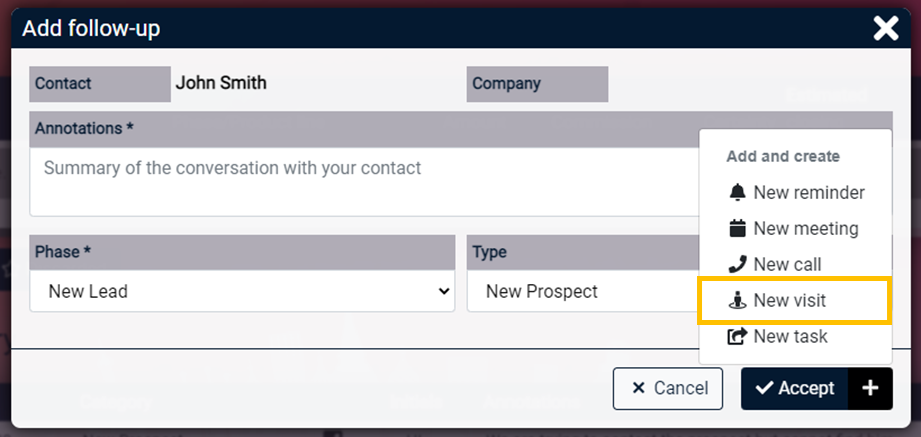
2.- Complete the details of the visit, and save by clicking OK.
In the contact file, Pending and in Follow everything you have just created