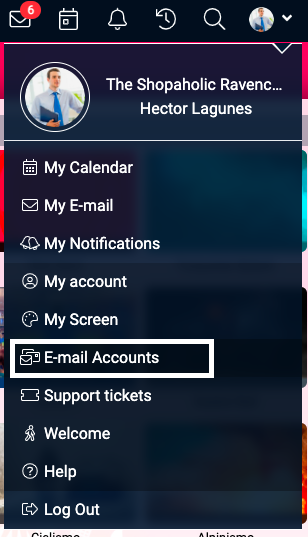
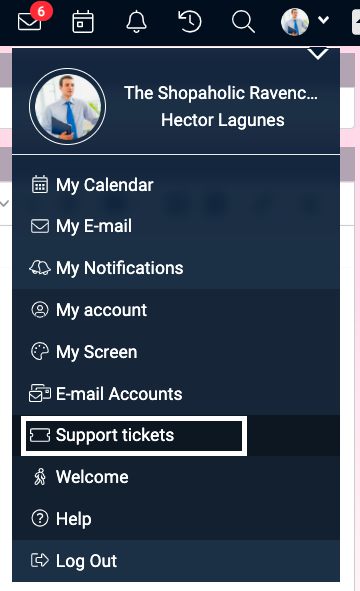
User menu
Mon Jun 13 2022 07:08:27 GMT-0500 (hora estándar oriental)
User Menu
My Account
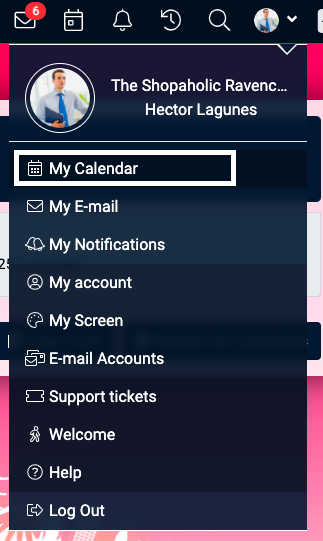
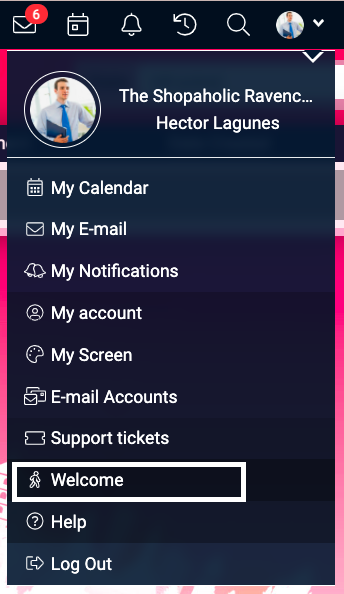
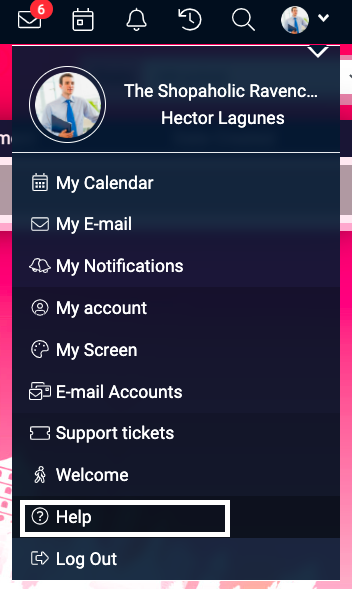
The User button appears in the access bar at the top of your screen. By selecting this button you will be able to find different options such as:
- My Calendar
- My email
- My notifications
- My account
- My screen
- Email accounts
- Support tickets
- Welcome
- Help
- Exit
- My Calendar
Gives you access to your calendar, where you can view your appointments, scheduled tasks, assigned tasks, reminders, calls and visits in different colors.
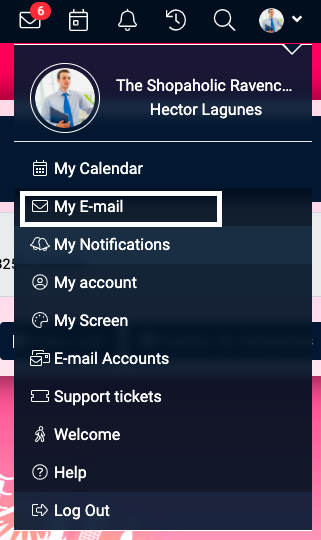
- My email
Access your mailbox by clicking on My mail.
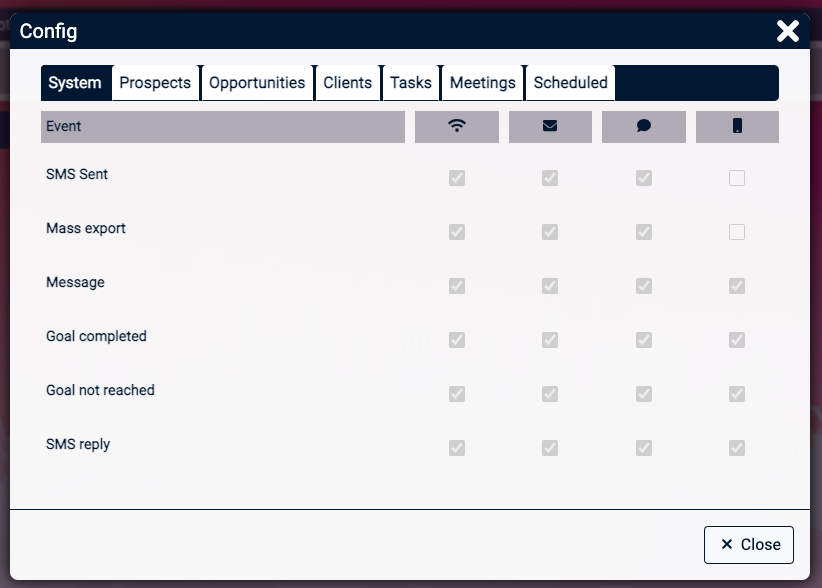
- My notifications
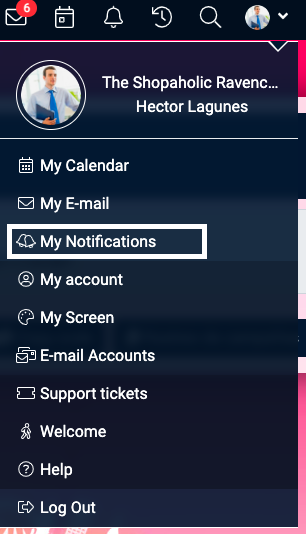
In this section you can activate the notifications that you would like to receive of the actions that generate notifications (web, mail, text balloon, SMS [if you have them contracted]). You can configure them for notifications of the system, prospects, opportunities, tasks, appointments or daily reports of the system.
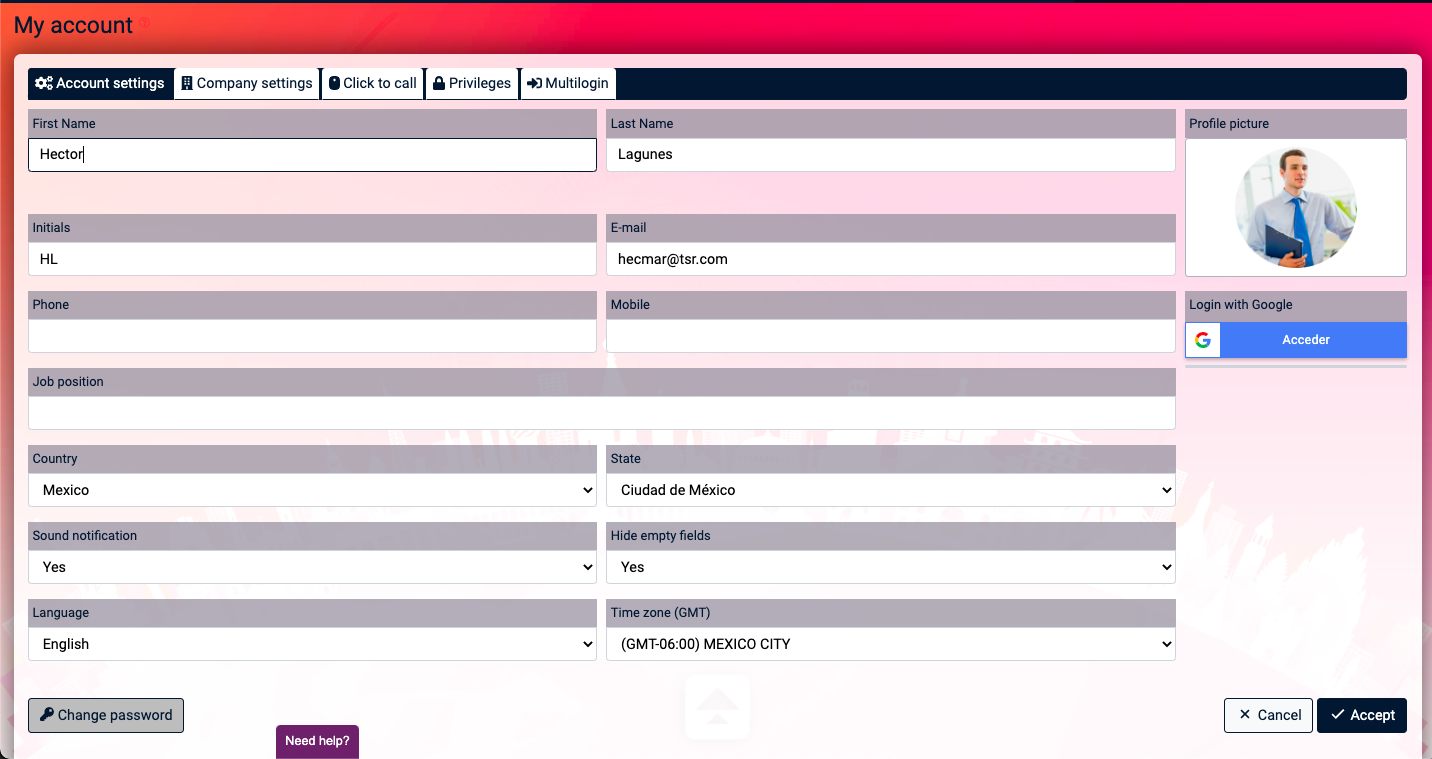
- My account
Verify or edit your data as a user, all you have to do is:
A) Position your cursor over your name located in the main bar in the upper right corner and click on the My Account option.

B) View your basic information as a Upnify user or modify this data with the Edit User button.
- My Screen
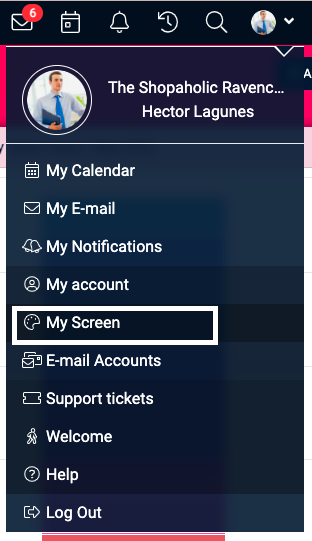
In this option, you can customize your screen, choose the color or theme you like the most, all you have to do is position your cursor over your name located in the main bar in the upper right corner and click on the option My Screen.
Select any of the colors and/or themes of your preference or if you wish, upload an image with the option to put it to the group you belong to, to the whole company or just for you.

- Email accounts
Upnify gives you the easiest and most efficient way to keep track of your customers and send all your emails using the email you commonly use, the first step is to configure your email.
A) Place your cursor over your name located in the main bar in the upper right corner and click on the Configure email option.
B) Click on the +Add button.
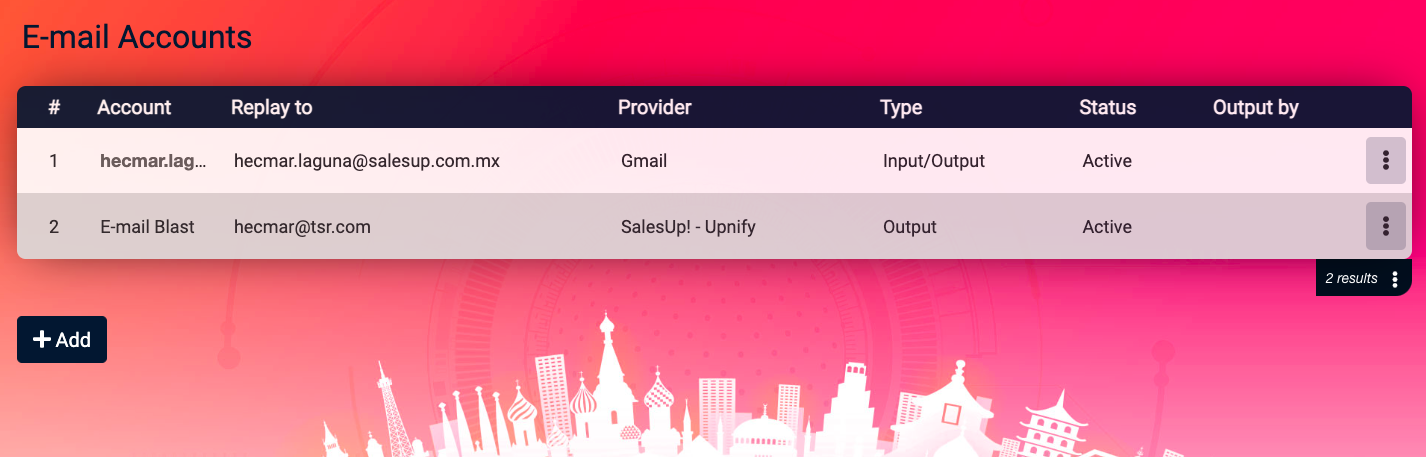
C) If you have a free Gmail account, enter the data as it appears in the previous screen, except for your Gmail email and the email application password.
- Type: Inbox/Outbox Configuration: SMTP/IMAP
- Account: Mail and mail application password
- SMTP Server: smtp.gmail.com Port: 465 Security: SSL
- IMAP Server: imap.gmail.com Port: 993 Security: SSL

If you have a paid Gmail (G Suite) email account, simply choose Gmail as your provider, click the Gmail link button and conclude by accepting all permissions.
If you are setting up a business email, select SMTP/IMAP as the provider and ask your IT team or the person who runs your website to provide you with the server and port information.
If you have an account with a public domain, simply select the provider, enter your email account and the provider's application password.
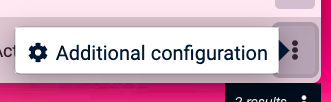
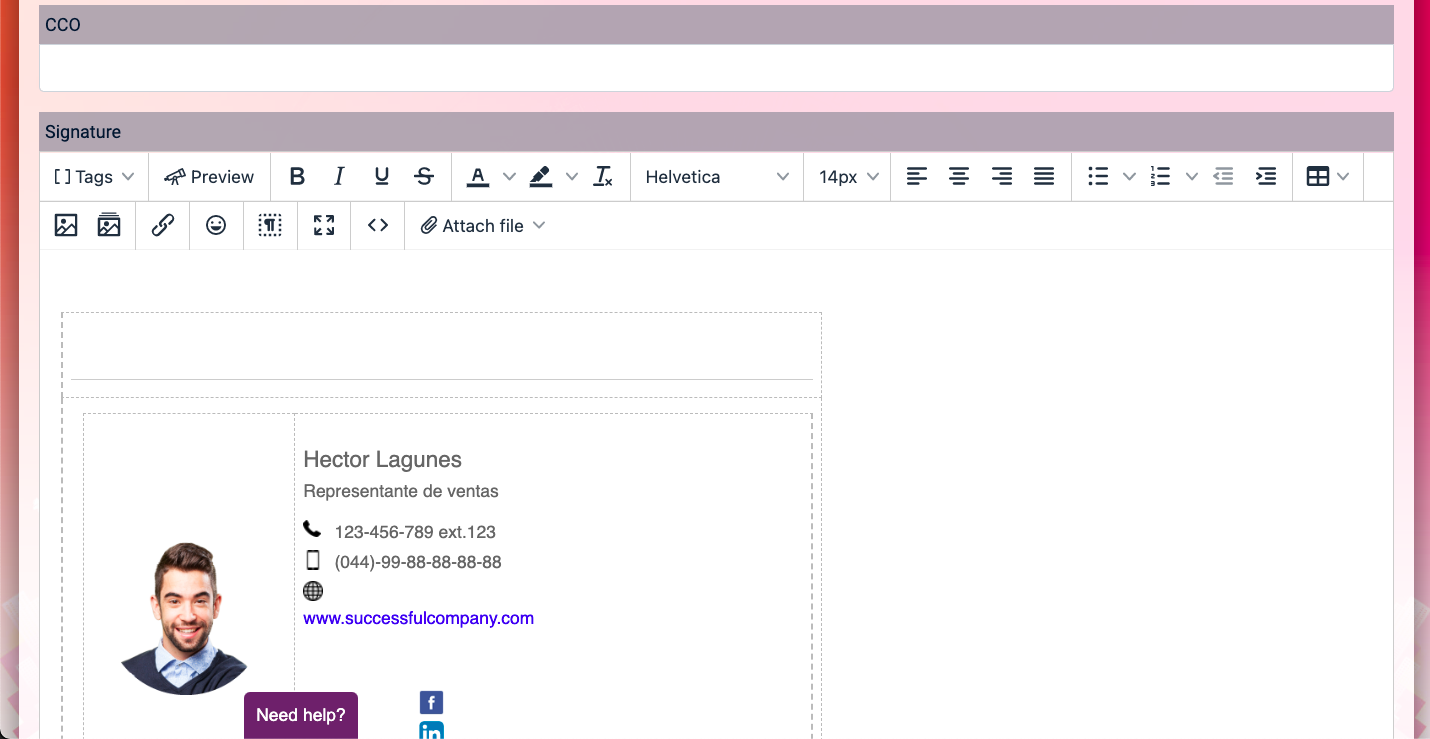
D) Click on Extra settings on the gear icon to set your email signature.
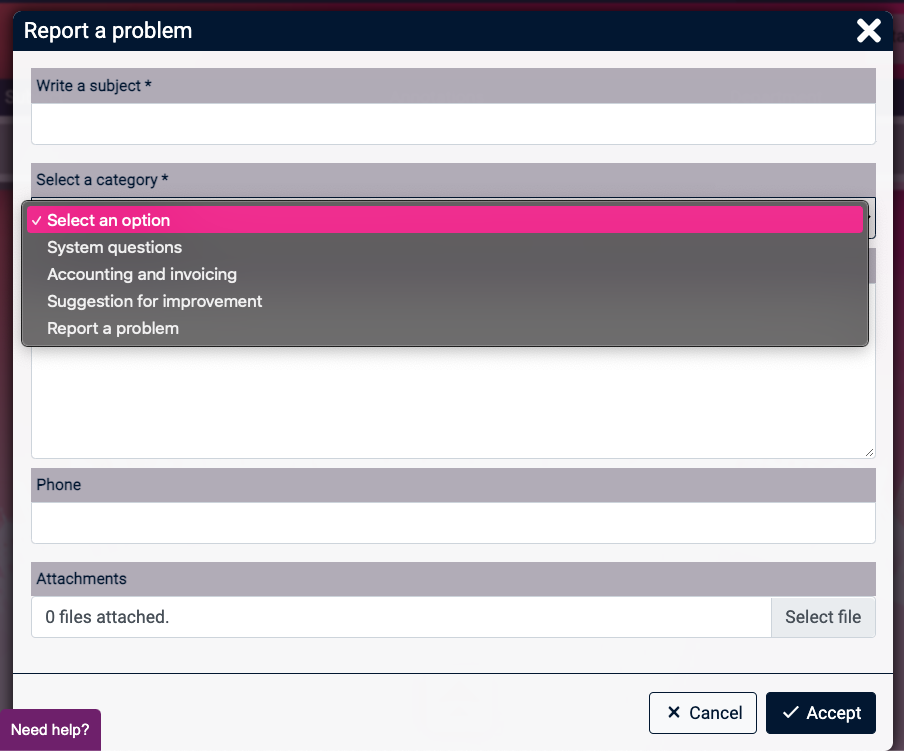
- Support Tickets
In this section you can make a report about the system or your payment and you could be in contact with our support team.
Choose the appropriate category for your report and describe the subject and description as detailed as possible so that our team can help you, remember that you can include screenshots or videos to make your report clearer.
- Welcome
This menu option will activate a tutorial for new users. You can refer to it whenever you need to review it or get our contact numbers.
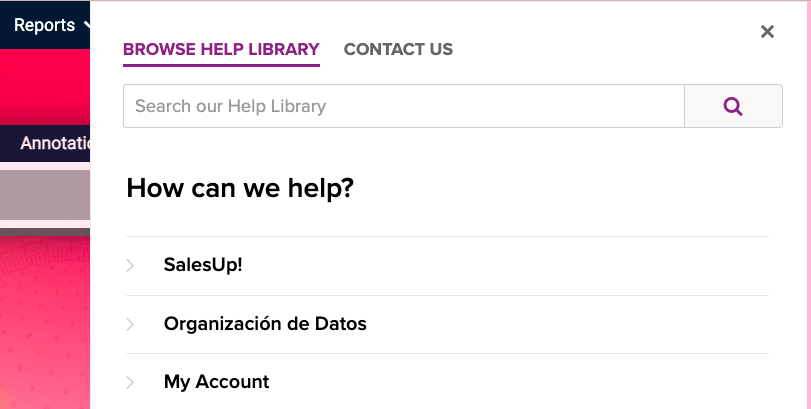
- Help
Help will allow you to access the system documentation, a library of articles, infographics and videos in which you can search by the function or topic you have a question about.
10. Exit
The Exit button allows you to close your assignment at any time. Logout is very useful if you are using a computer or electronic device that is not yours, so by clicking the Logout button you will be closing your assignment and protecting your information from the view of third parties.
